Google Workspace Integration
Connect IronWiFi to Google Workspace (formerly G Suite) to authenticate WiFi users with their Google accounts, automatically sync users and organizational units, and enable seamless social login on your captive portal.
Features
- User Synchronization - Import users from Google Workspace
- Group Synchronization - Sync organizational units and groups
- Google Authentication - Users authenticate with Google credentials
- Auto-provisioning - Automatically create users on first login
Prerequisites
- Google Workspace administrator account
- IronWiFi account with Connector access
- Google Cloud project (for advanced integrations)
Basic Setup
Enable Google Authentication
For captive portal social login:
- Navigate to Captive Portals > your portal
- Go to Authentication Providers
- Enable Google
- Configure OAuth settings (or use IronWiFi's default)
User Synchronization
Sync users from Google Workspace:
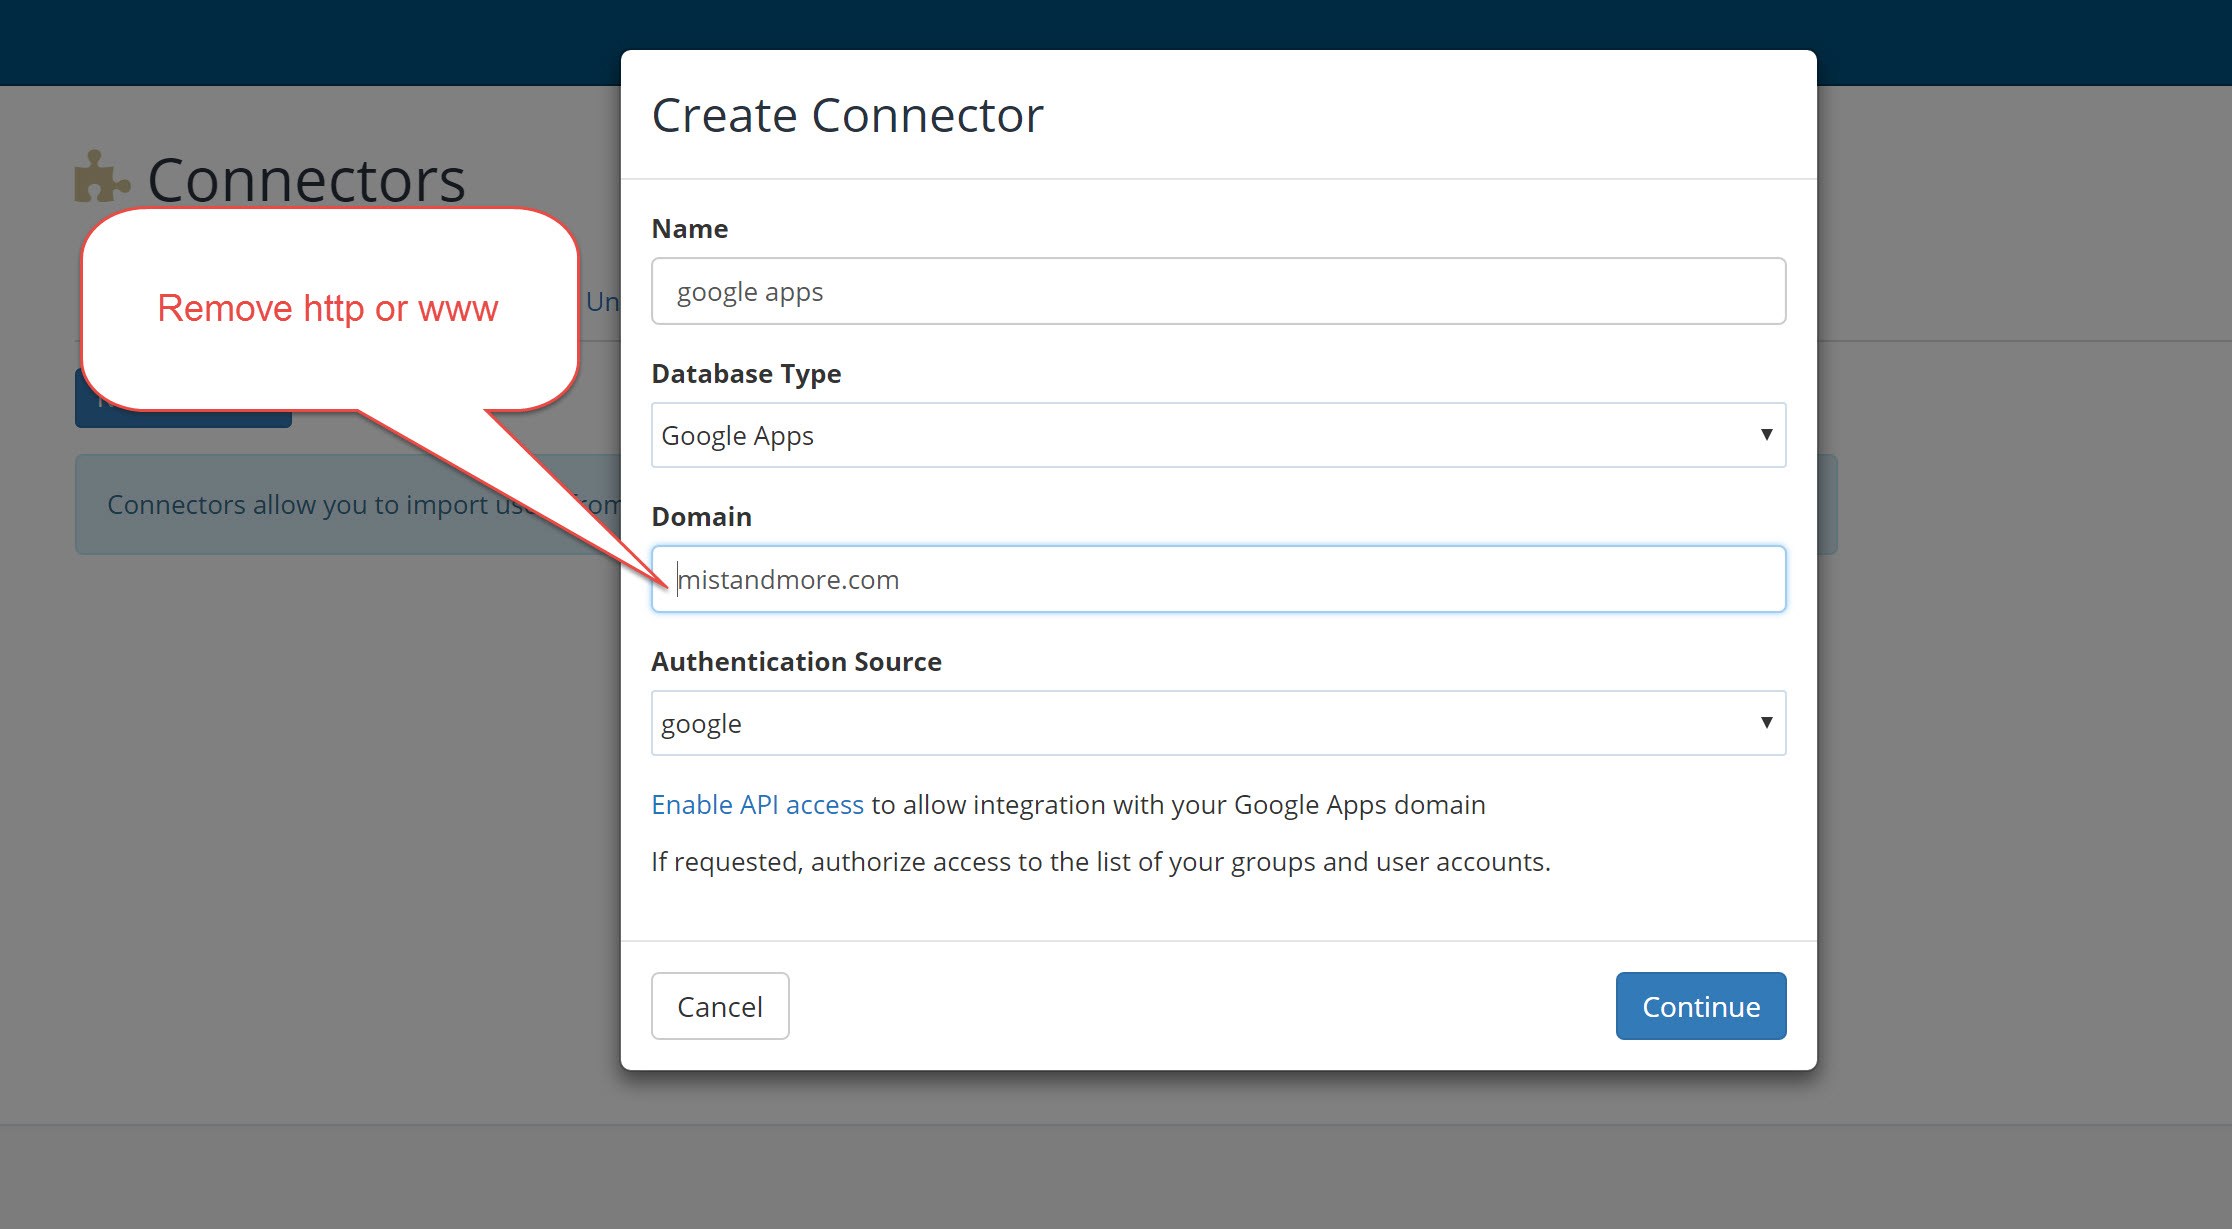
- Navigate to Connectors > Add Connector
- Select Google Apps as the Database Type
- Enter your Google Workspace domain (without http or www)
- Select the Authentication Source
- Click Click to Authorize to grant IronWiFi access to your Google Workspace
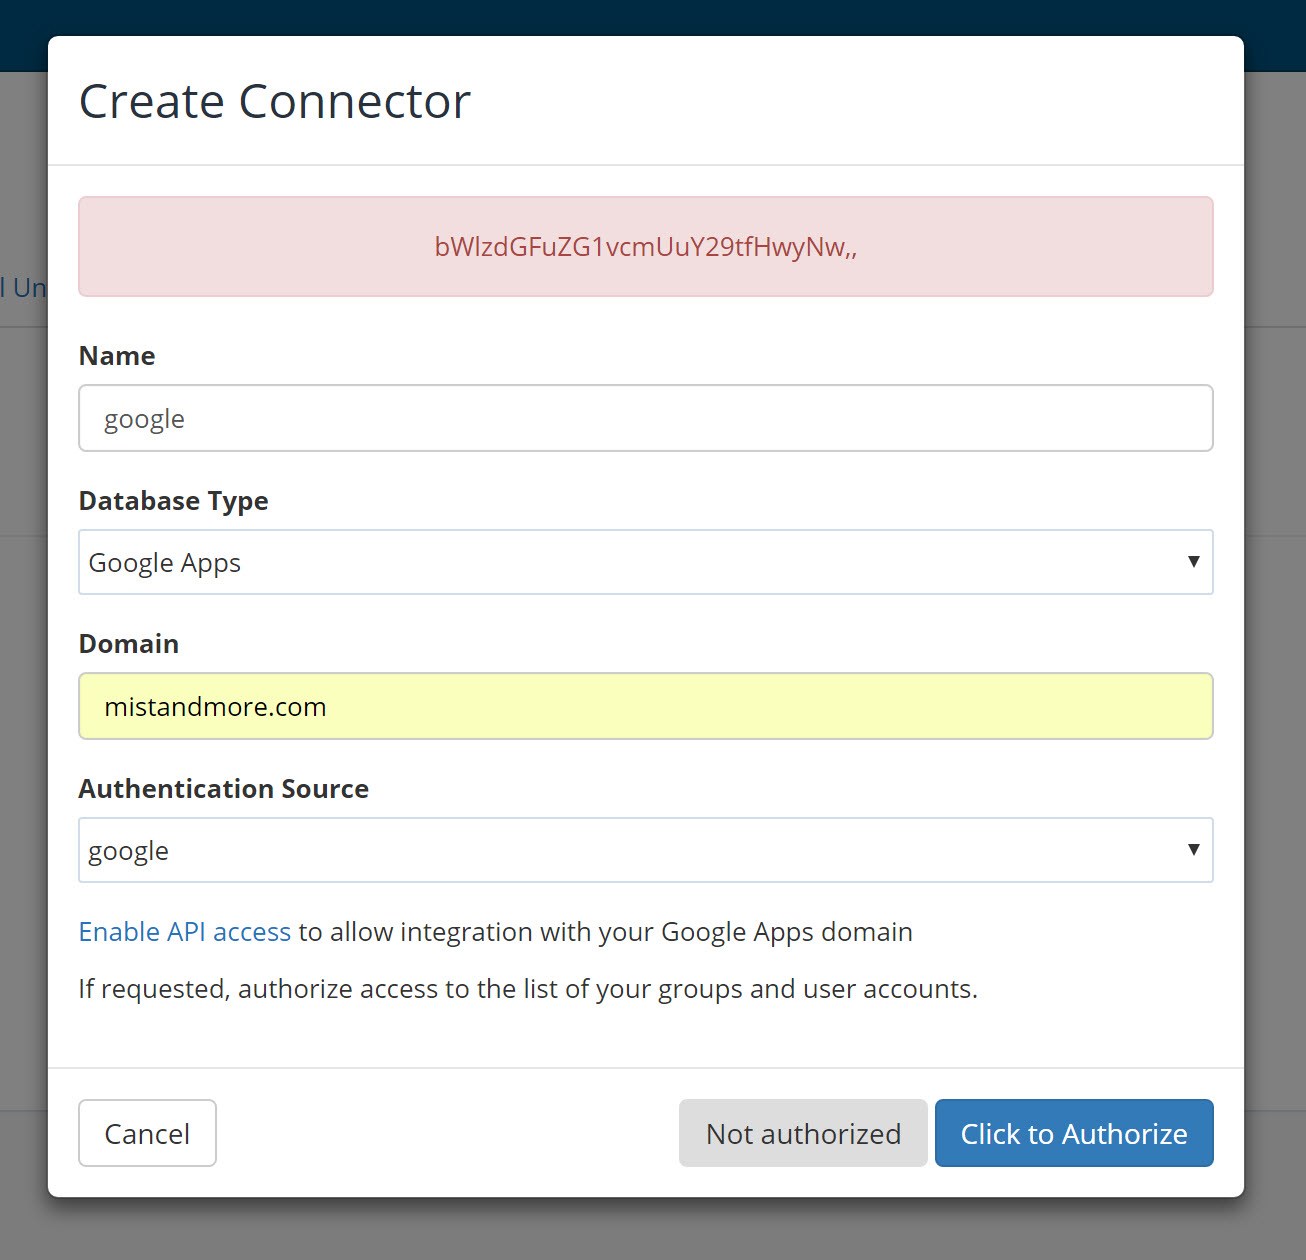
- Sign in with Google Workspace admin account
- Grant requested permissions
- Select the Groups or Organization Units to import
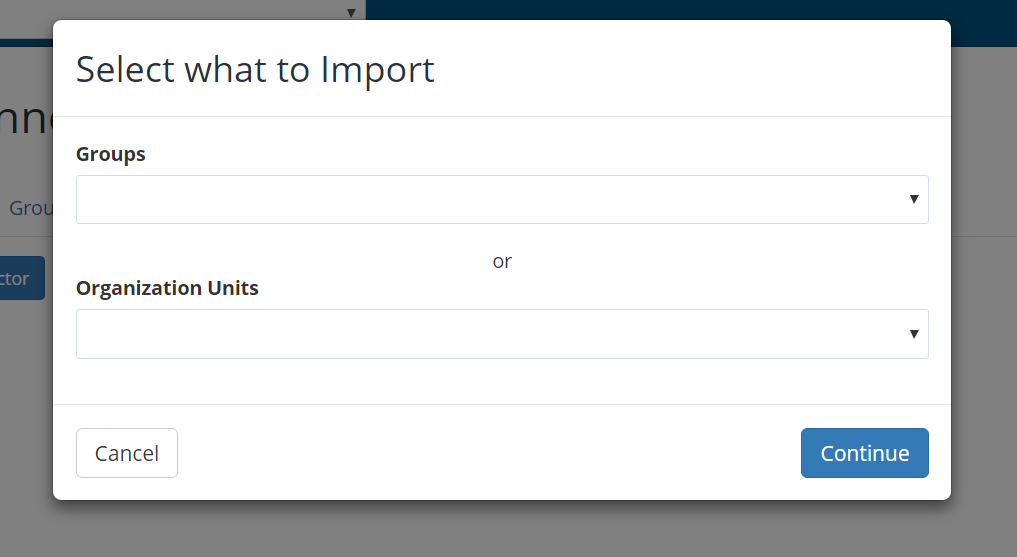
- Click Continue to start the initial import
Google Workspace SAML SSO
Configure Google Workspace as a SAML identity provider for your IronWiFi captive portal.
Step 1: Navigate to SAML Apps
- Go to Google Admin Console
- Search for "SAML" or navigate to Apps > SAML Apps


Step 2: Enable SSO for SAML Application
- Click Add a service/App to your domain
- Select SETUP MY OWN CUSTOM APP at the bottom of the list

Step 3: Copy Google IdP Information
- Copy the SSO URL and Entity ID
- Download the Certificate

Step 4: Configure IronWiFi SAML Provider
- In IronWiFi Console, navigate to your Captive Portal
- Add a SAML 2.0 Single Sign-On authentication provider
- Paste the SSO URL, Entity ID, and Certificate from Google

Step 5: Enter App Information
- Back in Google Admin, enter the basic information:
- Application Name: IronWiFi
- Description: IronWiFi Service Provider

Step 6: View Controller Configuration
Note the SAML ACS URL and Entity ID from your IronWiFi captive portal settings page for the next step.

Step 7: Configure Service Provider Details
- Enter the ACS URL and Entity ID from IronWiFi
- Set Name ID to Basic Information > Primary Email

Step 8: Configure Attribute Mapping
- Optionally add attribute mappings for email, first name, and last name
- Click FINISH

Step 9: Confirm Setup
Verify that the SSO setup is complete and attribute mapping is configured.

Step 10: Enable the App
- Navigate to Settings for IronWiFi
- Click the three-dot menu and select ON for everyone


Advanced Setup with Custom OAuth
For full control, create your own Google Cloud OAuth app:
Step 1: Create Google Cloud Project
- Go to Google Cloud Console
- Create a new project
- Enable these APIs:
- Admin SDK API
- People API
Step 2: Configure OAuth Consent Screen
- Navigate to APIs & Services > OAuth consent screen
- Select Internal (for Workspace users only) or External
- Enter app information:
- App name: IronWiFi
- User support email
- Developer contact
- Add scopes:
emailprofileopenid
Step 3: Create OAuth Credentials
- Go to APIs & Services > Credentials
- Click Create Credentials > OAuth client ID
- Select Web application
- Name: "IronWiFi"
- Add Authorized redirect URIs:
- US West:
https://us-west1.ironwifi.com/api/signin/google - Europe:
https://europe-west2.ironwifi.com/api/signin/google - Global:
https://splash.ironwifi.com/api/signin/google
- US West:
- Click Create
- Copy Client ID and Client Secret
Step 4: Configure IronWiFi
- Navigate to connector settings
- Enter your Client ID and Client Secret
- Save configuration
- Test authentication
Synchronization Options
What Gets Synced
| IronWiFi | |
|---|---|
| Username | |
| Name | Full Name |
| Organizational Unit | Organizational Unit |
| Groups | Groups |
| Status | Status |
Sync Settings
| Setting | Description |
|---|---|
| Auto-sync | Enable scheduled synchronization |
| Sync interval | How often to sync (hourly, daily) |
| Include suspended | Sync suspended Google users |
| OU filter | Only sync specific organizational units |
Manual Sync
Trigger immediate synchronization:
- Navigate to the connector
- Click Sync Now
- Monitor progress
- Review results
Authentication Methods
RADIUS with Google Credentials
Enable users to authenticate to WPA-Enterprise using Google credentials.
Authentication Methods:
| Method | Description | Requirements |
|---|---|---|
| PEAP-MSCHAPv2 | Generated passwords | IronWiFi creates unique passwords per user |
| EAP-TLS | Certificate-based | Deploy certificates via MDM |
| TTLS-PAP | Google account passwords | Requires "Less secure app access" enabled |
For TTLS-PAP with Google passwords:
- Configure Google Connector
- Enable RADIUS Authentication
- Set Authentication Source to Google
- Users must enable "Less secure app access" in their Google account (being deprecated by Google)
Google is deprecating "Less secure app access." For long-term RADIUS authentication, use generated passwords (PEAP) or certificates (EAP-TLS) instead.
For users with 2-Step Verification:
Users with Google 2FA enabled must generate an app-specific password:
- Go to Google App Passwords
- Select Mail and Windows Computer (or appropriate options)
- Click Generate
- Use the generated 16-character password for WiFi authentication
Captive Portal with Google Login
Enable Google social login on splash pages:
- Enable Google authentication provider
- Add Google domains to Walled Garden:
Restricting Access
By Domain
Only allow users from specific domains:
- In connector settings
- Set Allowed Domains
- Enter your domain(s)
By Organizational Unit
Only sync users from specific OUs:
- Configure OU filter
- Select OUs to include
- Save and sync
By Group
Only allow members of specific groups:
- Enable group-based filtering
- Select allowed groups
- Non-members will be denied
Troubleshooting
Authorization Failed
- Verify admin credentials
- Check required API scopes
- Confirm Workspace admin status
Users Not Syncing
- Check OU filter settings
- Verify user status in Google
- Review sync logs for errors
Authentication Failed
- Verify user exists in IronWiFi
- Check authentication source setting
- Confirm Google account is active
Best Practices
- Use dedicated admin account for connector authorization
- Enable auto-sync to keep users current
- Filter by OU to only sync relevant users
- Monitor sync logs for failures
- Test with single user before bulk operations
Was this page helpful?