TP-Link EAP Series
Set up standalone TP-Link EAP access points with IronWiFi for independent WiFi deployment. This guide covers RADIUS server configuration, external portal setup, free authentication (walled garden) configuration, SSID creation with portal enabled, and WPA2-Enterprise deployment for EAPs operating without Omada Controller management.
Prerequisites
In TP-Link EAP:
- TP-Link EAP access point (any model in EAP series)
- Admin access to EAP web interface
- EAP operating in standalone mode (not adopted by Omada Controller)
- Network connectivity to reach IronWiFi RADIUS servers
In IronWiFi Console (complete these first):
- Create a Network in IronWiFi Console
- Create a Captive Portal with vendor TP-Link
- Note your RADIUS settings (Primary IP, Secret) and Splash Page URL
EAP Configuration (Standalone Mode)
Access Web Interface
- Connect to the EAP management network
- Navigate to the EAP's IP address
- Log in as administrator
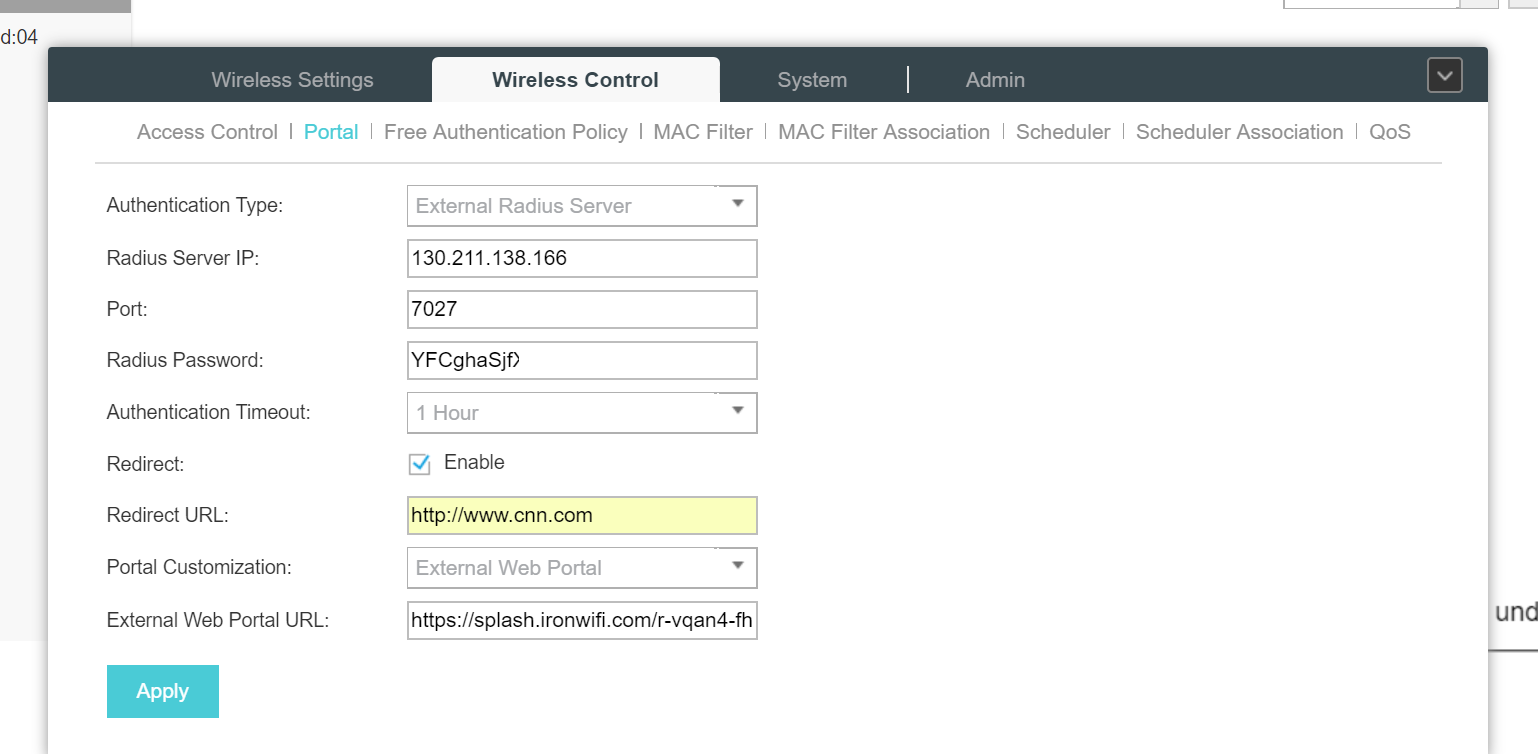
Step 1: Configure RADIUS Server
In standalone mode, RADIUS settings are configured per-EAP. If you have multiple EAPs, you need to configure each one individually. For centralized management, consider using the Omada Controller instead.
- Navigate to Wireless → Portal
- Enable Portal
- Configure:
- Authentication Type: External RADIUS Server
- RADIUS Server IP:
{Primary IP} - RADIUS Port:
{AUTH_PORT} - RADIUS Password:
{Secret}
Step 2: Configure External Portal
- In Portal settings:
- External Portal Server:
107.178.250.42 - Portal URL:
{Splash Page URL}
- External Portal Server:
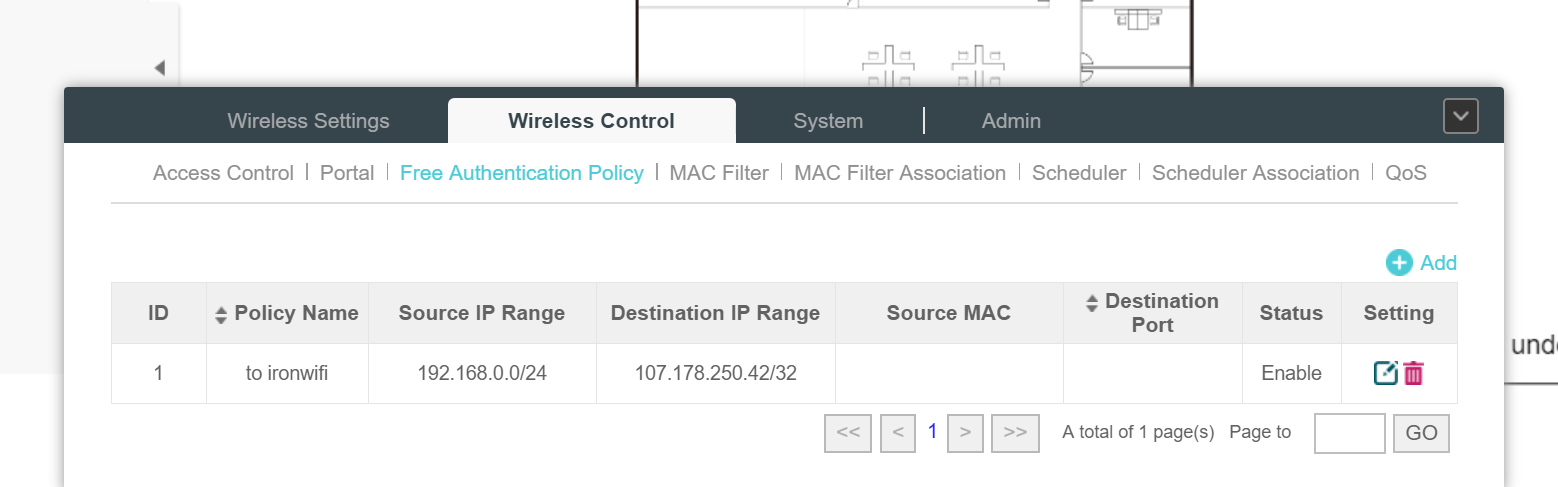
Step 3: Configure Free Auth
Without Free Auth entries, guests cannot reach the IronWiFi splash page and will see a blank page or timeout. At minimum, add
107.178.250.42
Configure addresses that guests can access before authentication. This is essential for the captive portal to function correctly.
Add allowed addresses before authentication:
107.178.250.42
If you're using social login or payment providers, add these domains to your Free Auth list:
| Provider | Required Entries |
|---|---|
| |
| |
| |
| Twitter/X | |
| Apple | |
| Microsoft Entra ID | |
| Stripe | |
| PayPal | |
| Twilio (SMS) | |
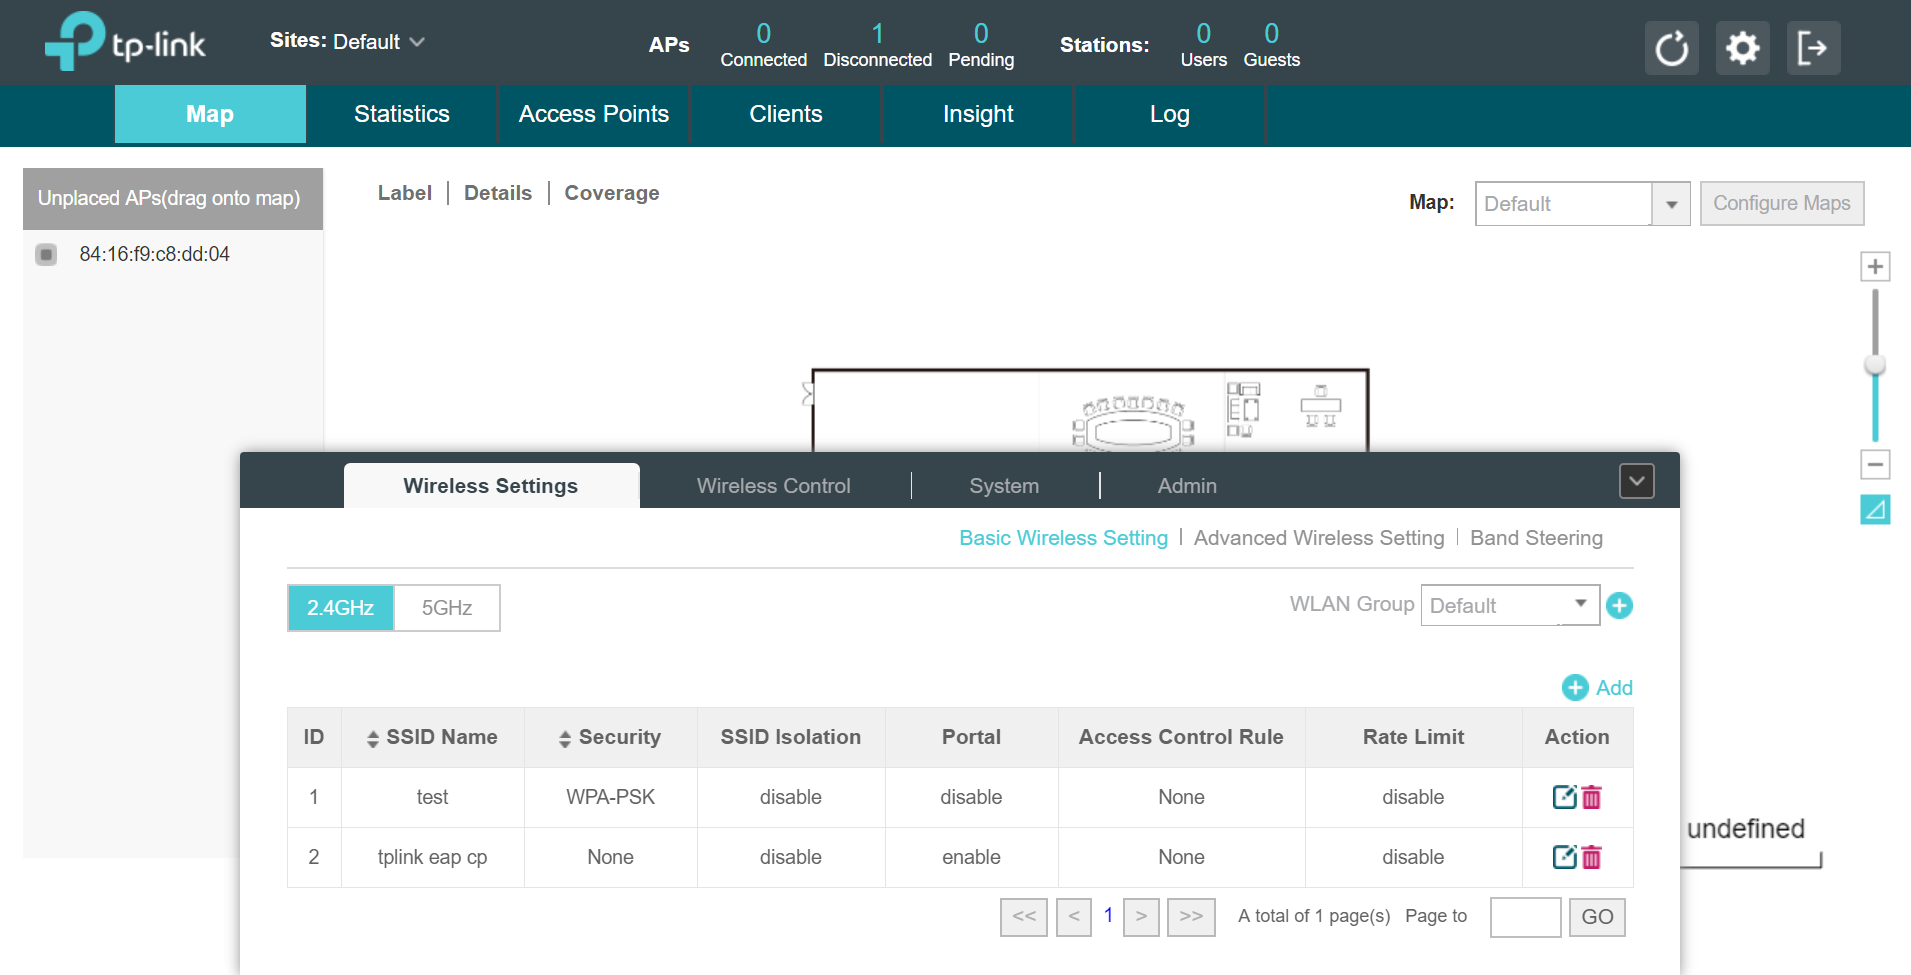
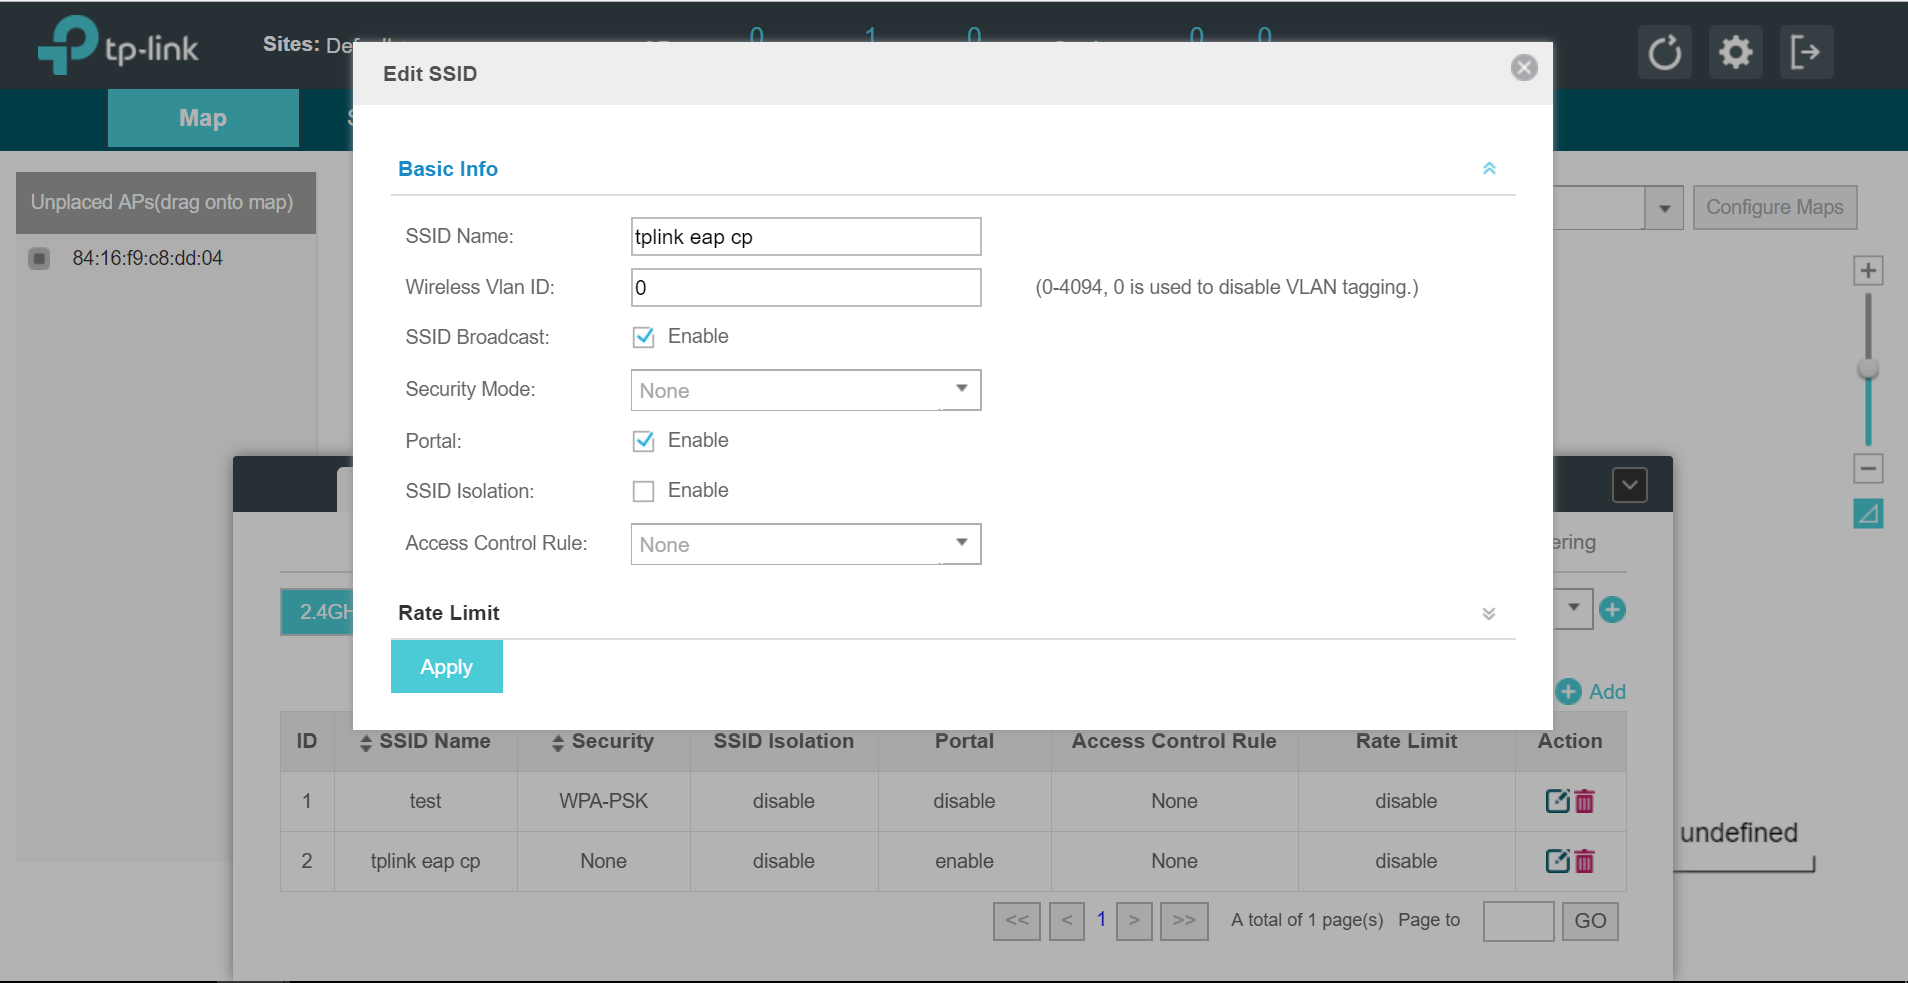
Step 4: Create SSID
- Navigate to Wireless → Wireless Settings
- Create or edit SSID
- Enable Portal for this SSID
EAP Controller (Omada)
If using Omada Controller, see the Omada Controller guide.
WPA-Enterprise
For 802.1X:
- Navigate to Wireless → Wireless Security
- Configure:
- Security Mode: WPA2-Enterprise
- RADIUS Server IP:
{Primary IP} - RADIUS Port:
{AUTH_PORT} - RADIUS Password:
{Secret}
Troubleshooting
If you encounter issues after configuration, use this table to diagnose and resolve common problems:
| Symptom | Cause | Solution |
|---|---|---|
| Cannot access portal | Portal not enabled or misconfigured | Verify portal is enabled on SSID, check external server IP is 107.178.250.42, confirm RADIUS configuration is correct |
| Authentication failed | RADIUS connectivity or credential issues | Test RADIUS connectivity from EAP, verify shared secret matches IronWiFi Console, check user credentials in IronWiFi Console |
| Portal shows but login doesn't work | Missing Free Auth entries | Ensure 107.178.250.42 is in Free Auth list, add authentication provider domains if using social login |
Related Topics
For this vendor
Shared configuration
Was this page helpful?