Aerohive (Extreme) - Passpoint Configuration
Configure Passpoint (Hotspot 2.0) on Aerohive/Extreme Networks access points to enable automatic WiFi authentication through IronWiFi's cloud RADIUS service. This eliminates manual network selection and provides WPA2/WPA3-Enterprise security without splash pages.
Overview
Aerohive Networks (now part of Extreme Networks) supports Hotspot 2.0/Passpoint through:
- ExtremeCloud IQ - Cloud-managed platform
- HiveManager NG - On-premises management
- ExtremeCloud IQ - Site Engine - Enterprise management
Prerequisites
In Aerohive/Extreme:
- Aerohive/Extreme access points with Hotspot 2.0 support
- HiveOS 10.x or later
- ExtremeCloud IQ account or HiveManager NG
In IronWiFi Console (complete these first):
- Log in to IronWiFi Management Console
- Navigate to Networks > select your network
- Enable Passpoint from dropdown
- Note configuration details:
- RADIUS Server IP
- RADIUS Secret
- Authentication Port: Customer Authentication Port
- Accounting Port: Customer Accounting Port
- NAI Realm:
ironwifi.com
ExtremeCloud IQ Configuration
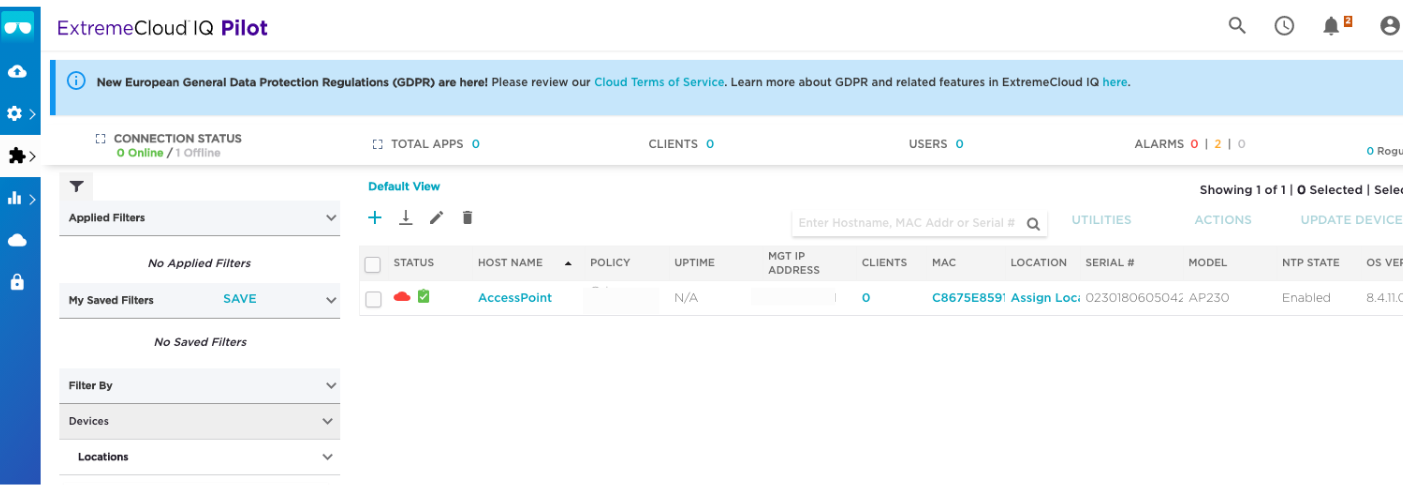
Step 1: Log in to ExtremeCloud
Log in to the ExtremeCloud console as admin. For existing environments with additional users, log in as a user with administrative privileges. The ExtremeCloud Dashboard appears with your access points displayed.
There are a number of options you can set. Only the options that require your input are shown. Default values are used for options that don't need changes.
Step 2: Create a Network Policy
- Click Configure in the menu bar on the left of the Dashboard
- Select Network Policies
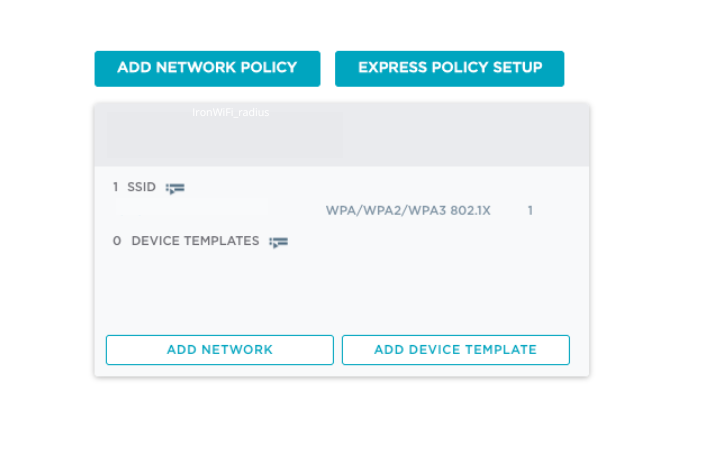
- Click Add Network Policy
- On the Policy Details tab:
- Under What type of policy are you creating?, leave the box checked next to Wireless. Uncheck the boxes next to other options.
- Enter a Policy Name, such as
IronWiFi_network_policy
- Click Next on the bottom right
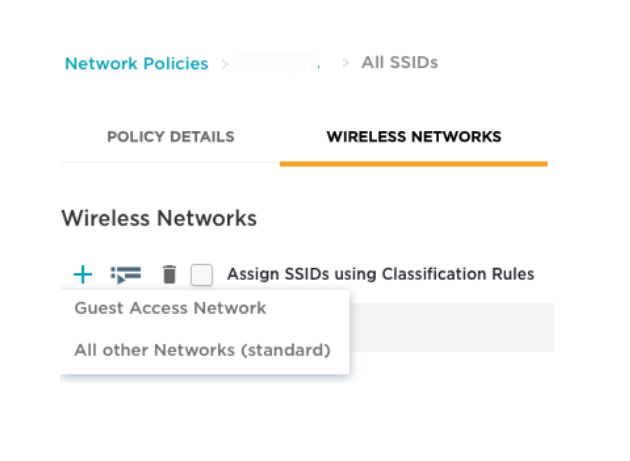
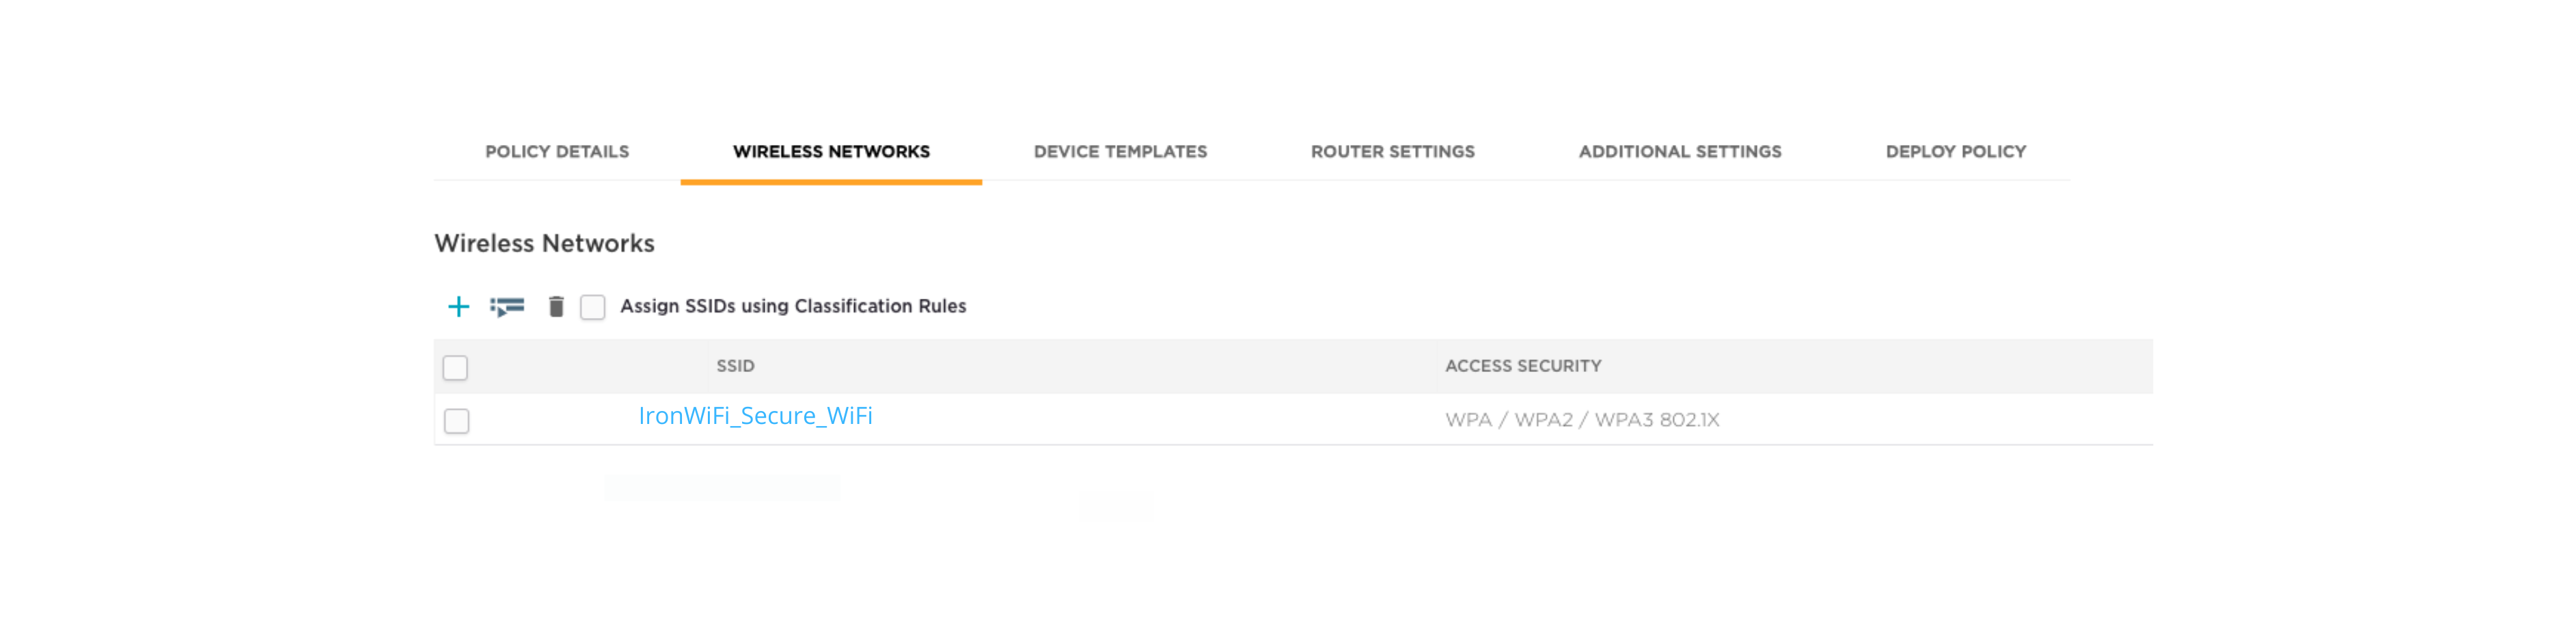
Step 3: Create an SSID
The Wireless Networks page appears.
- Click Configure in the menu bar on the left
- Select Network Policies > Wireless Networks at the top
- Click + to create an SSID
- Select All other Networks (standard)
- Enter a Name for internal purposes and a Broadcast Name that your clients will see (the names can be the same)
- Under Security, select WPA2-Enterprise (the default is Private Pre-Shared Key)
- In the Key Management field, select 802.1X and set Encryption Method to AES-CCMP
Step 4: Add RADIUS Authentication Servers
It is important to set up a secure RADIUS connection between the wireless LAN controller and IronWiFi.
- Still on the Wireless Networks page, scroll down to Authentication Settings
- Under Authenticate via RADIUS Server, click + to add a RADIUS server group
- The Configure RADIUS Servers dialog box appears
- Enter a RADIUS Server Group Name
- Click + to the right of the server group to add a server
- The Select RADIUS Settings dialog box appears
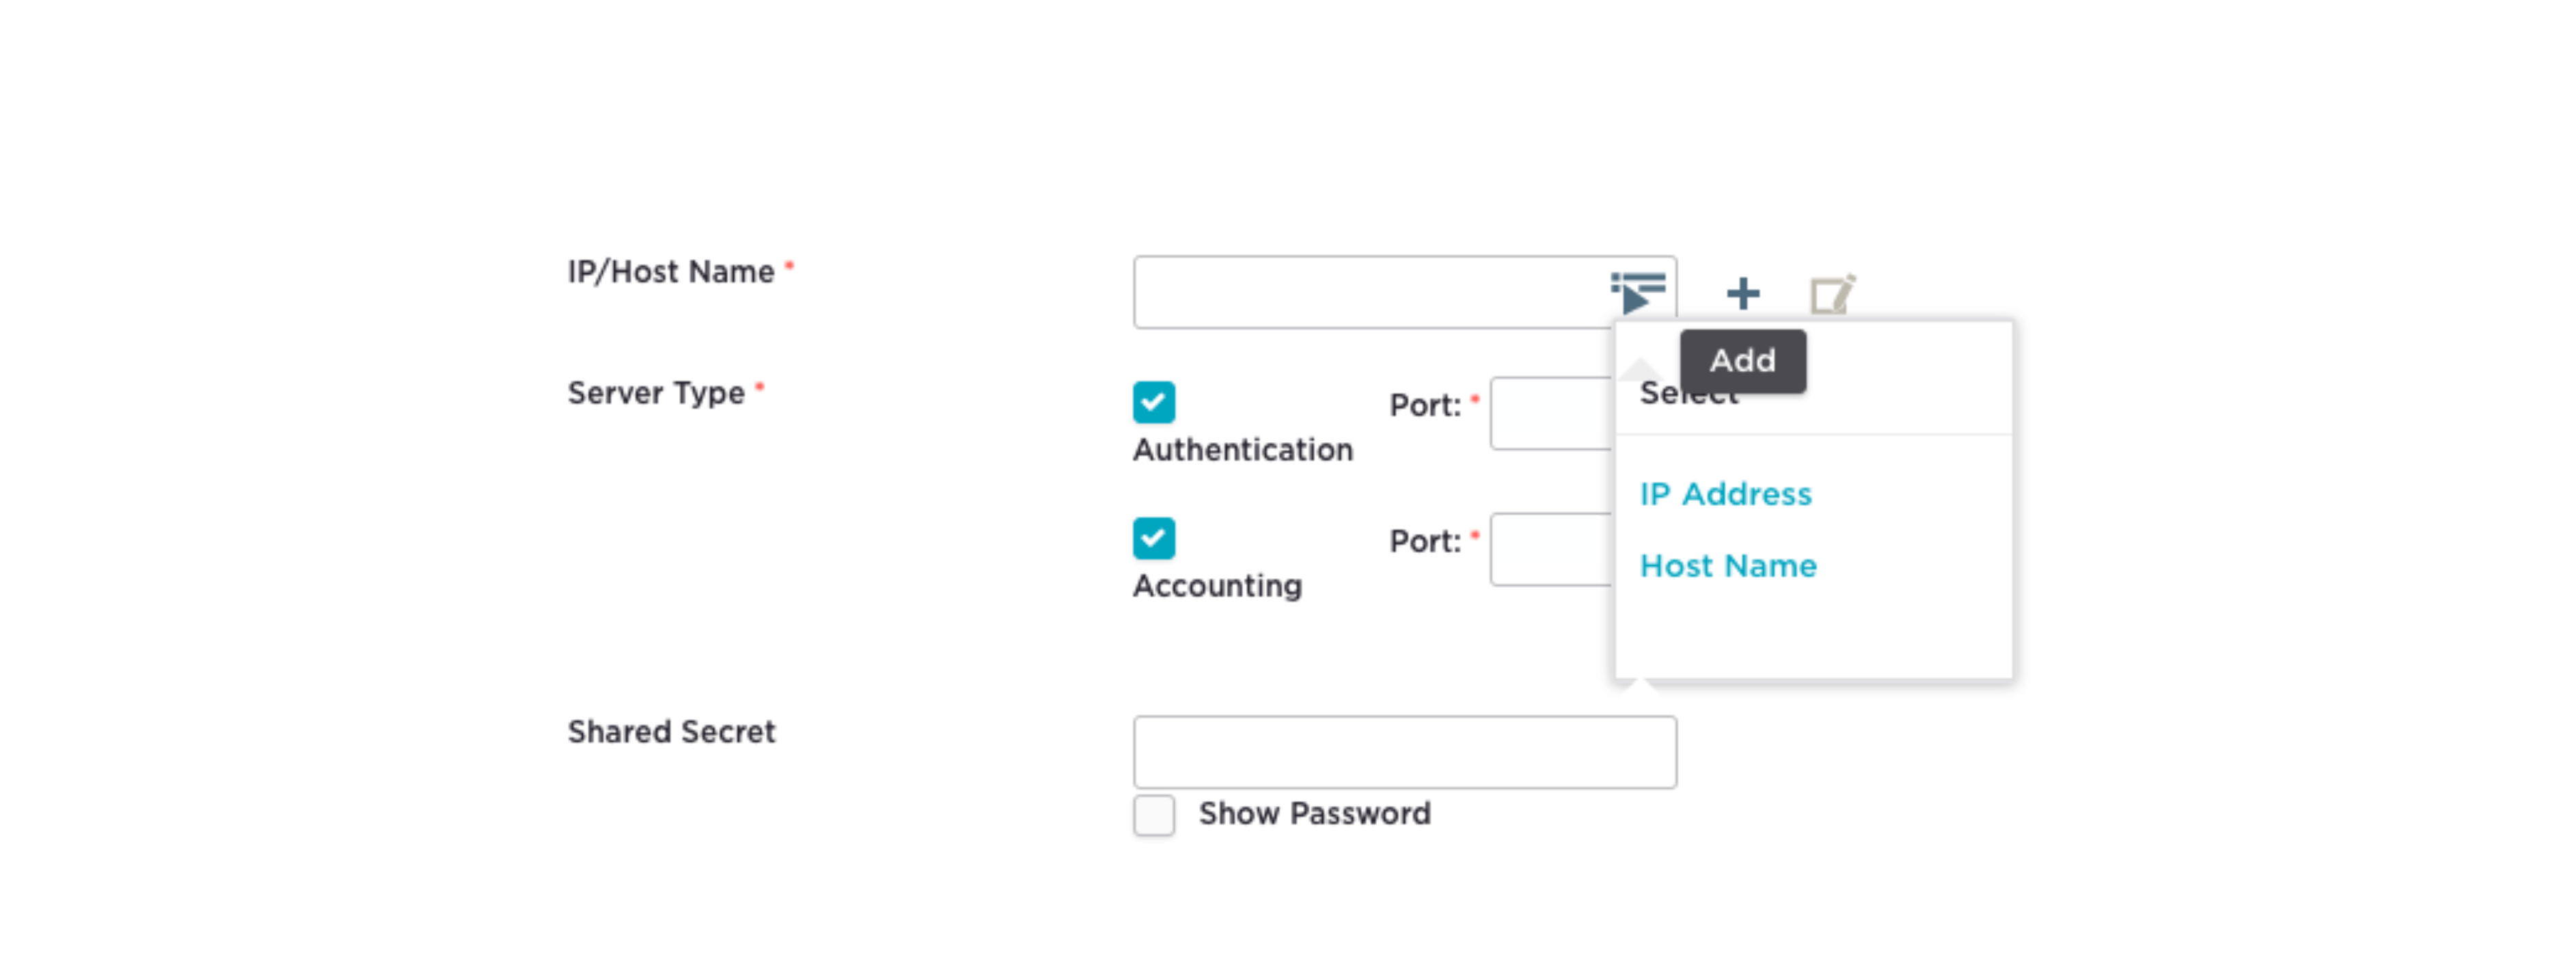
- In the New External RADIUS Server section, enter a Name such as
Primary_radius - Click + next to IP/Host Name
- Select IP Address. The New IP Address or Host Name dialog box appears.

- Enter the IronWiFi RADIUS Server IP address and click Save
- You return to the New External RADIUS Server section with the IP/Host Name field populated
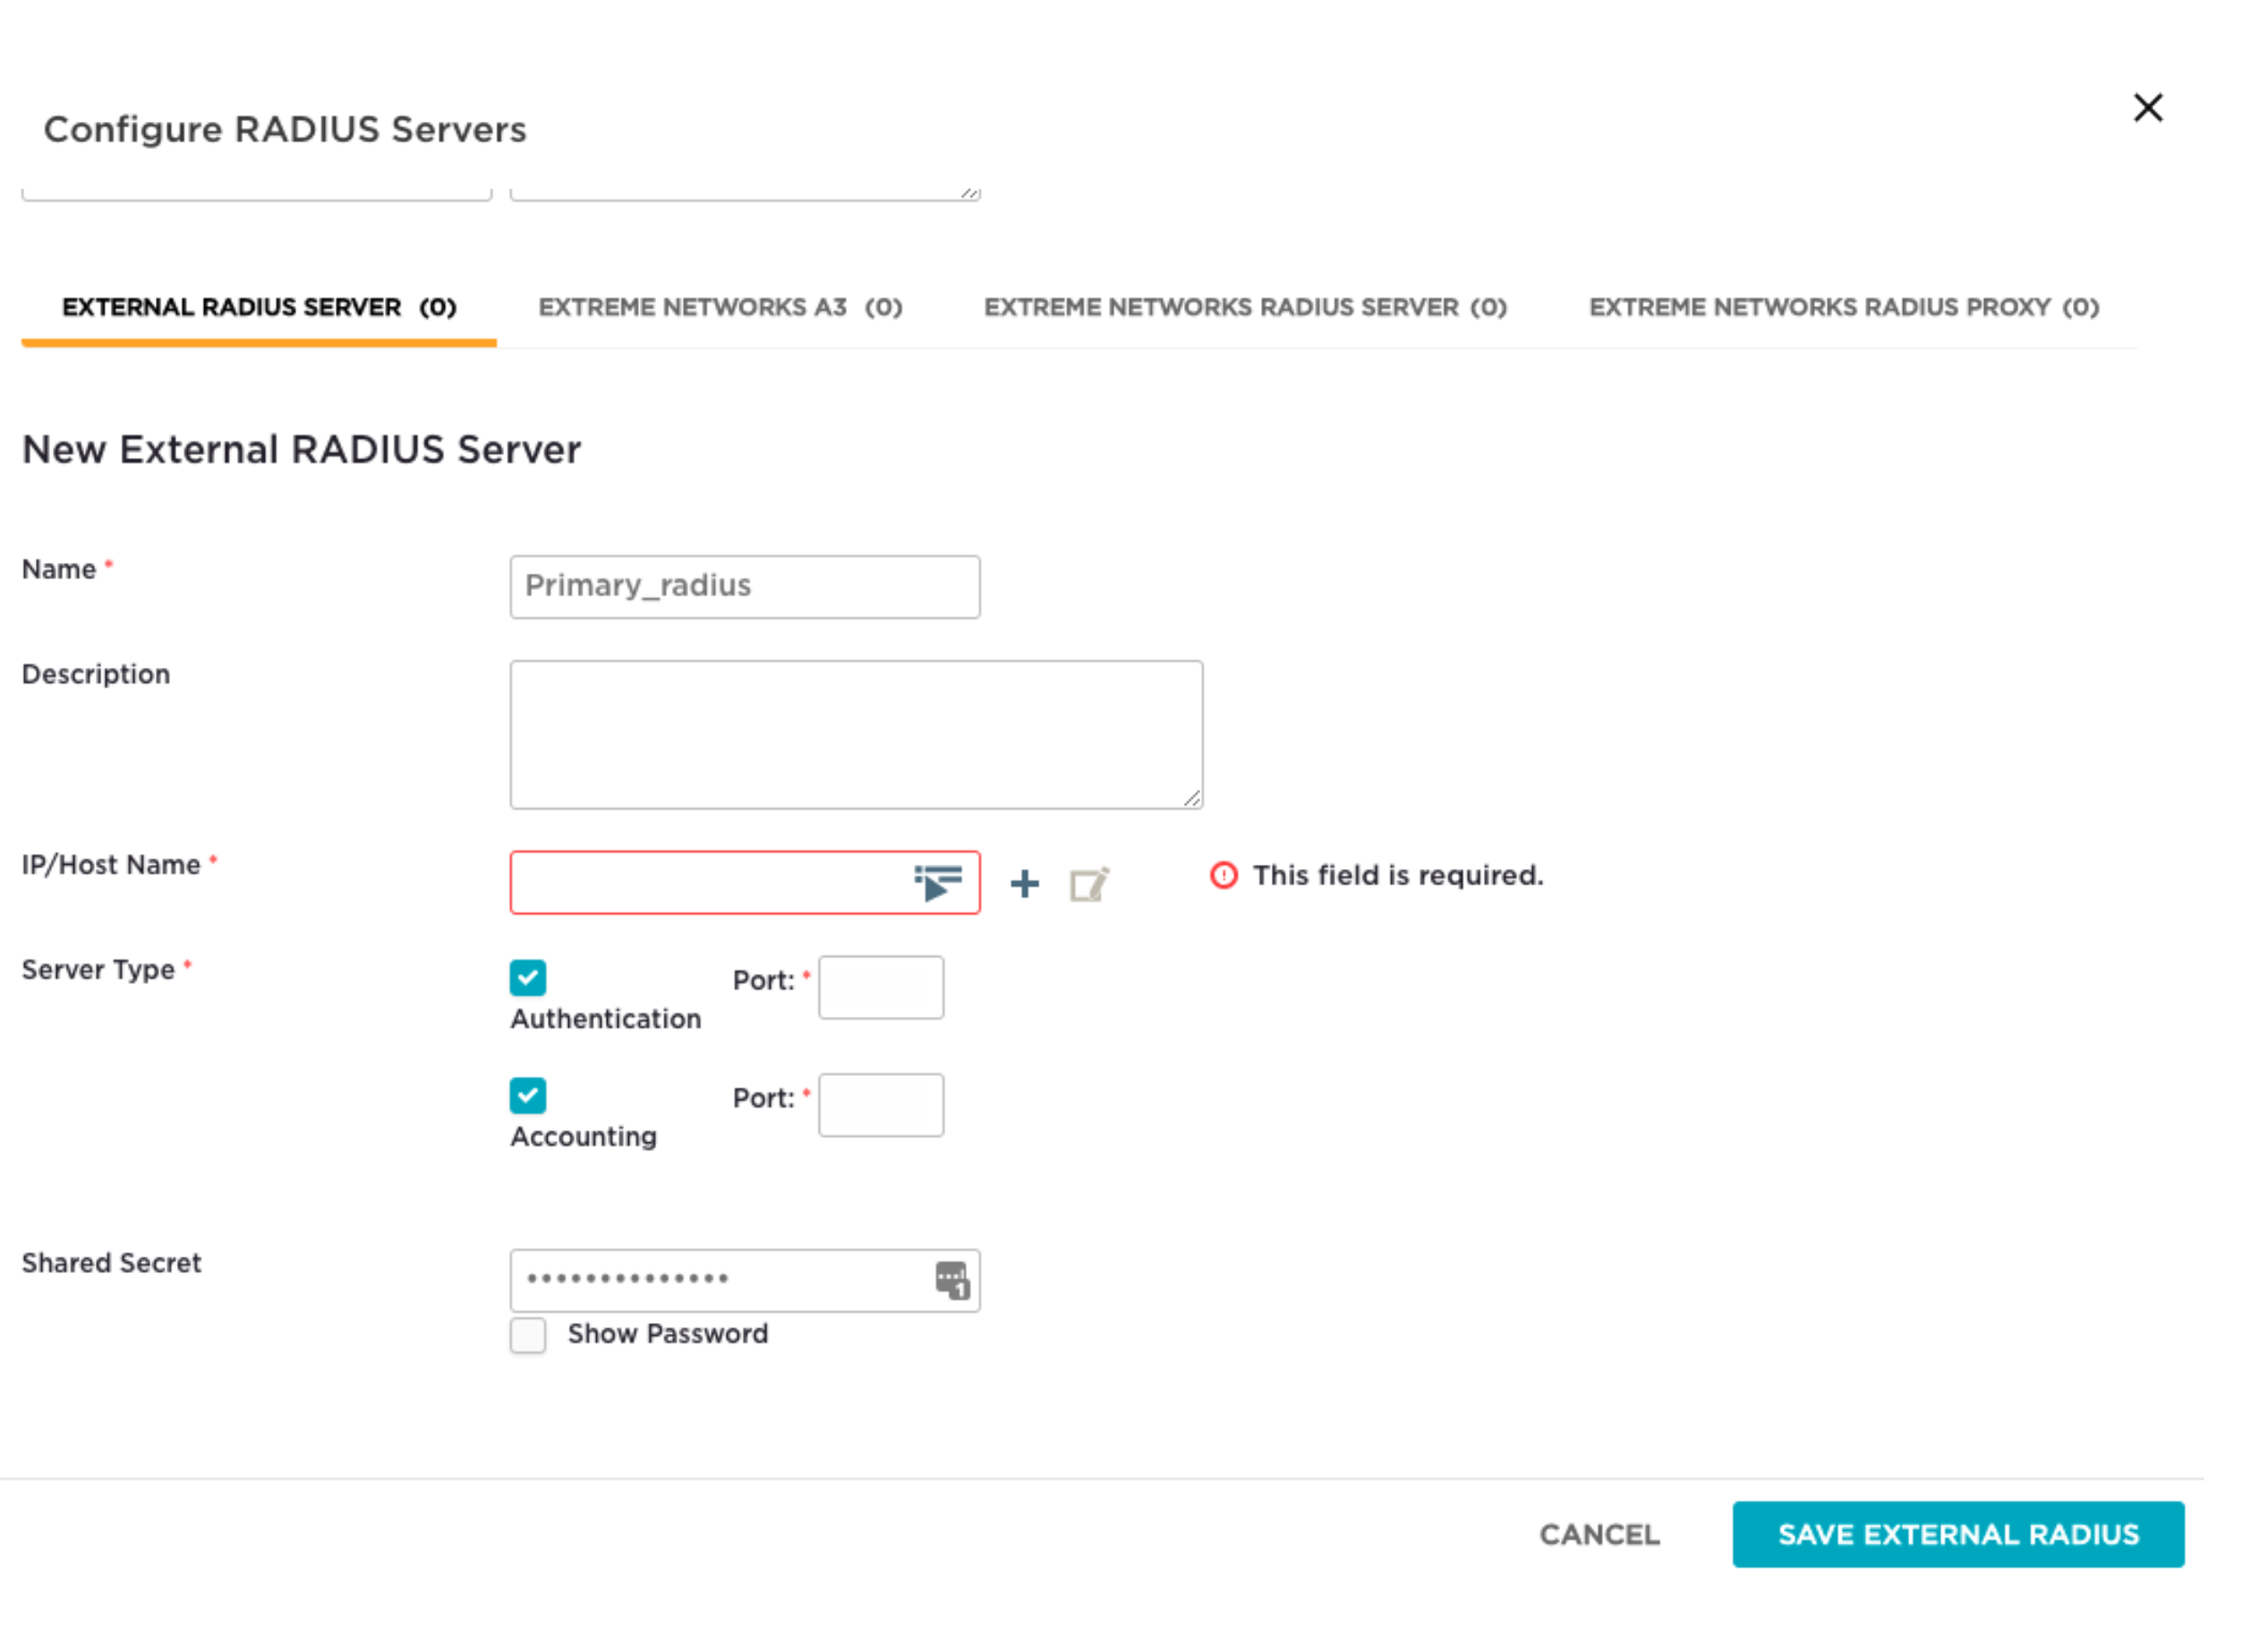
- Enter the Shared Secret from your IronWiFi console
- Configure Authentication Port and Accounting Port with the values from your IronWiFi console
- Click Save
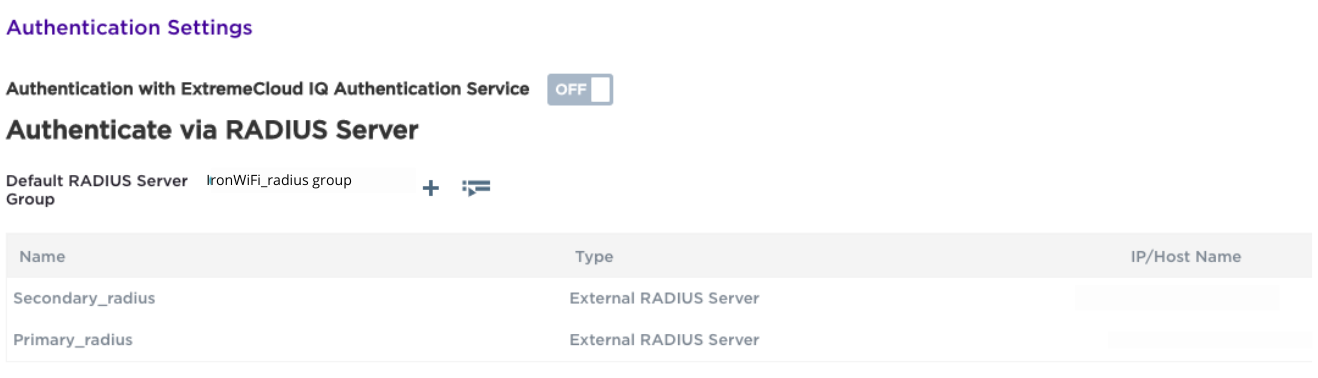
Step 5: Verify RADIUS Configuration
The Authenticate via RADIUS Server section of the Wireless Networks page now shows the RADIUS server group and server you created.
Step 6: Assign the SSID to the Network Policy
Still on the Wireless Networks page:
- Select the SSID by clicking the checkbox next to the SSID
- Click Save

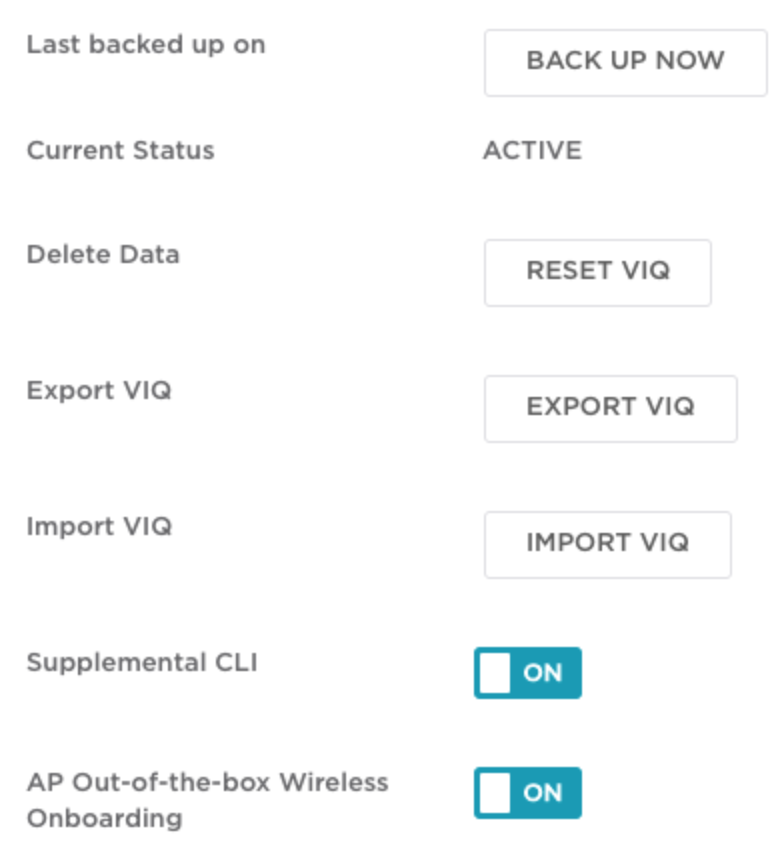
Step 7: Configure VIQ Management
The VIQ Management page appears for additional configuration options.
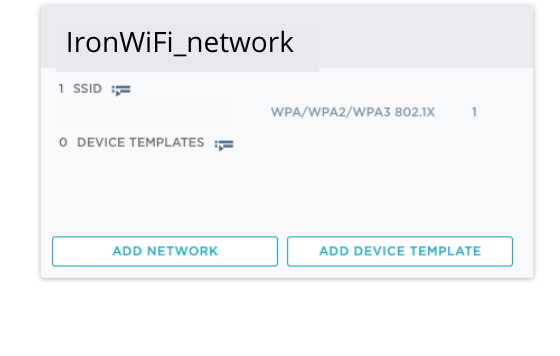
Step 8: Verify the Network Policy
Navigate back to the Network Policies page. You see the network policy you created (e.g.,
IronWiFi_network_policy
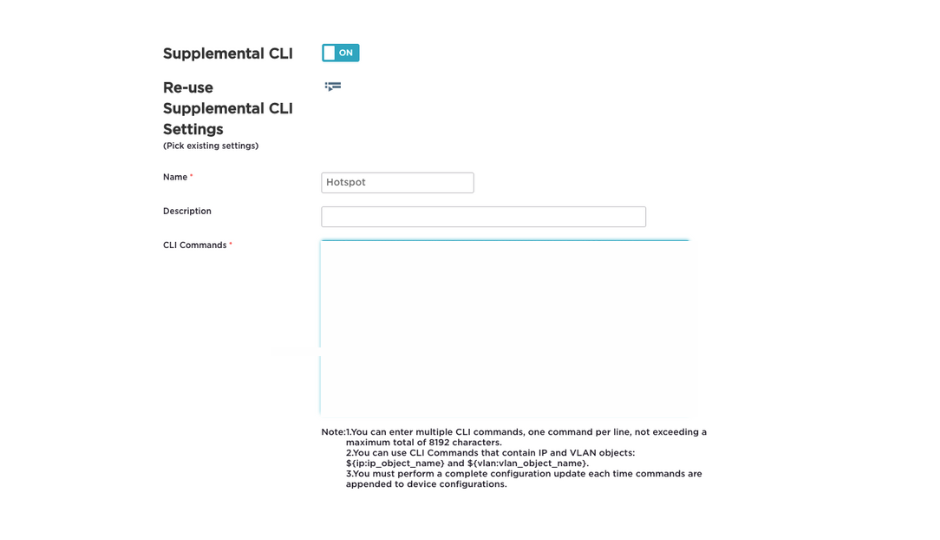
Step 9: Configure Hotspot 2.0 / Passpoint
Click the name of the SSID you created. The Wireless Network page appears.
- Ensure Hotspot 2.0 is set to ON (enable it if not)
- Enter a Name, such as
Hotspot - Paste the Passpoint CLI commands into the CLI Commands box:
Step 10: Deploy Configuration to Access Points
- Click Next
- The Apply the network policy to selected devices page appears
- Click Eligible to display your access points
- Select the target access points and apply the configuration

Hotspot 2.0 Settings Reference
When configuring the Hotspot 2.0 / Passpoint profile, use these settings:
Domain Names:
Operator Information:
- Friendly Name: IronWiFi
- Language Code: eng
Roaming Consortium OIs:
| OI | Description |
|---|---|
| 5A03BA0000 | OpenRoaming Settlement-free |
| 004096 | Cisco OpenRoaming |
| AA146B0000 | Cityroam (if applicable) |
NAI Realm:
- Realm:
ironwifi.com - EAP Method: EAP-TTLS
- Inner Authentication: PAP, MSCHAPv2
- Credential Type: Username/Password
HiveManager NG Configuration
Configure RADIUS
- Log in to HiveManager NG
- Go to Configuration > Authentication > RADIUS Servers
- Click Add
- Configure:
- Name: IronWiFi
- IP Address: IronWiFi RADIUS IP
- Auth Port: Customer Authentication Port
- Accounting Port: Customer Accounting Port
- Shared Secret: Your secret
Configure Hotspot 2.0
- Go to Configuration > Wireless > Hotspot 2.0
- Click Add Profile
- Configure all Hotspot 2.0 settings as described in the settings reference above
Create SSID Profile
- Go to Configuration > Wireless > SSIDs
- Create new SSID with:
- WPA2-Enterprise security
- RADIUS authentication
- Hotspot 2.0 profile assigned
CLI Configuration (Advanced)
For advanced users, use HiveOS CLI:
RADIUS Configuration
RADIUS Group
AAA Profile
Hotspot 2.0 Profile
SSID Profile
Apply to Interface
Verification
ExtremeCloud IQ
- Go to Monitor > Devices
- Select access point
- Check Wireless status
- Verify SSID is broadcasting
- Check client connections
Check Hotspot 2.0 Status
- Go to Monitor > Clients
- Filter by SSID
- Verify Passpoint client connections
CLI Verification
Test Connection
Device Requirements
- Passpoint-capable device (iOS 7+, Android 6+, Windows 10+)
- Passpoint profile installed or OpenRoaming profile
Connection Process
- Ensure device Passpoint is enabled
- Device discovers Passpoint network via ANQP
- Automatic connection based on credentials
- Verify in IronWiFi Console > Logs
Troubleshooting
Network Not Discovered
- Verify Hotspot 2.0 enabled on SSID
- Check ANQP responses:
show hotspot20-anqp-stats - Verify beacon frames include Interworking IE
- Test with different client devices
Authentication Failures
-
Test RADIUS connectivity:
test radius server IronWiFi username testuser -
Check RADIUS server status:
show radius-server-status -
Review authentication logs in ExtremeCloud IQ
-
Verify NAI realm matches IronWiFi configuration
Connection Drops
- Check signal strength - Ensure adequate coverage
- Review AP logs for disconnection reasons
- Verify VLAN configuration - Ensure proper network access
- Check session timeout settings
Common Errors
| Error | Cause | Solution |
|---|---|---|
| RADIUS timeout | Network issue | Check firewall, verify IP |
| Auth rejected | Wrong credentials | Verify realm, check user |
| No ANQP response | HS2.0 disabled | Enable Hotspot 2.0 on SSID |
| Certificate error | TLS mismatch | Update AP firmware |
Best Practices
- Firmware Updates: Keep HiveOS updated for best Passpoint support
- Testing: Verify with multiple device types before production
- Monitoring: Use ExtremeCloud IQ dashboards for visibility
- Redundancy: Configure backup RADIUS servers
- Documentation: Record all configuration settings
- Security: Use strong RADIUS secrets, enable accounting
Related Topics
Same vendor
Standards & reference
Was this page helpful?