Aruba Central - OpenRoaming with RadSec
Configure RadSec (RADIUS over TLS) on Aruba Central to enable secure OpenRoaming authentication with IronWiFi. This guide covers certificate management, RadSec server configuration, and Hotspot 2.0 deployment for Aruba access points managed through Aruba Central cloud platform.
Prerequisites
In Aruba Central:
- Aruba Central account with managed access points
- Aruba access points with Hotspot 2.0 support
- Administrator access
In IronWiFi Console (complete these first):
- Create a Network and enable OpenRoaming
- Enable RadSec on the network
- Download the certificate bundle containing:
- - Root CA
iw-rsa-root-ca.cert.pem - - Intermediate CA
iw-rsa-radsec-signing-ca.cert.pem - - Client certificate
client.cert.pem - - Private key
client.key.pem
RadSec Server Details
| Setting | Value |
|---|---|
| Server | |
| Port | |
| Protocol | TLS |
Quick Start
- Upload certificates to Aruba Central (Global Settings → Security)
- Create RadSec authentication server with
radsec.ironwifi.com:2083 - Create WLAN with WPA2-Enterprise and assign the RadSec server
- Enable Hotspot 2.0 with OpenRoaming OIs: ,
5A03BA0000,5A03BA0200004096 - Configure NAI realm:
ironwifi.com - Deploy to access points
Aruba Central Configuration
Step 1: Prepare Certificates
Extract the zip file containing the 2 CA certificates, Client Certificate, and the Client Key.
Concatenate the Client Certificate and Client Key, either using the
cat
.pem

Step 2: Upload Certificates
- Log in to Aruba Central (central.arubanetworks.com)
- Navigate to Global > Organization > Network Structure > Certificates
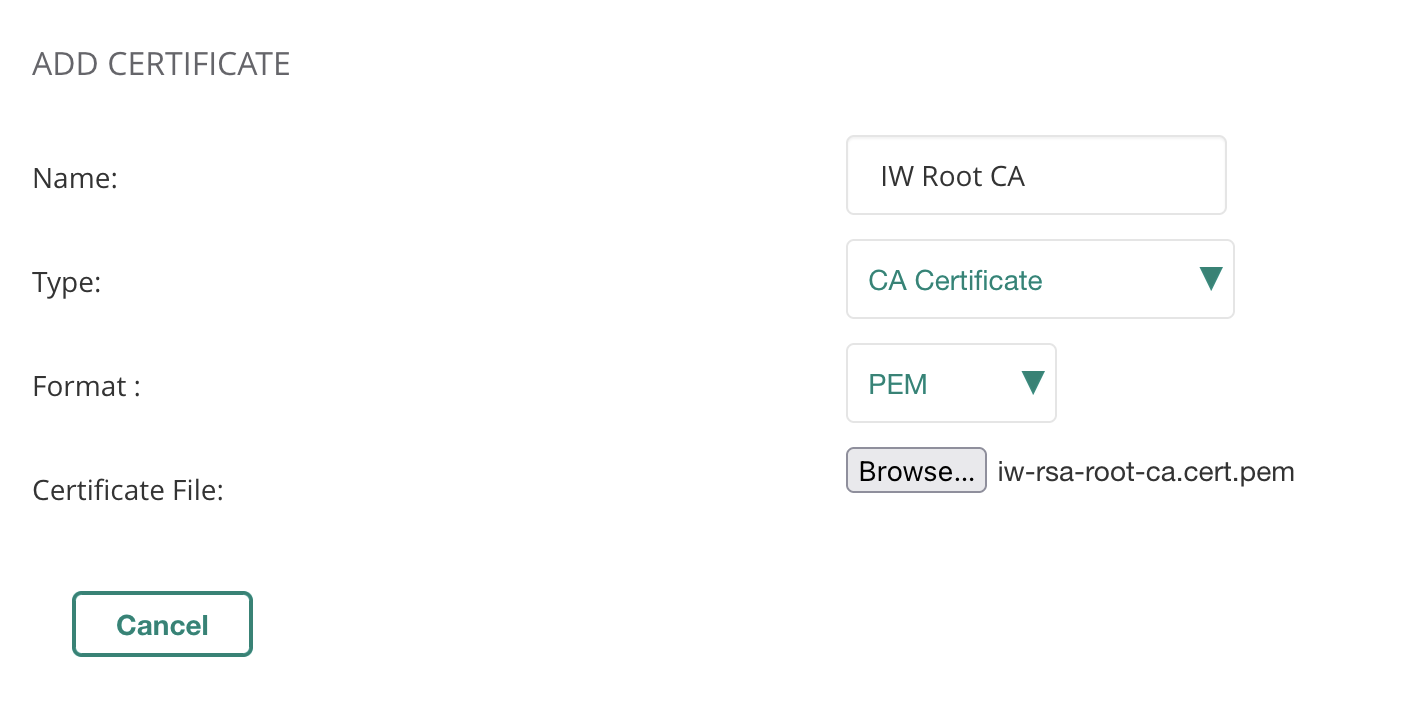
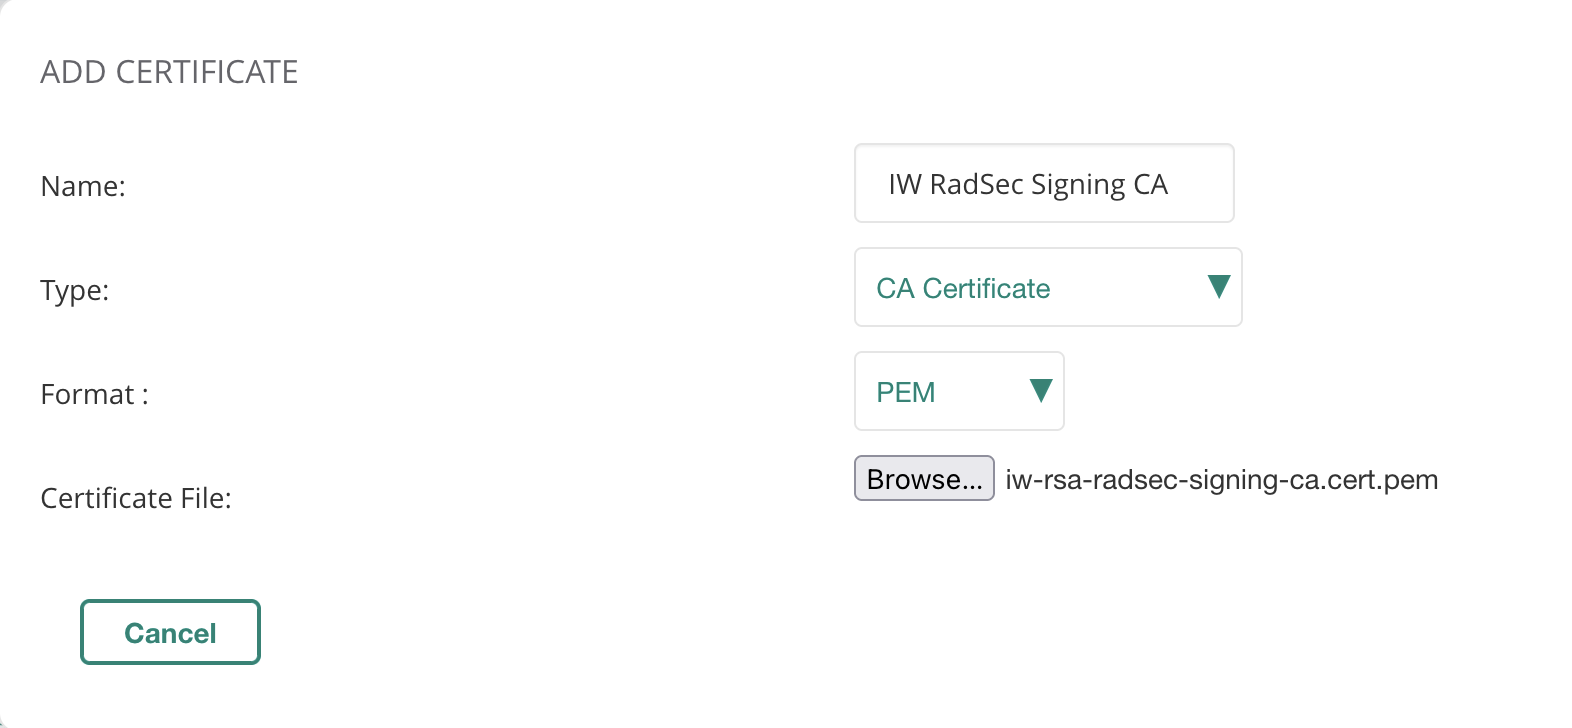
- Click + to add a new entry
- Add IW Root CA and IW RadSec Signing CA as CA Certificate
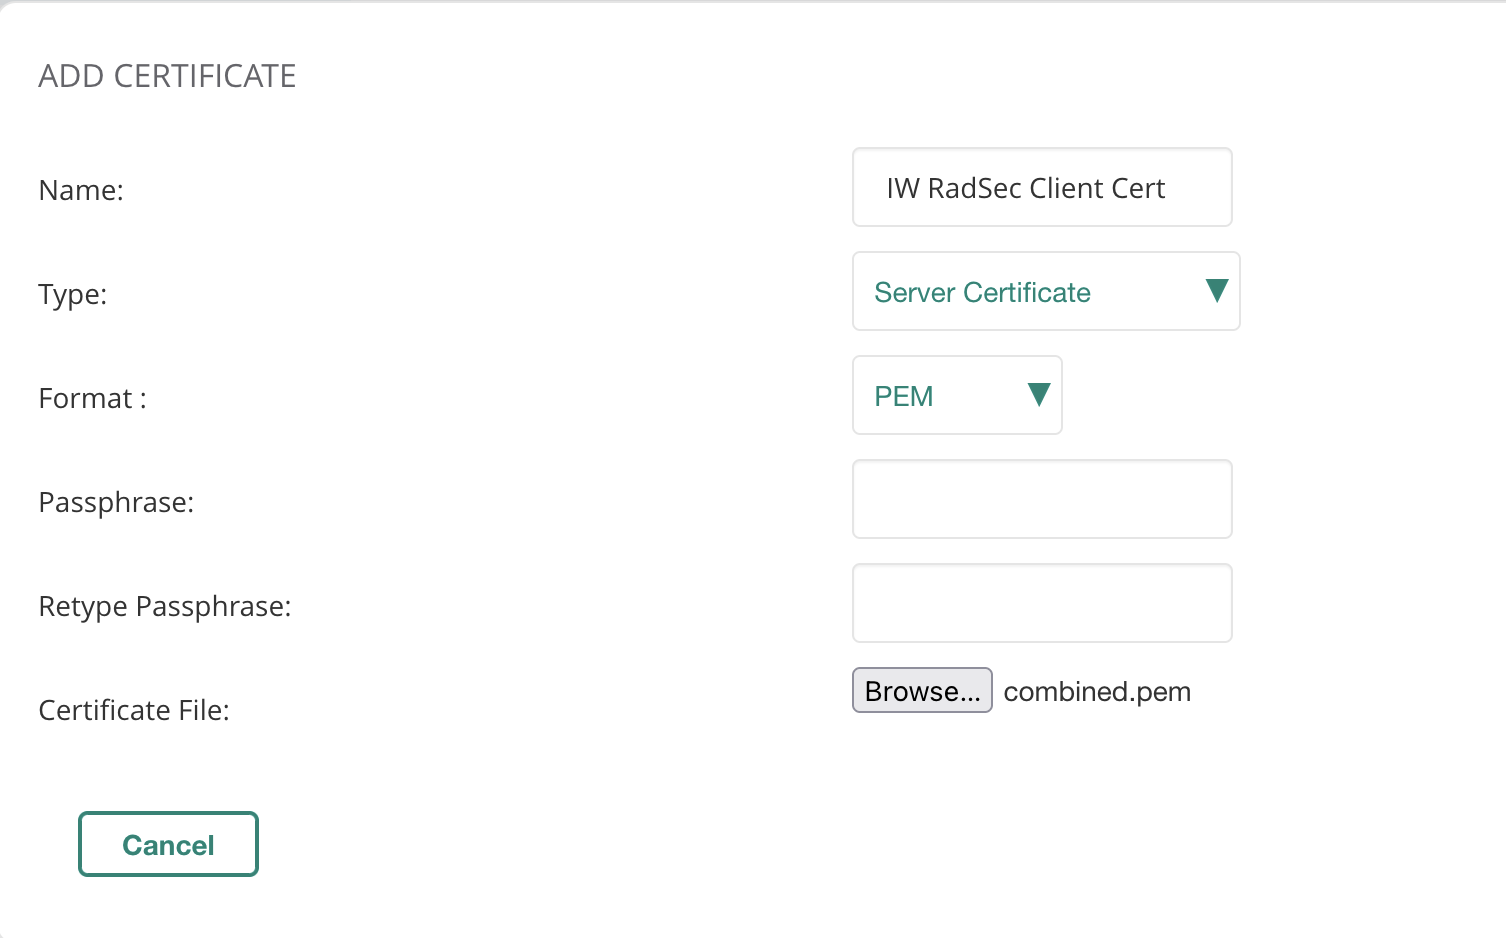
- Add the concatenated Client Certificate + Key as Server Certificate
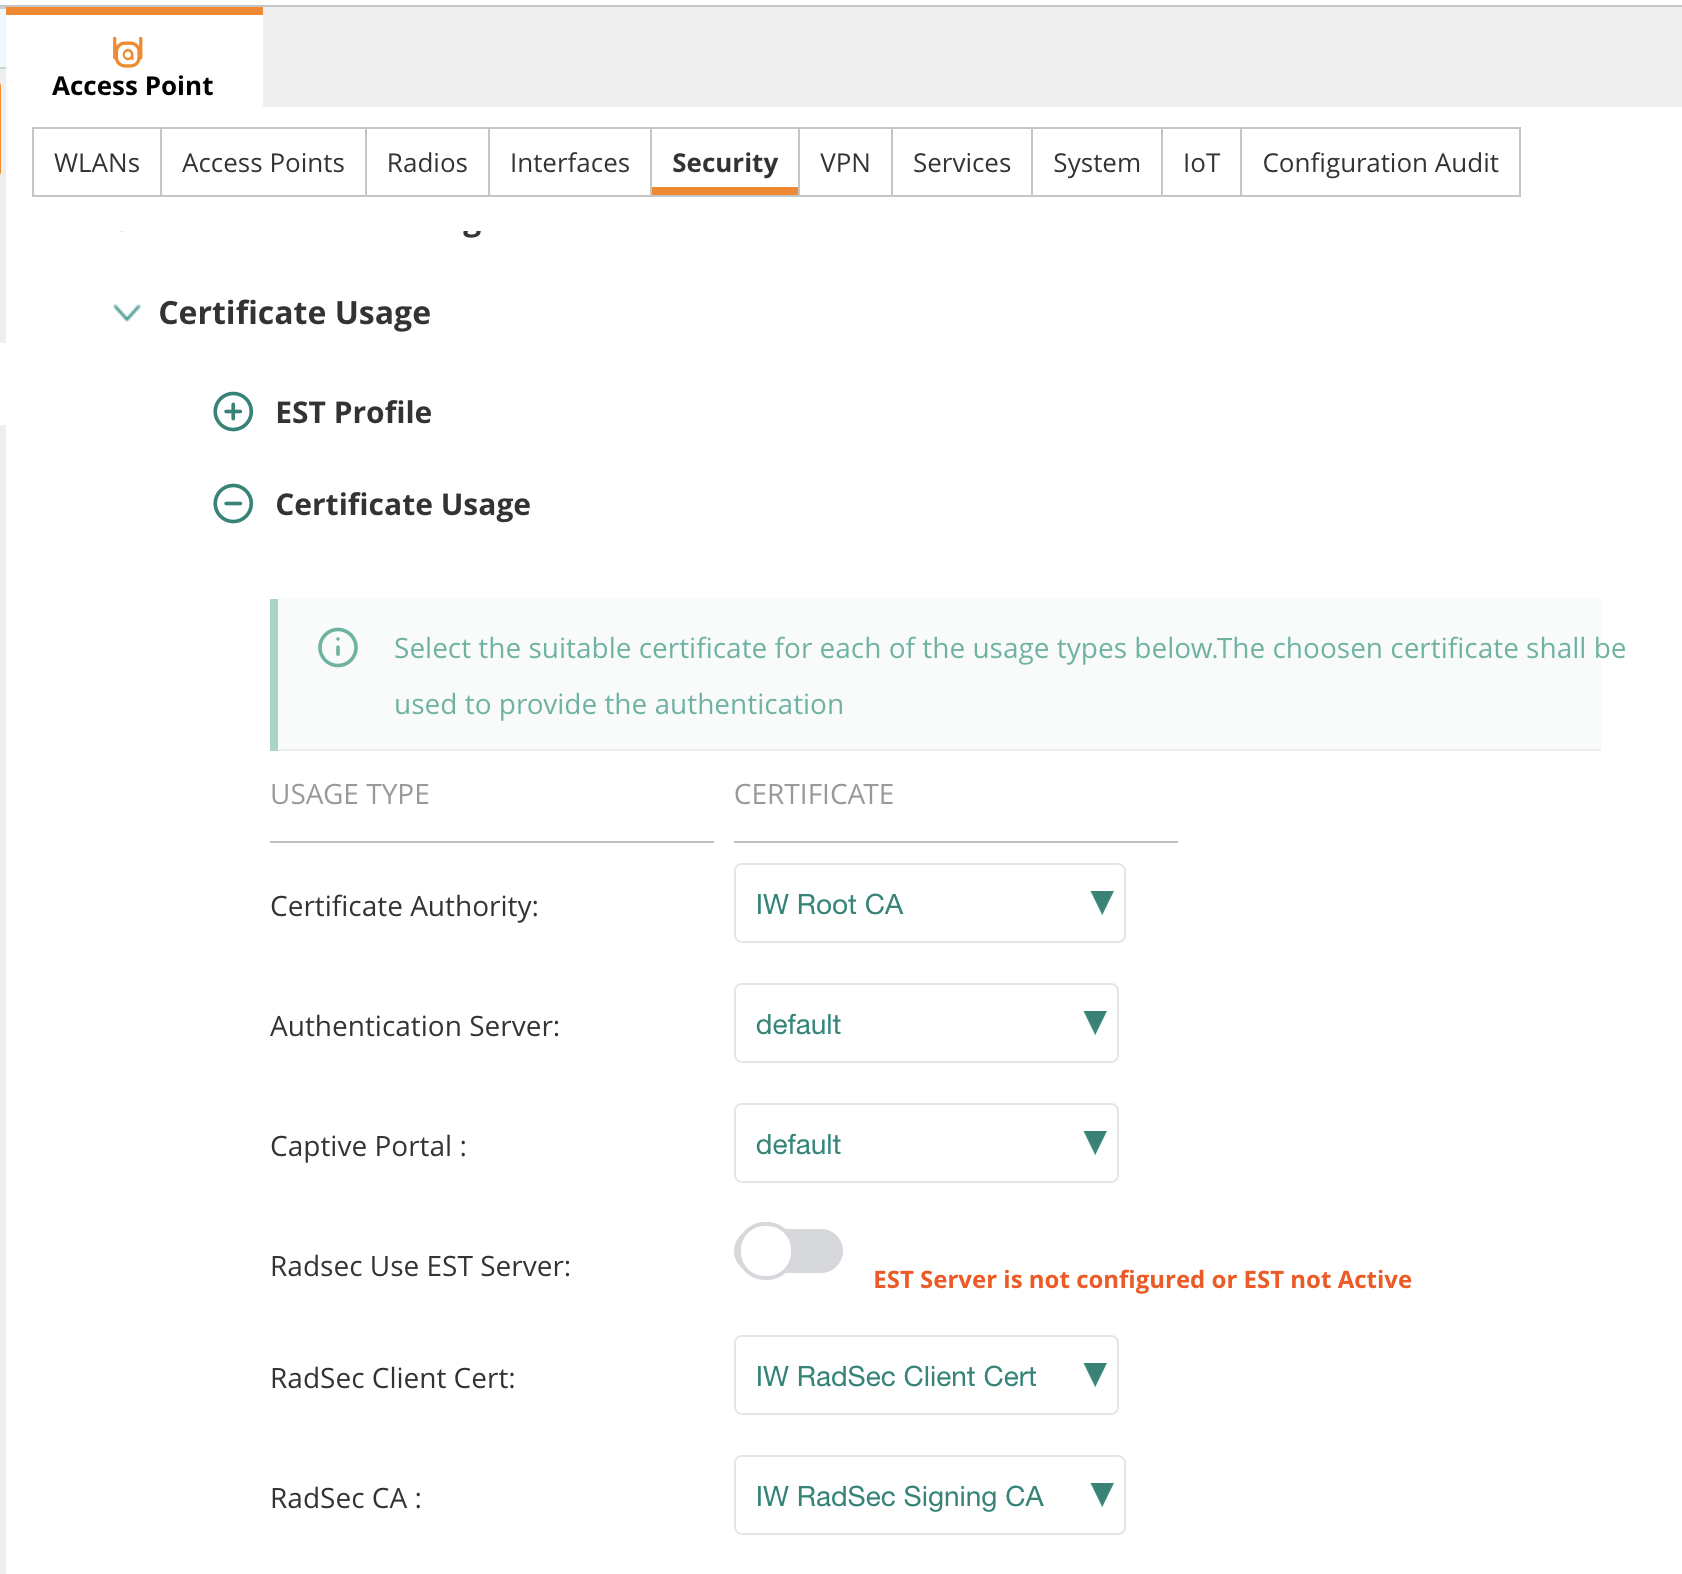
Step 3: Create RadSec Authentication Server
- Go to Device > Access Point > Security
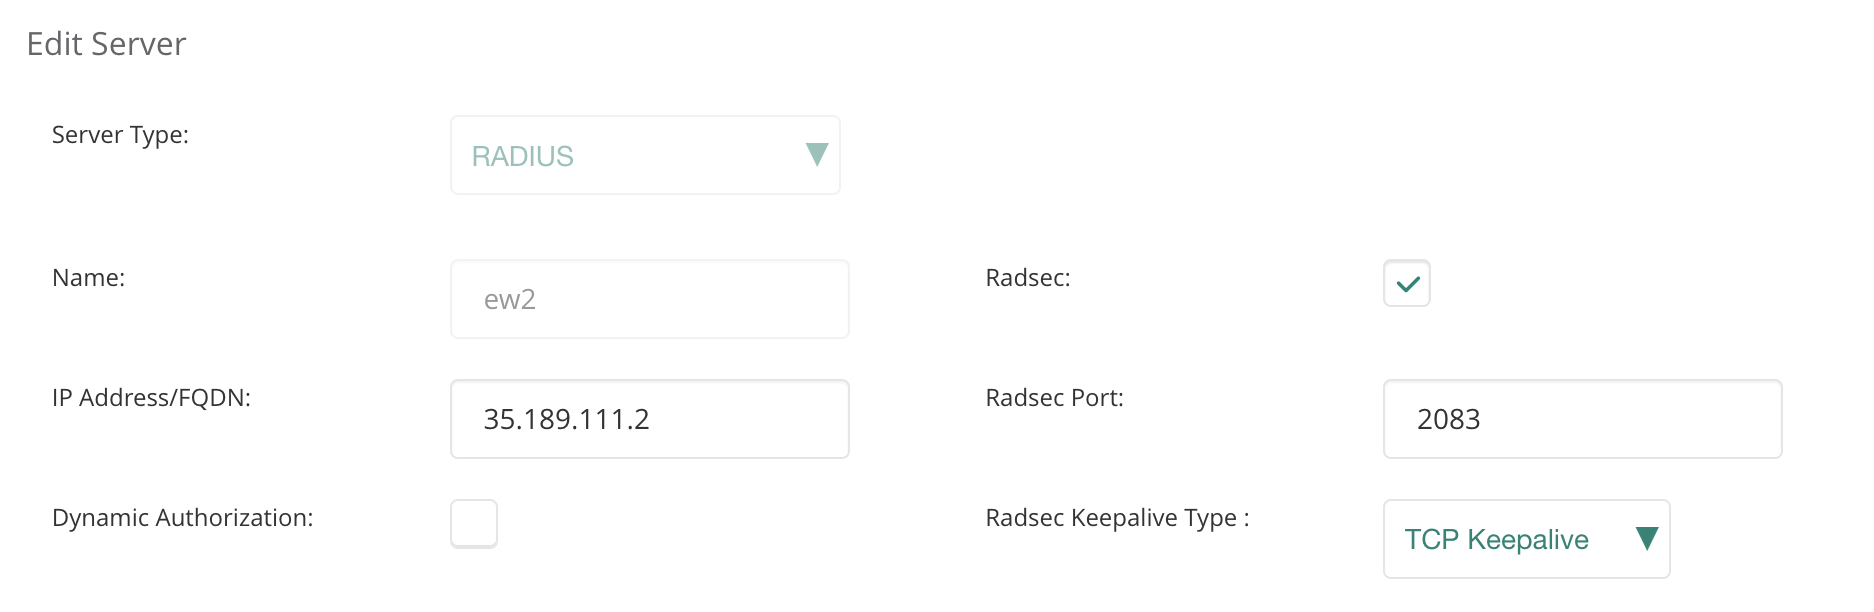
- Click + to add Authentication Server
- Add desired name, tick Radsec, enter the IP address from IronWiFi Console
- Click Save
- Scroll down to Certificate Usage and select the certificates you added previously
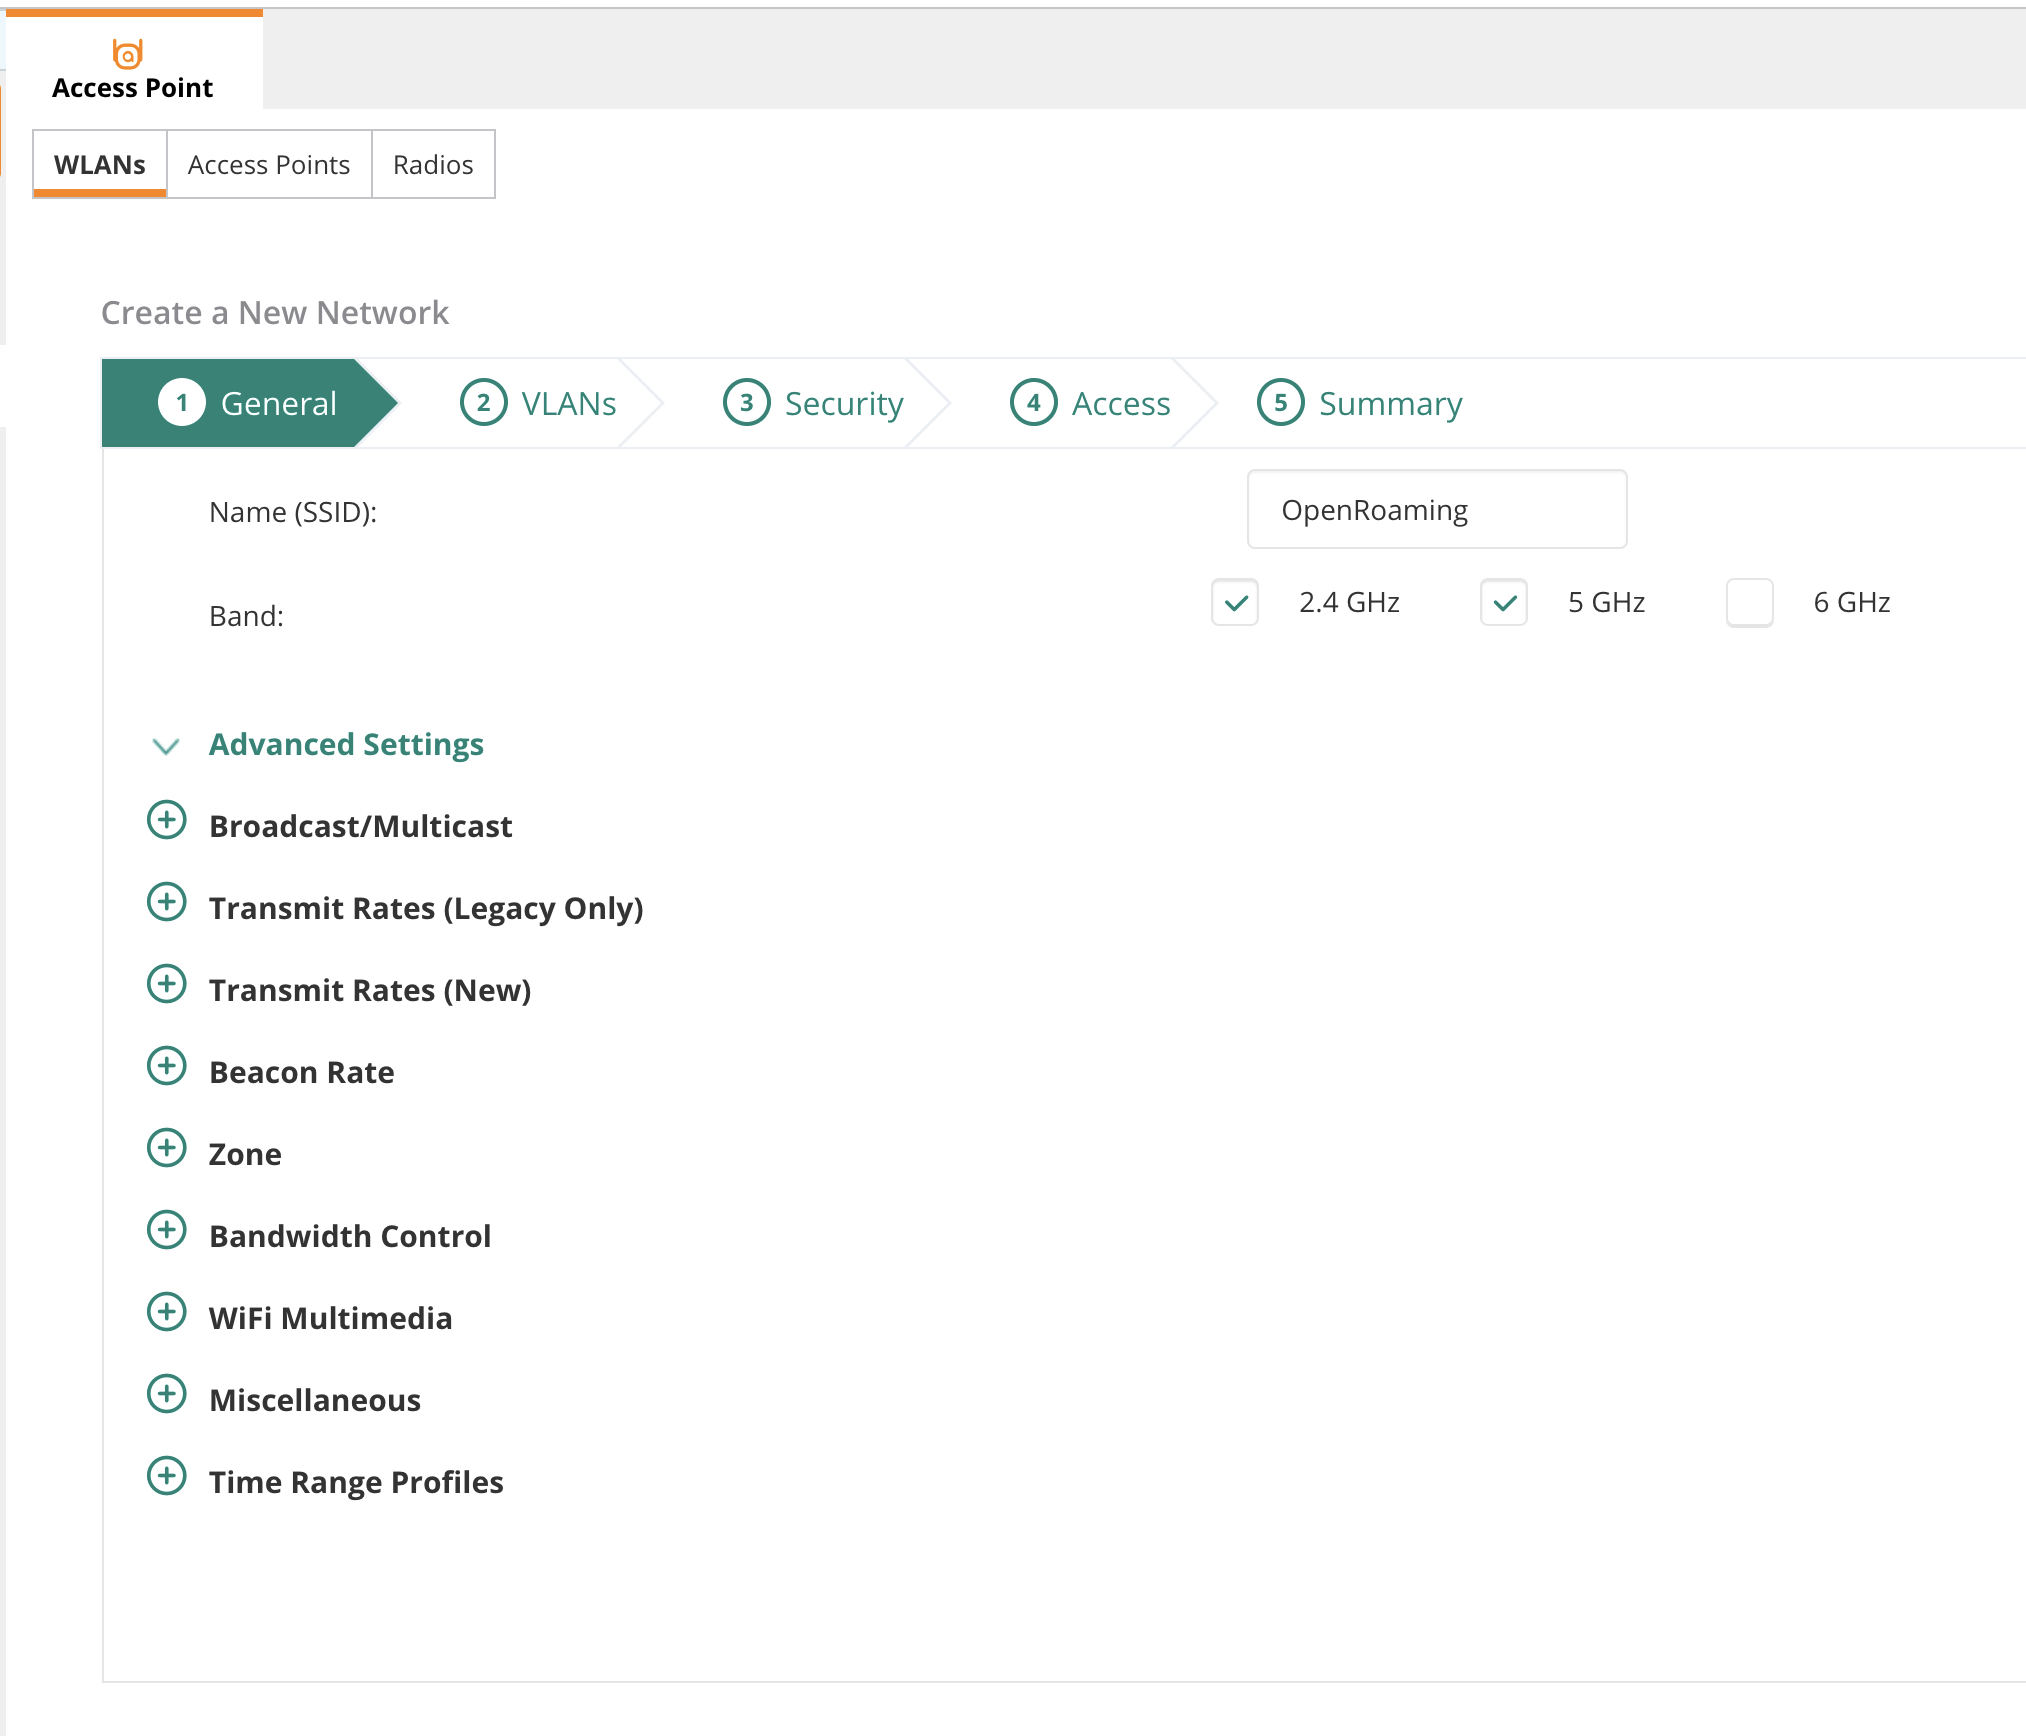
Step 4: Create WLAN with Passpoint
- Go to the WLANs tab and add a new SSID
- Give it a name and click Next
Step 5: Configure Security
- Select appropriate VLAN in section 2
- In section 3, set Security Level to Enterprise
- Select the RadSec server you added previously as your Primary Server
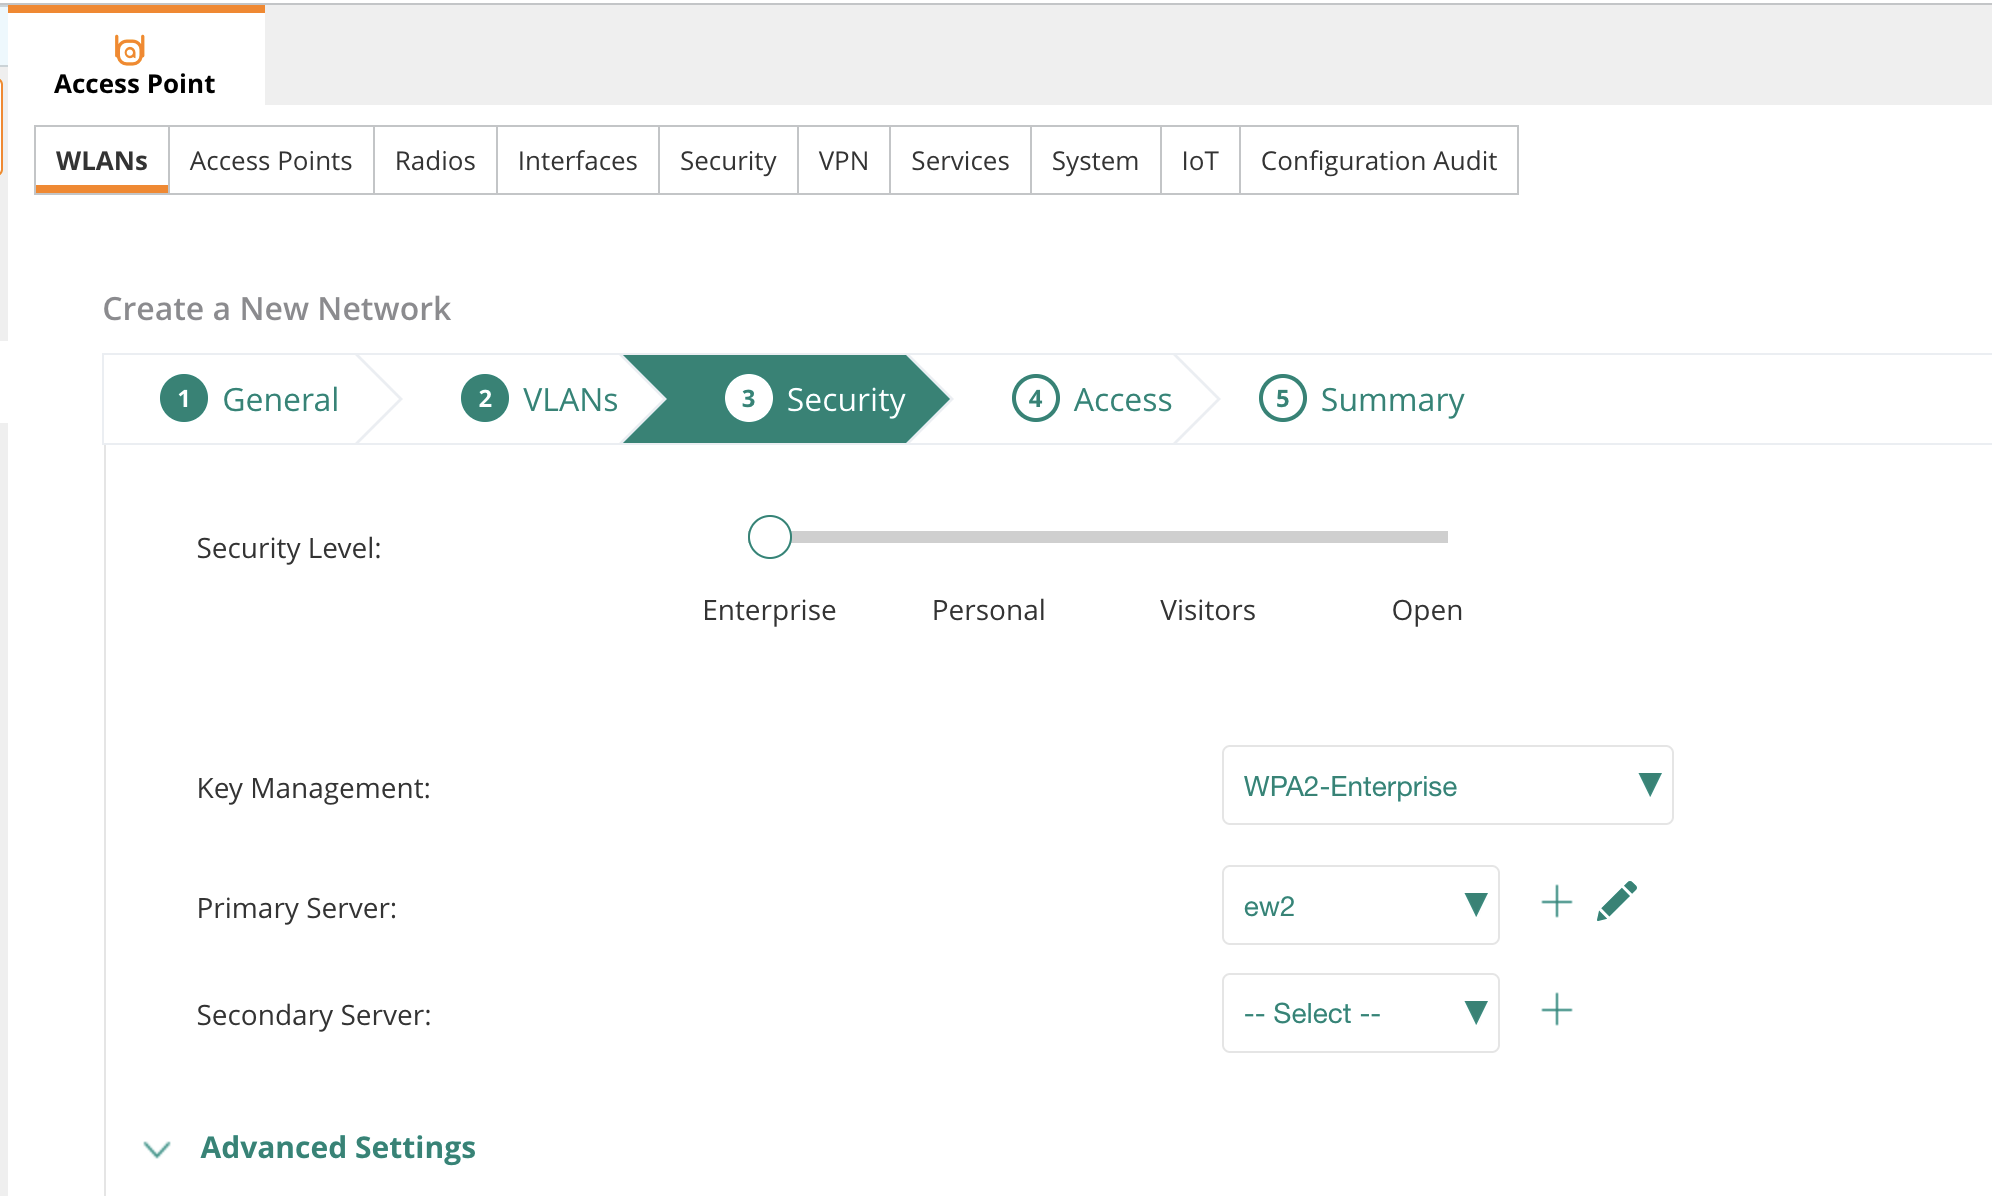
- Click on Advanced Settings and scroll down
- Enable Called Station ID Include SSID
- In the Accounting subsection, pick Use Authentication Servers and set interval to 10 minutes
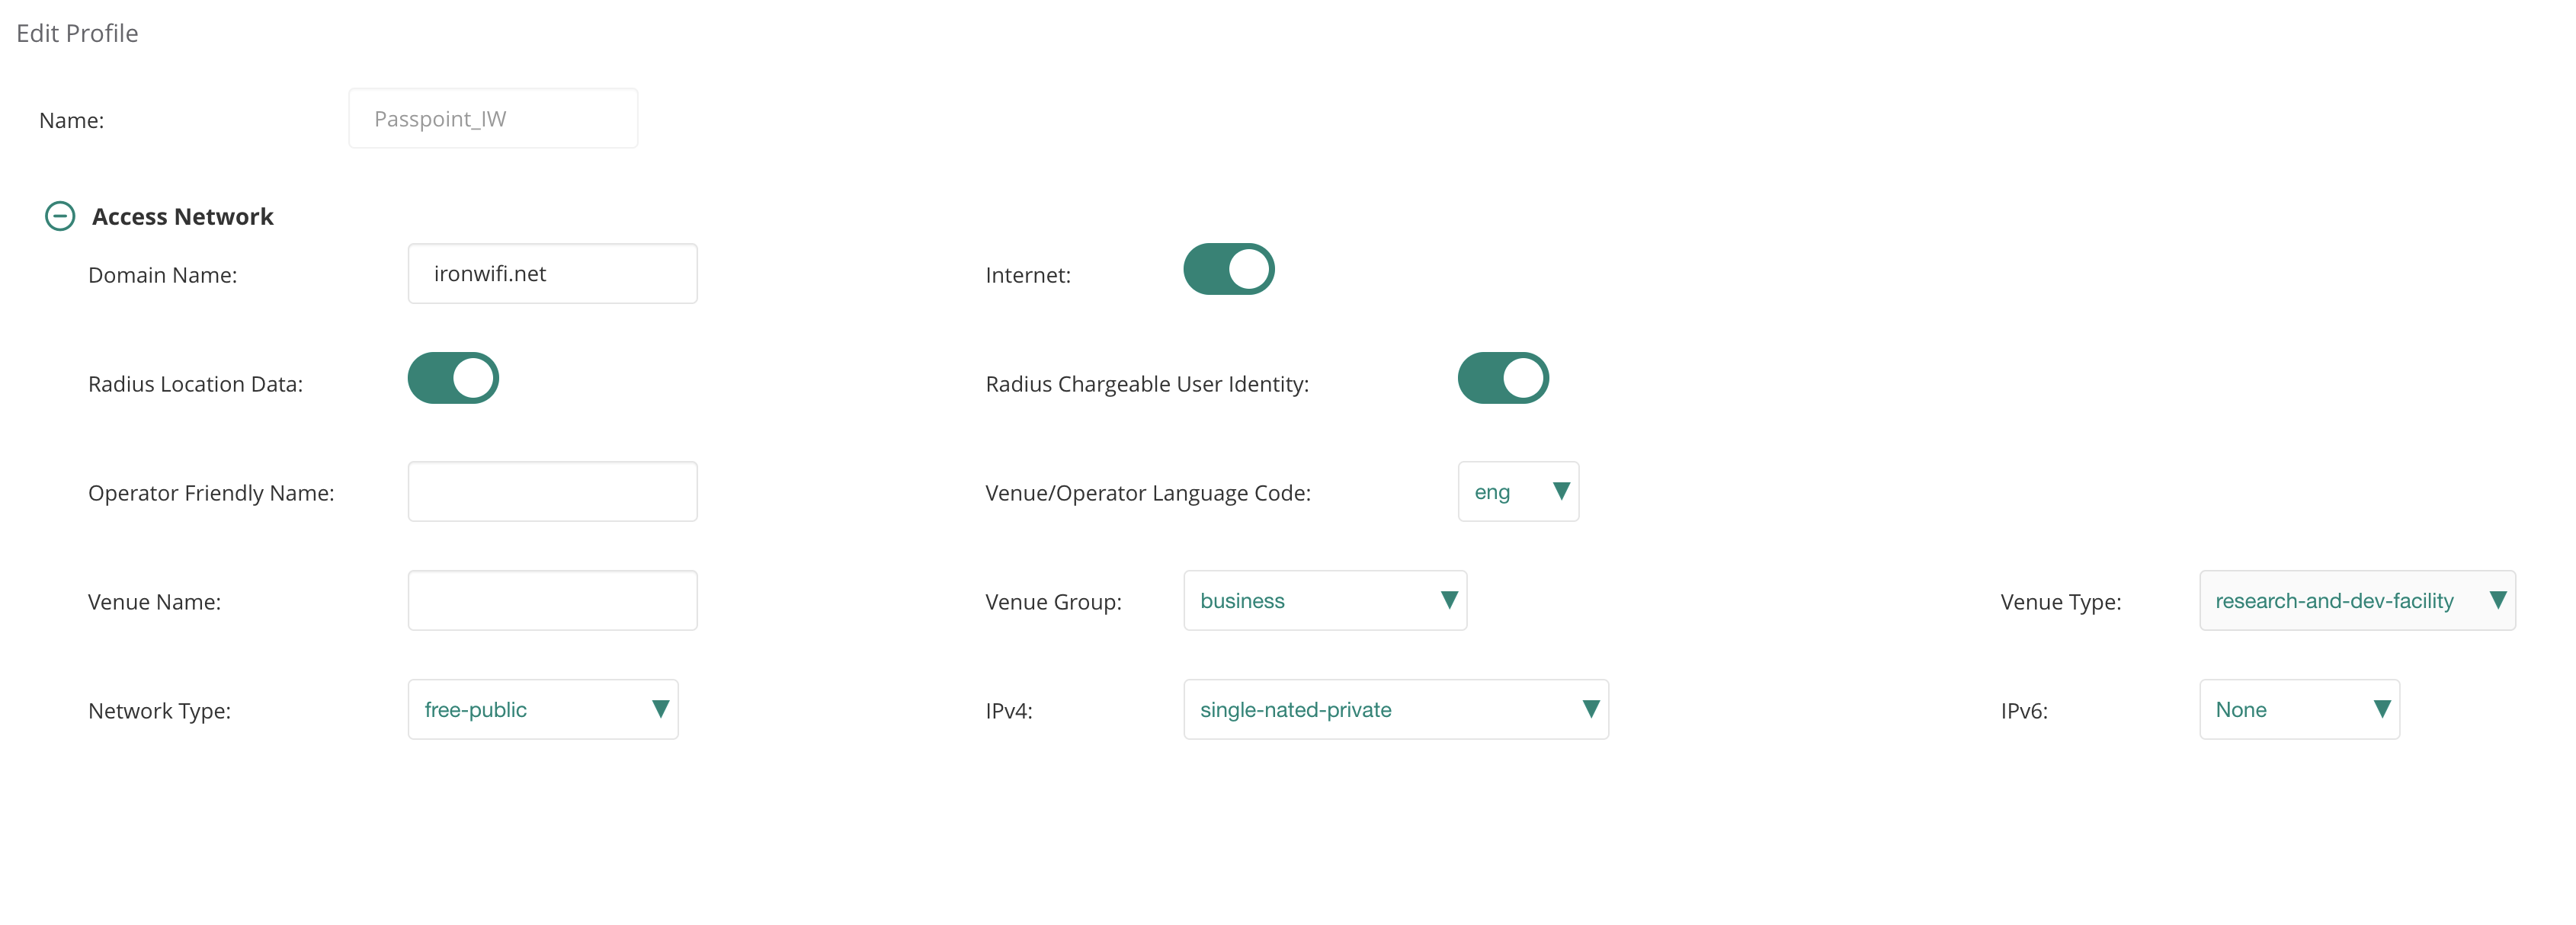
Step 6: Configure Passpoint / Hotspot 2.0
- Click on Manage Passpoint Services to add a Passpoint Profile
- Give the profile a suitable name
- In the Access Network section:
- Add as Domain Name
ironwifi.net - Enable Internet, Radius Location Data, and Radius Chargeable User Identity
- Select Network Type as free-public
- Select the suitable venue and network parameters to reflect your local setup
- Add
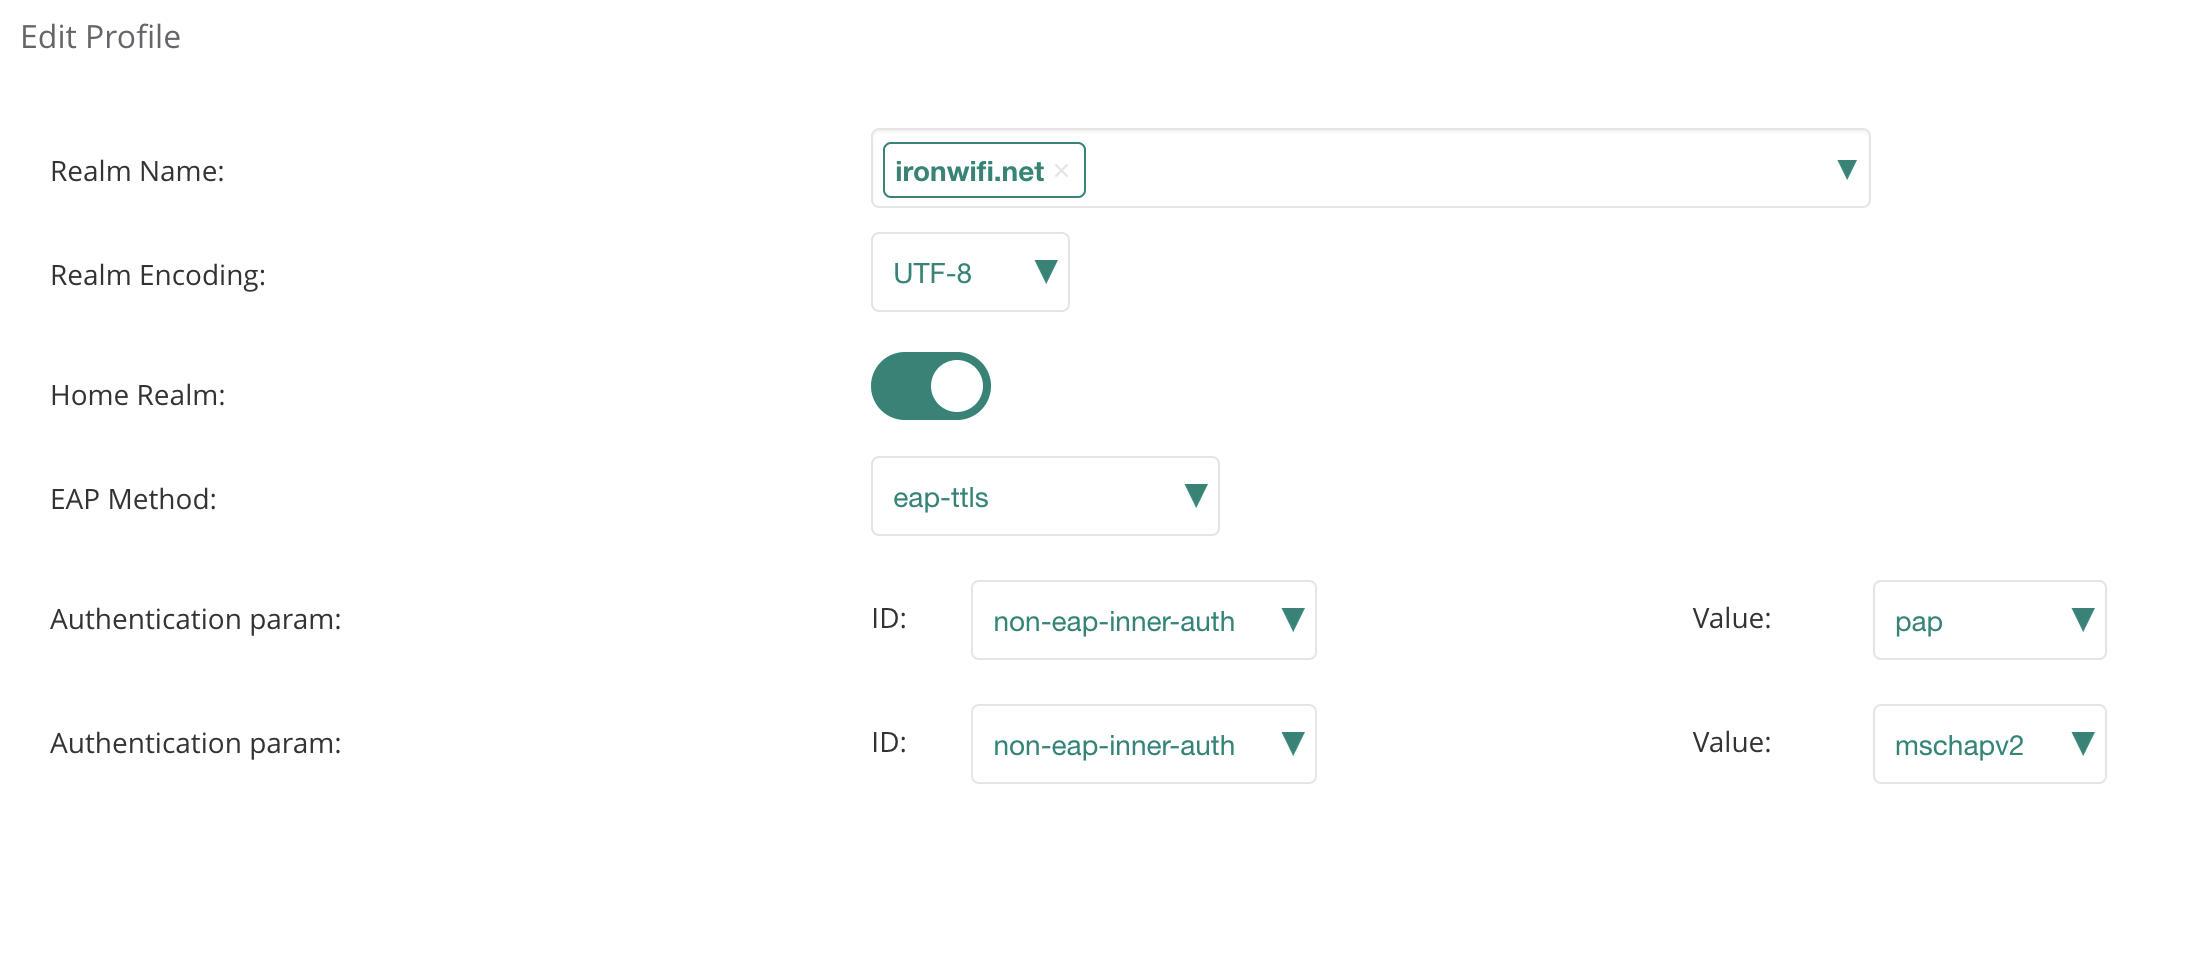
- In the Identity Provider section:
- Add as the Realm Name
ironwifi.net - Enable Home Realm
- Set EAP Method as eap-ttls
- Add pap and mschapv2 as non-EAP inner auth
- Add
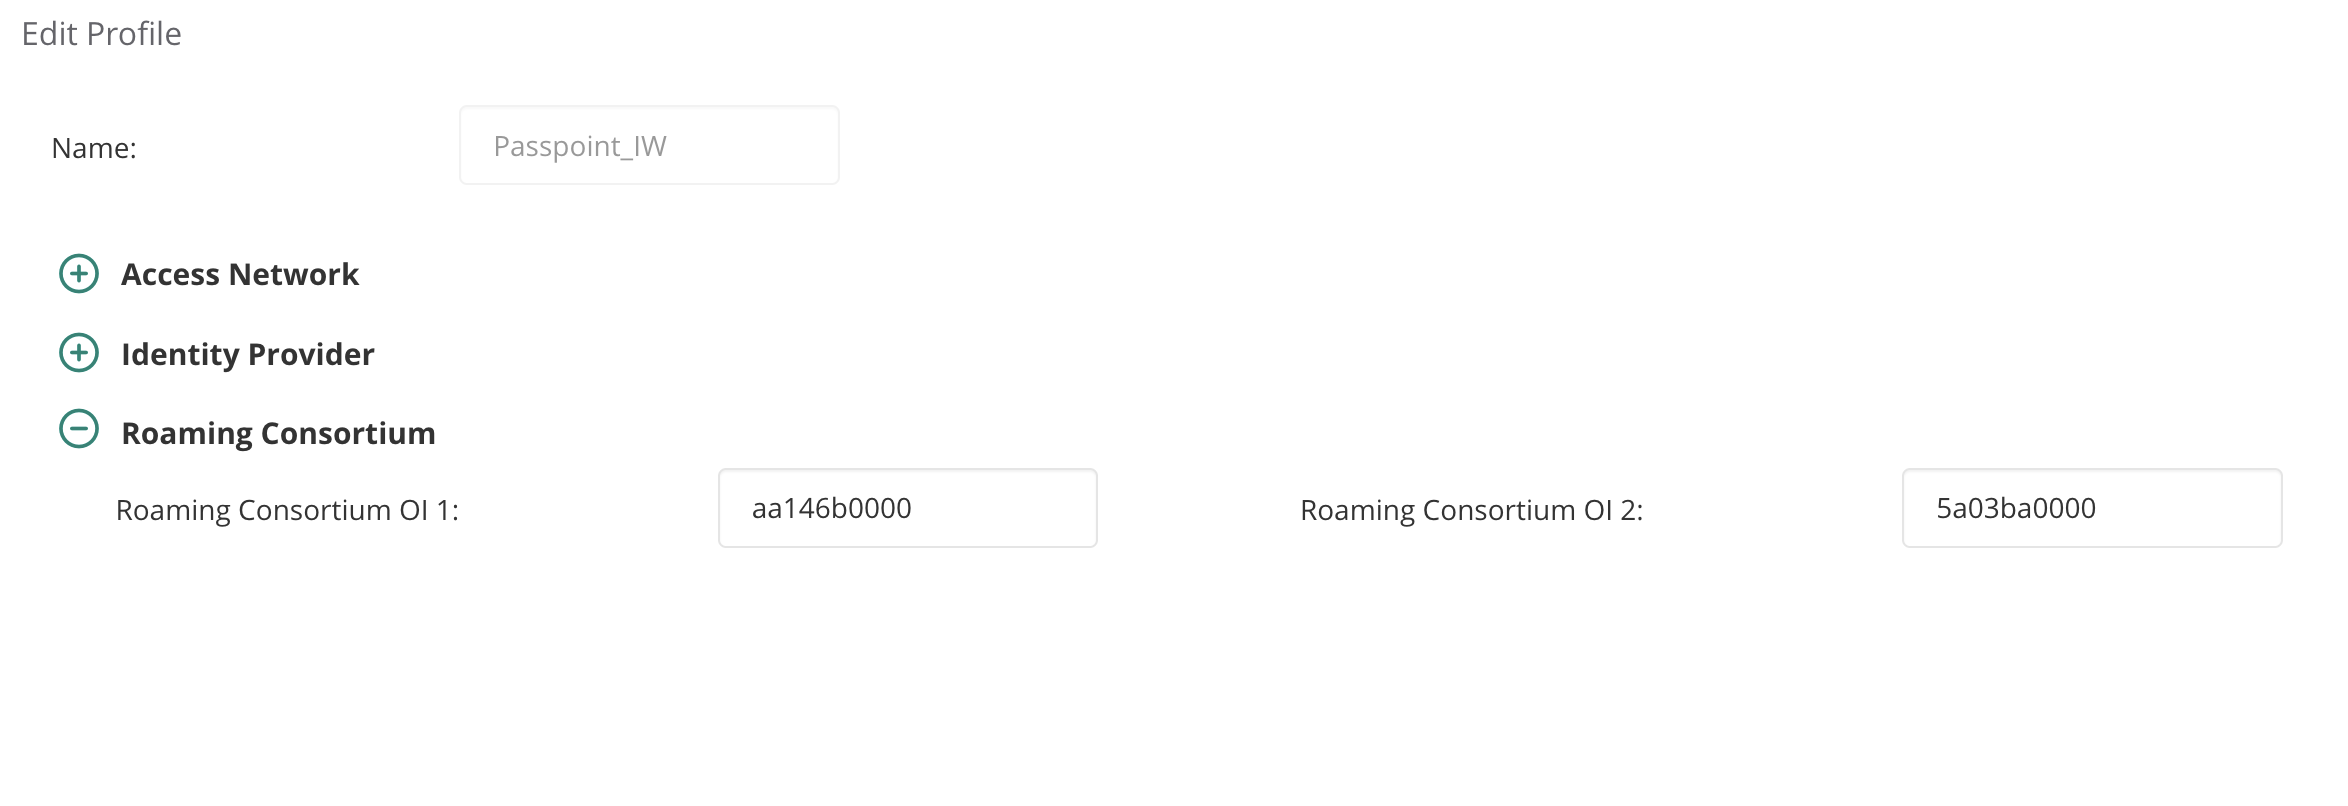
- In Roaming Consortium, add and
aa146b00005a03ba0000 - Click Save and close the Passpoint Profile pop-up
- Select the profile you just created
Step 7: Finalize and Deploy
- Click Next
- Make sure Unrestricted is selected
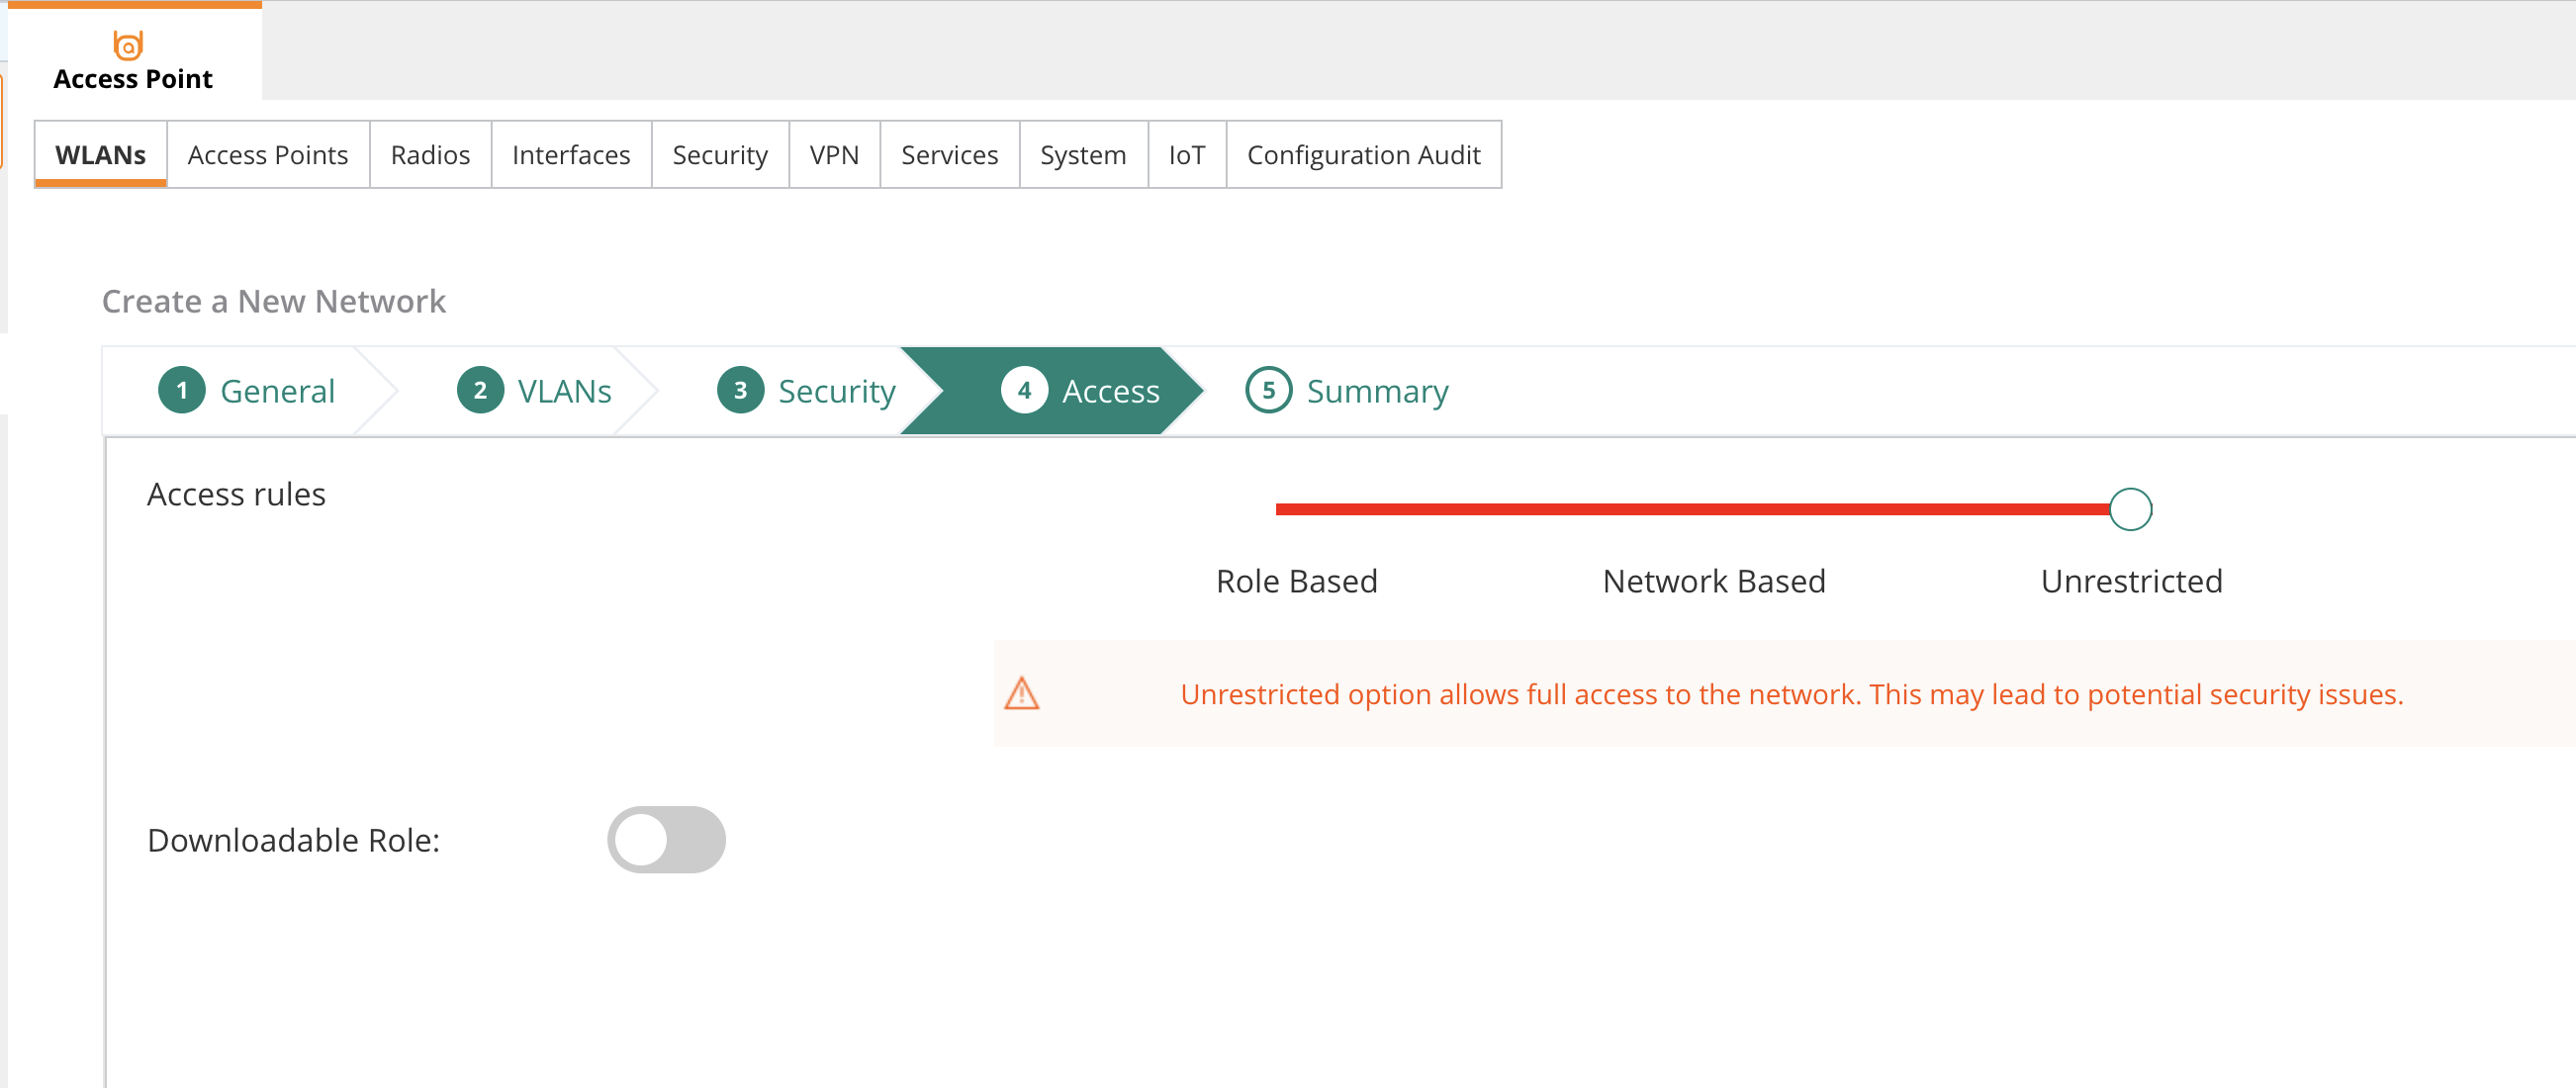
- Click Save
Group vs Site Configuration
Group-Level (Recommended)
Configure RadSec and Hotspot 2.0 at the group level for consistent deployment across all sites in the group.
Site-Level Override
For site-specific configurations:
- Navigate to specific Site
- Override group settings as needed
- Upload site-specific certificates if required
Verification
Check WLAN Status
- Go to Dashboard > Network Health
- Verify WLAN is active on APs
- Check for configuration errors
Monitor RadSec Connectivity
- Navigate to Monitor > Security
- Check RADIUS/RadSec connection status
- Look for successful TLS handshakes
Test Client Connection
- Connect Passpoint-enabled device
- Verify automatic Passpoint connection
- Check authentication in:
- Aruba Central Client Monitor
- IronWiFi Console Authentication Logs
Troubleshooting
Certificate Issues
-
Certificate Upload Failed
- Verify certificate format (PEM)
- Check certificate chain completeness
- Ensure private key matches certificate
-
TLS Handshake Failure
- Verify CA certificates are correctly installed
- Check certificate expiration dates
- Ensure server name matches certificate CN/SAN
RadSec Connection Problems
-
Connection Timeout
- Verify port 2083 is open outbound
- Check firewall rules
- Test connectivity to radsec.ironwifi.com
-
Authentication Rejected
- Verify client certificate is valid
- Check NAI realm configuration
- Review IronWiFi console logs
Hotspot 2.0 Issues
-
Network Not Discovered
- Verify Hotspot 2.0 is enabled on WLAN
- Check roaming consortium OIs
- Ensure client device supports Passpoint
-
ANQP Query Failures
- Review AP logs for GAS/ANQP errors
- Verify domain and realm configuration
- Check client Passpoint settings
Debug in Aruba Central
- Go to Troubleshooting > Logs
- Filter by AP or client
- Look for RADIUS/RadSec events
- Check authentication success/failure reasons
Common Errors
| Error | Cause | Solution |
|---|---|---|
| TLS handshake failed | Certificate issue | Re-upload certificates |
| Connection refused | Port blocked | Open port 2083 |
| Certificate expired | Outdated cert | Download new bundle |
| Unknown CA | Trust not configured | Install CA chain |
| Auth rejected | Wrong realm | Check NAI realm config |
Best Practices
- Group Configuration: Use group-level settings for consistency
- Certificate Management: Track expiration dates, plan renewal
- Monitoring: Set up alerts for RadSec failures
- Testing: Verify with multiple device types
- Documentation: Record all configuration settings
- Backup: Export configuration before changes
Related Topics
Same vendor
- Aruba IAP RADIUS configuration
- Aruba Mobility Controller RADIUS configuration
- Aruba Passpoint (Hotspot 2.0)
Standards & reference
Was this page helpful?