Ubiquiti Unifi - Passpoint Configuration

This guide is for Network version 8.4.x and above ONLY. Ubiquiti has recently reintroduced Passpoint feature into their codebase.
Prerequisites
- Access to the Ubiquiti Dashboard as a user with administrative privileges.
- Information about the assigned RADIUS servers - Server IP address, port numbers, shared secrets - available from IronWiFi Management Console - Sign in or Open Account
About this guide
This guide describes how to set up and test your Ubiquiti UniFi environment so you can use it with IronWiFi Passpoint:
- Log in to the Ubiquiti UniFi dashboard as a user with administrative privileges.
- Configure a secure RADIUS connection.
- Configure the wireless LAN.
Log in to the Ubiquiti UniFi Dashboard
To start the configuration process, log in to the Ubiquiti UniFi Dashboard as admin (https://unifi.ui.com/dashboard). For existing environments with additional users, log in as a user with administrative privileges.
There are a number of options you can set. Only the options that require your input are shown. Default values are used for options that don’t need adjustment.
Configure the RADIUS Profile
Navigate to Settings -> Profiles -> Radius, click Create New
Fill in the fields, clicking Add after adding each server, tick Wireless Networks, Accounting and set Interim Update Interval
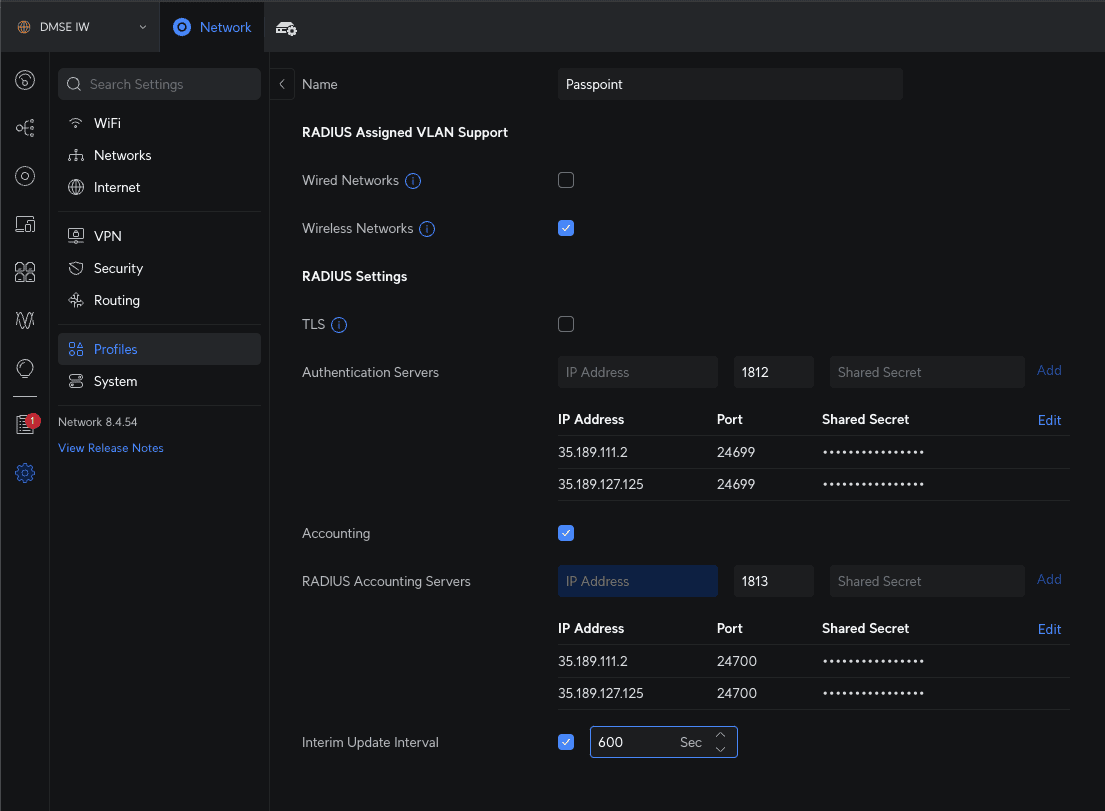
Click Apply Changes when done.
Configure Wireless Network
Click on WiFi, click Create New
Fill in name, click Manual next to Advanced, switch HotSpot2.0 to Passpoint option.
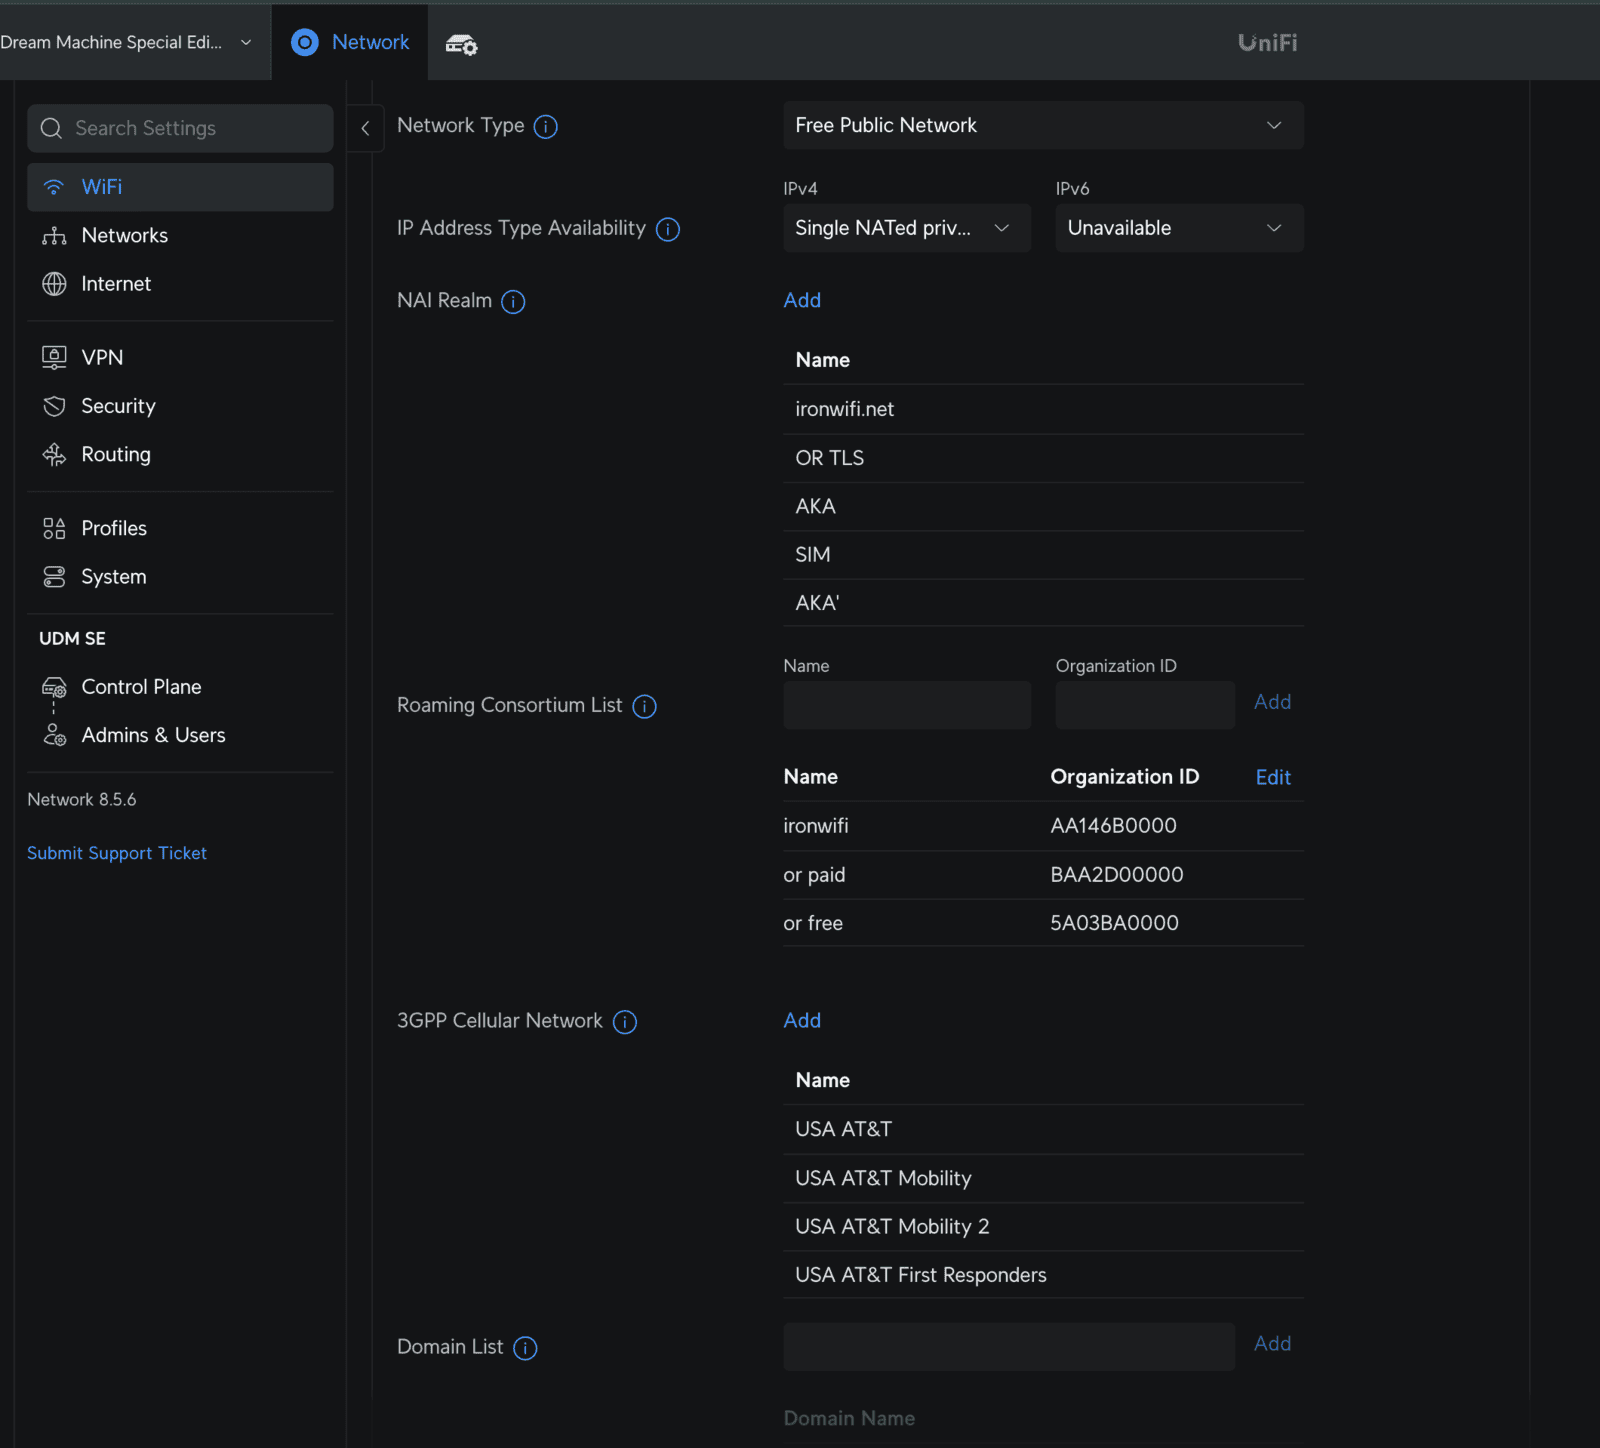
Add Venue Information accordingly.
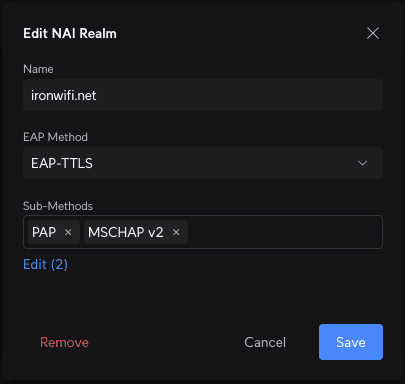
Add ironwifi.net as NAI Realm, select EAP-TTLS and add PAP and MSCHAP v2, click Save.
In the Roaming Consortium List add ironwifi.net as Name and following Organization IDs -
- AA146B0000 - ironwifi.net
Add ironwifi.net as Domain Name and add Operator Friendly Name [this setting is overwritten with the input from the generated profile]
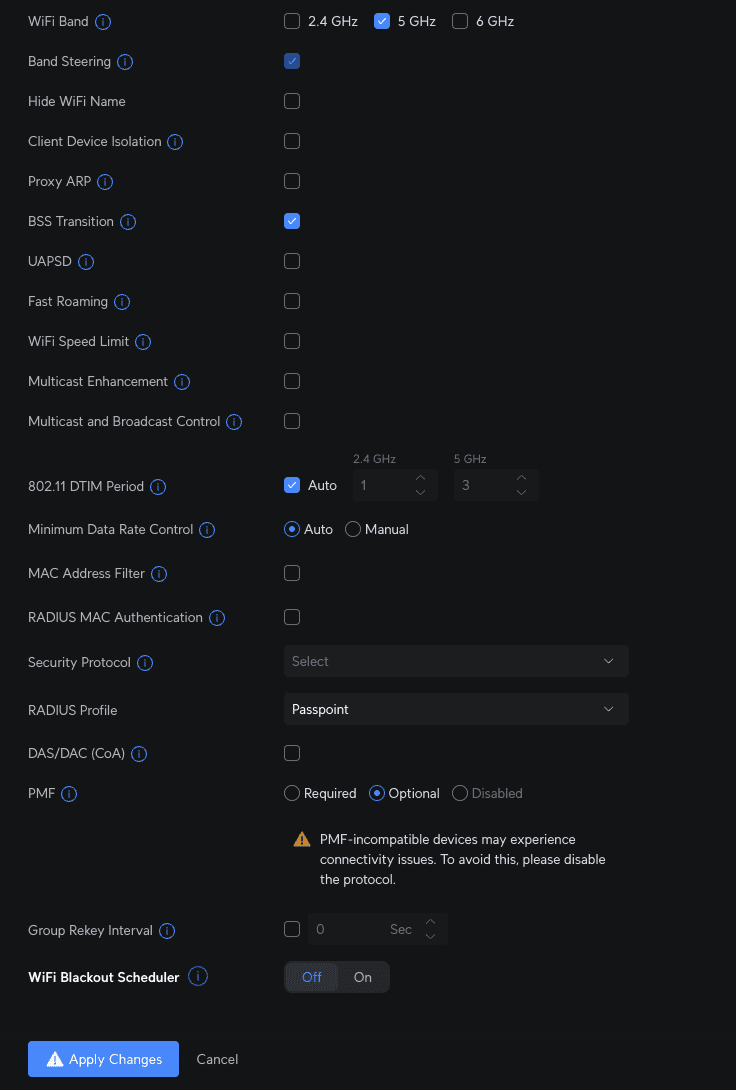
Select the remaining option according to your requirements, select correct RADIUS Profile and click Apply Changes
Related Articles
Ubiquiti Unifi - OpenRoaming Configuration
This guide is for Network version 8.4.x and above ONLY. Ubiquiti has recently reintroduced Passpoint feature into their codebase. Further information about Unifi and Passpoint can be found on the Unifi website: Unifi Passpoint Prerequisites Access to ...FortiGate wireless LAN controller - Passpoint Configuration
Prerequisites Access to the FortiGate CLI as a user with administrative privileges. Information about the assigned RADIUS servers (Server IP address, port numbers, shared secrets): Access to the IronWiFi Management Console - Sign in or Open Account ...TP-Link OMADA Passpoint
This guide requires Passpoint enabled firmware on both the controller and Access Point. The lastest stable firmware for the controller is 1.30.7 Build 20250704 Rel.78617 (Stable), and you need to have the lastes dev / testing firmware installed on ...Ubiquiti Unifi Hotspot [Network v8 and v9]
IronWiFi Console Configuration Log into the IronWiFi console or register for free Create a new network (skip if you already have one) After that, create a new captive portal, with vendor Ubiquiti UniFi (Legacy) IronWiFi servers need direct access to ...OpenWrt - Passpoint configuration
Prerequisites OpenWrt compatible device with Passpoint-capable wireless device (PHY). OpenWrt 21.02, or newer, including wpad (hostapd) built with hs20 option. Full version of iw package in OpenWrt. 802.1x infrastructure (RADIUS server). Information ...