TP Link Omada (version 4)
This page explains the configuration of TP Link access points with Omada version 4 controller for external Captive Portal and RADIUS authentication.
IronWiFi Console Configuration
- Log into the IronWiFi console or register for free
- Create a new network
- After that, create a new captive portal, with vendor TP Link Omada v4
Access Point Configuration
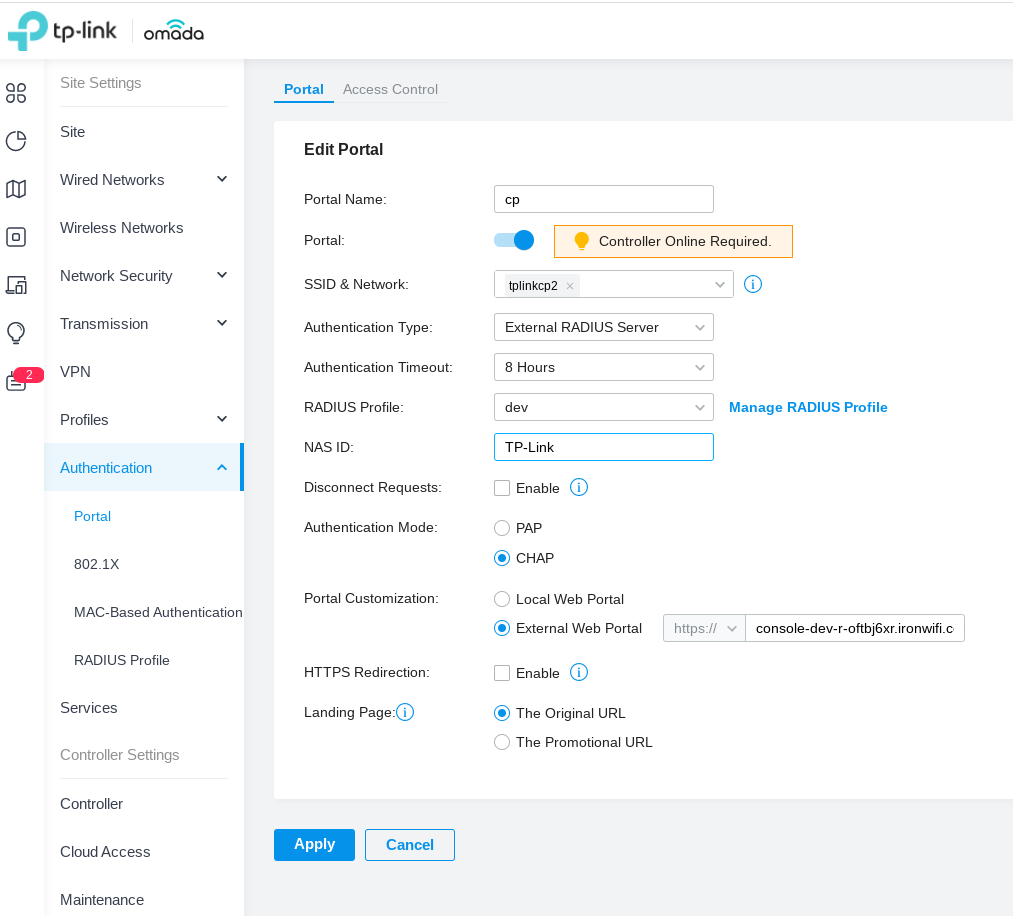
- Configure the Captive Portal under Authentication -> Portal. Use the following values:
- Authentication Type - External RADIUS Server
- Authentication Timeout - 8 hours
- NAS ID - TP-Link
- Authentication Mode - CHAP
- Portal Customization - External Web Portal - get this value from the IronWiFi console
- Landing Page - The Original URL
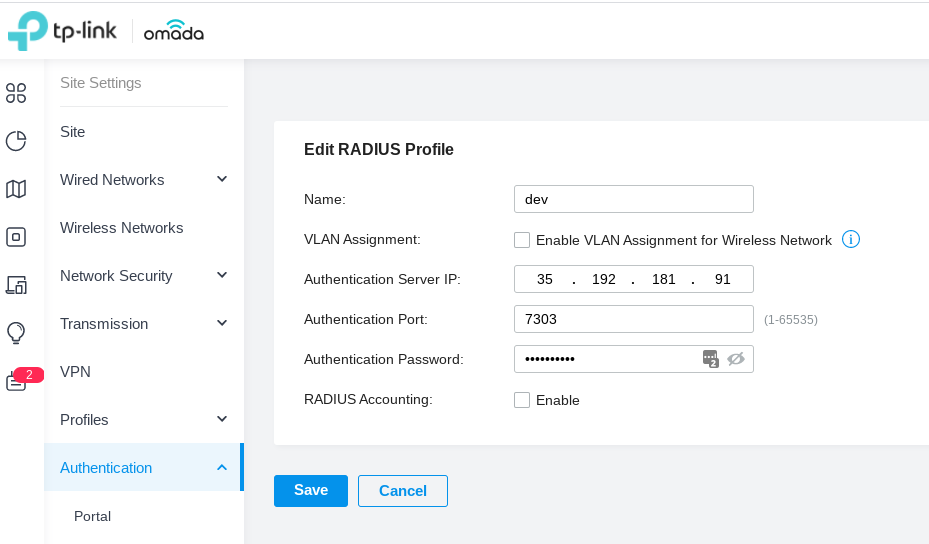
- Define a RADIUS profile by clicking on manage RADIUS Profile. Configure with:
- Name - ironwifi_radius (or whatever you wish)
- VLAN Assignment - Disabled
- Authentication Server IP - get this value from the IronWiFi console
- Authentication Port - get this value from the IronWiFi console
- Authentication Password - get this value from the IronWiFi console
- Radius Accounting - Enabled
- Accounting Port - get this value from the IronWiFi console
-
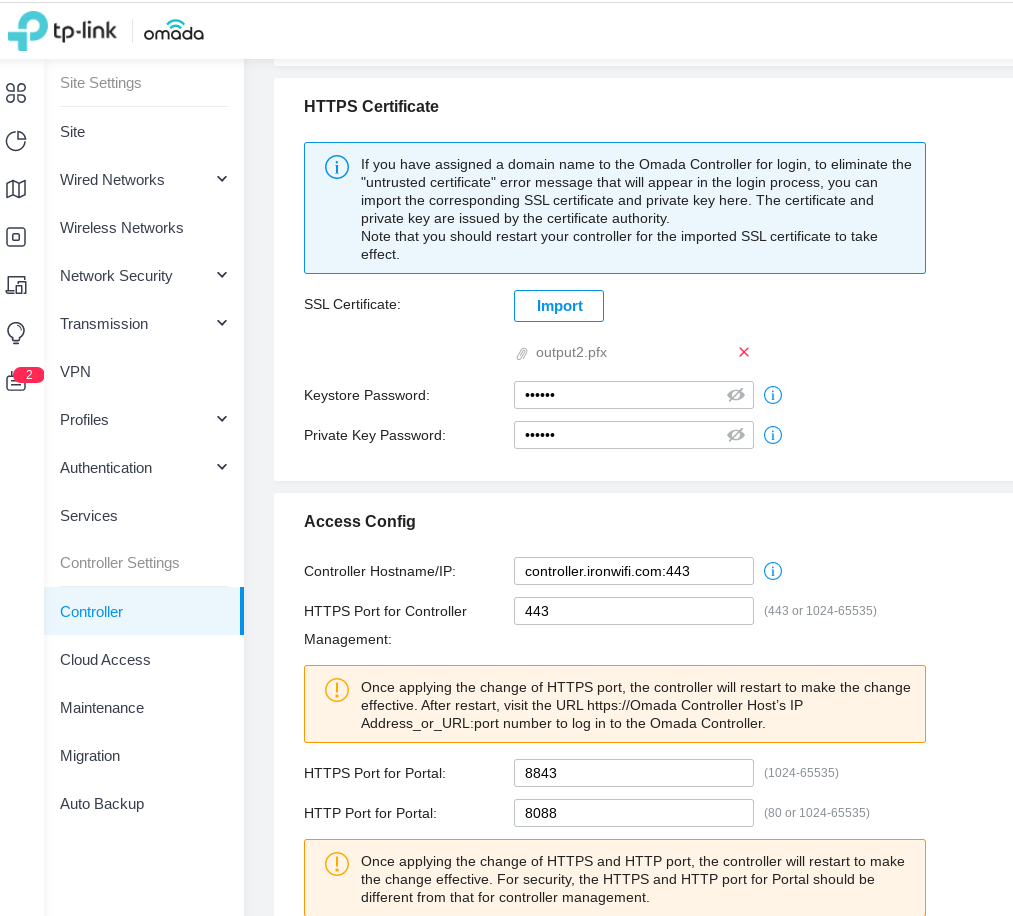
Import your SSL certificate under Controller
-
Add an A type DNS record to point the hostname to your omada controller.
! You must also install a valid SSL certificate on your controller/AP, in order to avoid authentication issues !


Related Articles
TP-Link OMADA Passpoint
This guide requires Passpoint enabled firmware on both the controller and Access Point. The lastest stable firmware for the controller is 1.30.7 Build 20250704 Rel.78617 (Stable), and you need to have the lastes dev / testing firmware installed on ...TP-Link OMADA OpenRoaming
This guide requires Passpoint enabled firmware on both the controller and Access Point. The lastest stable firmware for the controller is 1.30.7 Build 20250704 Rel.78617 (Stable), and you need to have the lastes dev / testing firmware installed on ...TP-Link EAP
This page explains the configuration of TP-Link wireless access points in standalone mode or managed by the EAP controller. We will configure the device to use an external Captive Portal and RADIUS server authentication. IronWiFi Console ...D-Link Nuclias Cloud
IronWifi Console Configuration Log into the IronWifi console or register for free Create a new network After that, create a new captive portal, with vendor D-Link Nuclias Cloud Access Point Configuration Log in to your Nuclias Cloud portal. Step 1 - ...CoovaChilli
This page explains the configuration of CoovaChilli installed on an OpenWRT compatible device (TP-Link) to work with IronWiFi Captive Portal. These steps are only an example. IronWiFi is not providing support for configuring CoovaChilli devices. If ...