Testing Azure Connector
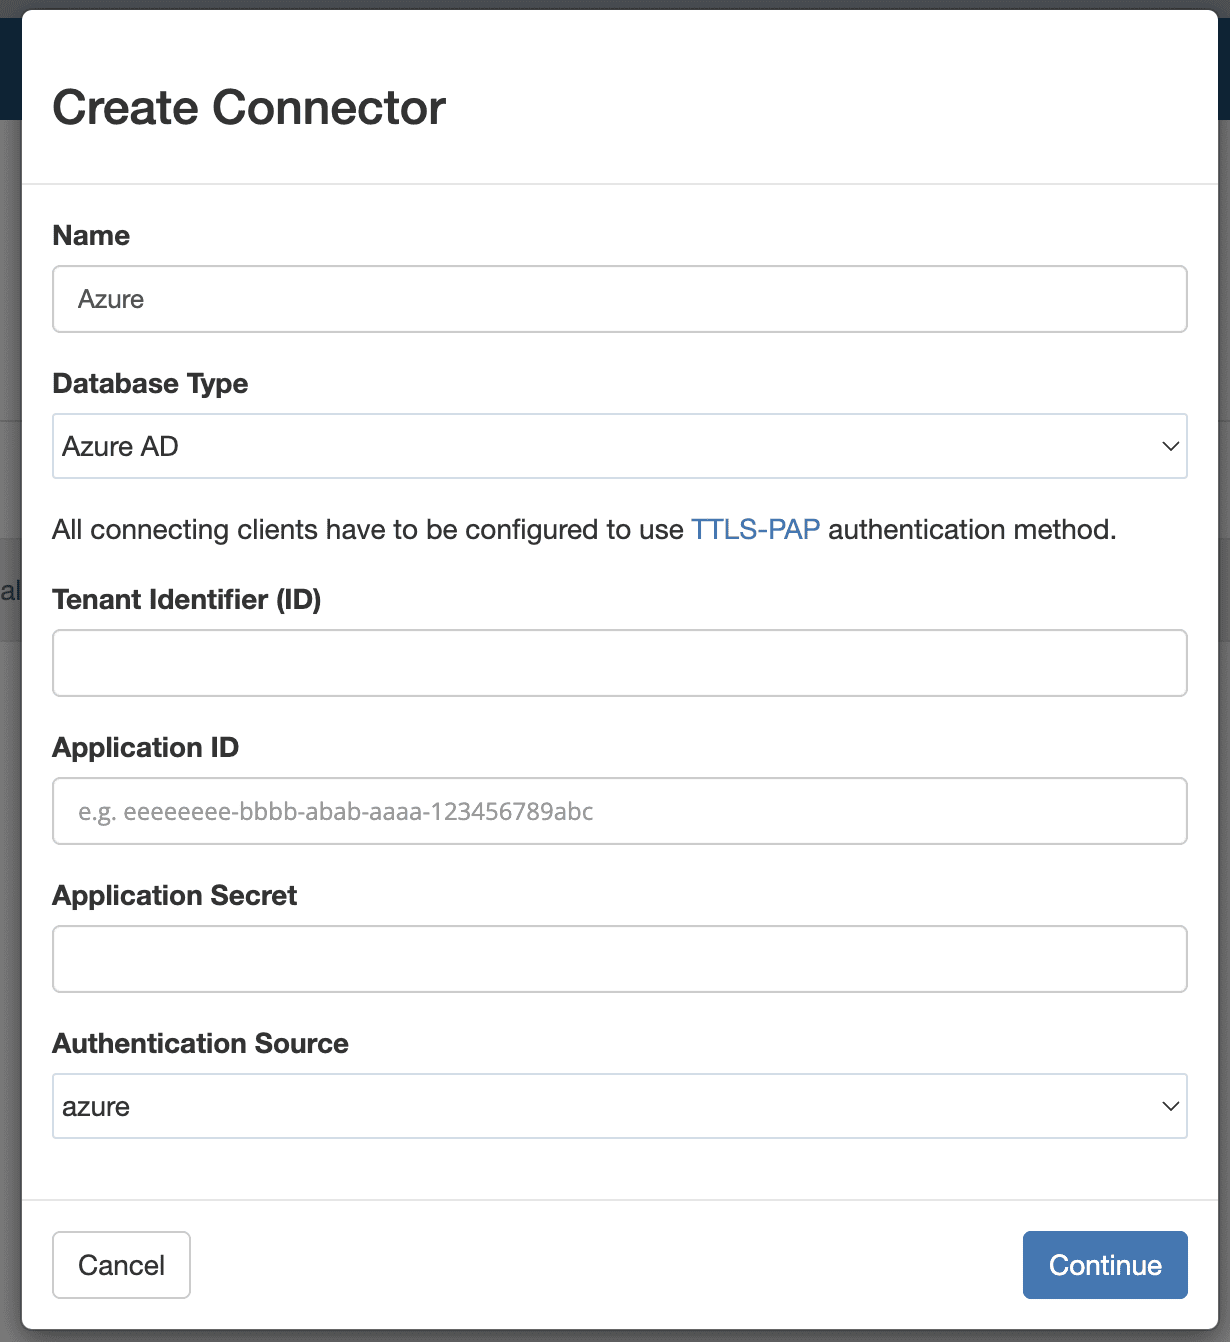
- Go to Users -> Connectors -> New Connector
- Select Azure AD as Database Type

- Select Azure AD as Database Type
-
- Enter values for Tenant Identifier (ID), Application ID and Application Secret that are provided from Azure.
- Select Authentication Source as "azure".
- Click Continue
- It should redirect you to Azure website to login.
- Once login in successful, it will redirect back, click continue again.
- The connector should now be created and status will be set to "pending import".
- Connector status should move to "processing" and "active", or "failed" if there was an error.
- Once connector is set to "active", do the following steps:
-
- Go to Users, newly created users should be visible.
- Click on a user
- Verify that attributes and groups are correctly assigned.
- Go to Groups, newly created groups should be visible.
- Number of users in each group should match the ones present in Azure AD.
- Go to Users, newly created users should be visible.
Deleting Azure Connector
- Go to Users -> Connectors
- Select a connector in Options click delete
- Type delete to confirm
- Select “delete users, groups” option
- Connector status should be “deleted” after some time
- Go to Users. Imported users should be deleted.
- Go to Groups. Imported groups should be deleted.
- Repeat Step 1 and create a new Connector.
- Repeat Deleting process.
- Do not select “delete users, groups” option
- Connector status should be “deleted” after some time
- Go to Users. Imported users should still be visible.
- Go to Groups. Imported groups should still be visible.
Related Articles
Testing Azure Connector
Go to Users -> Connectors -> New Connector Select Azure AD as Database Type Enter values for Tenant Identifier (ID), Application ID and Application Secret that are provided from Azure. Select Authentication Source as "azure". Click Continue It should ...Azure AD Connector
To manage your wireless users using Azure Active Directory account, you can enable remote synchronization with your Azure account for users in specific groups. Log in to the Azure Portal From the main menu, navigate to Azure Active Directory > ...Testing CSV Connector
Go to Users -> Connectors -> New Connector Select CSV as connector type Download the sample file and upload the same file. The connector should show “active” after some time. Go to Users, newly created users should be visible. Click on a user Verify ...Testing CSV Connector
Go to Users -> Connectors -> New Connector Select CSV as connector type Download the sample file and upload the same file. The connector should show “active” after some time. Go to Users, newly created users should be visible. Click on a user Verify ...Testing Google Connector
Go to Users -> Connectors -> New Connector Select Google Apps as Database Type Enter the domain name for your organization. Select Authentication Source as "google". If you have any Attributes Template set up, choose the one's you would like to apply ...