MikroTik ROS v7 OpenRoaming with RadSec

Select Enabled from the drop-down menu for both RadSec and OpenRoaming

The page will reload and you will see the link to the certificate bundle, consisting of the Root CA certificate, the RadSec Signing Intermediate CA certificate, your Client Certificate and the Client Key. Download the pack and unzip it.

Log in to your MikroTik device (AP or WiFi Router).
Copy all 3 certificates and 1 key from the downloaded bundle to the MikroTik file system:

Go to System > Certificates and Import 3 certificates, marking them as trusted and then import the key.

When correctly imported the CA certificates will have the LT flags and the RadSec Client Certificate will have the KLT flag denoting you have a private key for it:

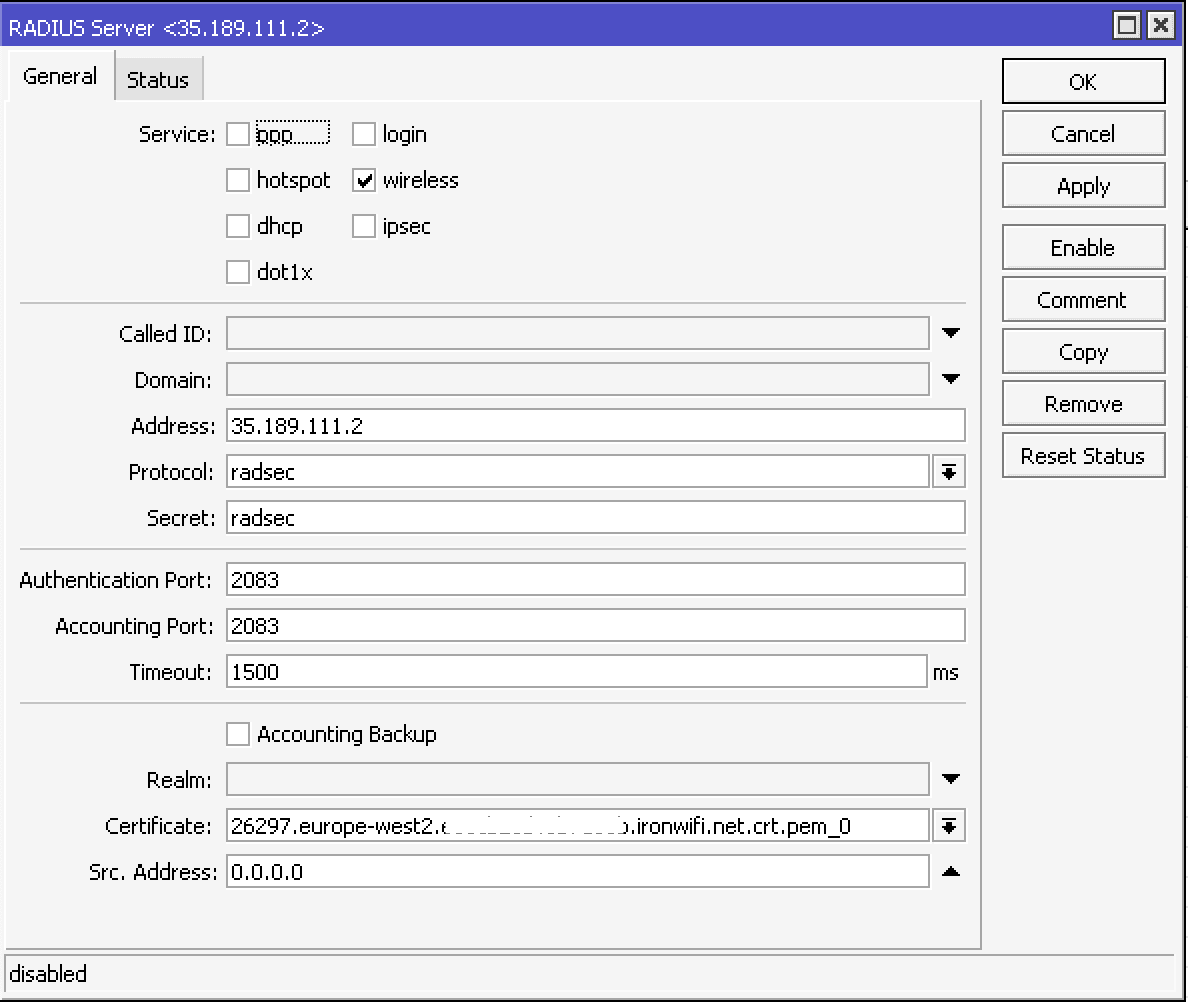
In the MikroTik configuration menu, navigate down to the Radius and click Add New to add RADIUS server. In the Service section, configure with:
- Service - wireless
- Address - get this value from the IronWiFi console
- Protocol - radsec
- Secret - radsec
- Authentication Port - 2083
- Accounting Port - 2083
- Timeout - 1500ms
- Certificate - select the client certificate with the key that you have imported
CLI equivalent:
/radius
add accounting-port=2083 address=XXX.XXX.XXX.XXX authentication-port=2083 certificate=xxx.xxx.xxx.ironwifi.net.crt.pem_0 protocol=radsec service=wireless timeout=1s500ms
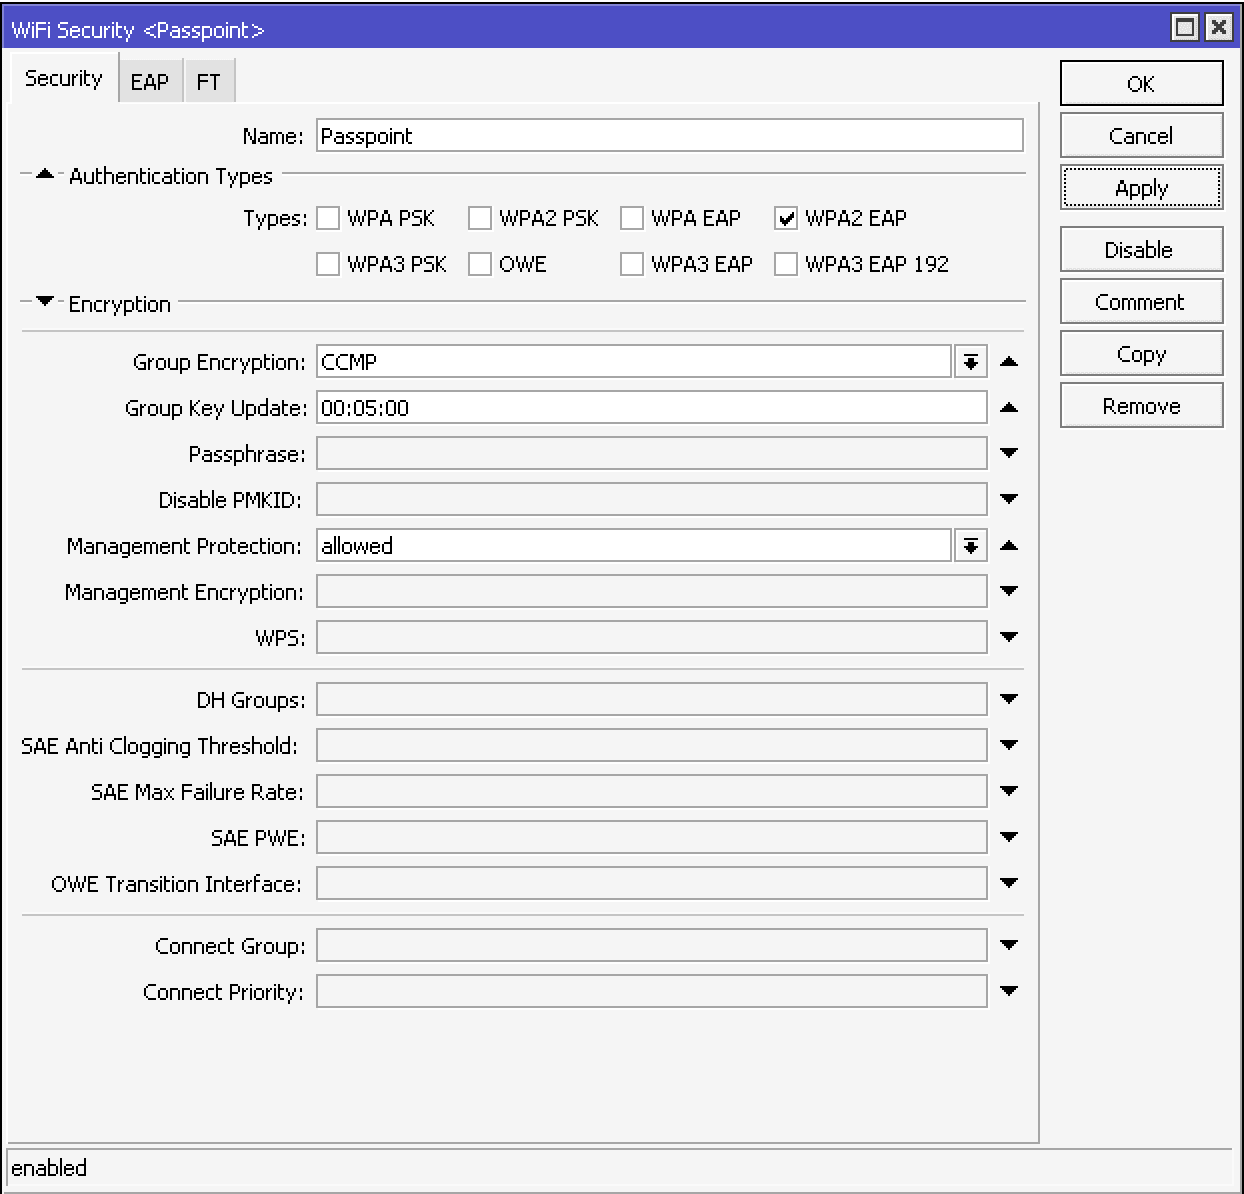
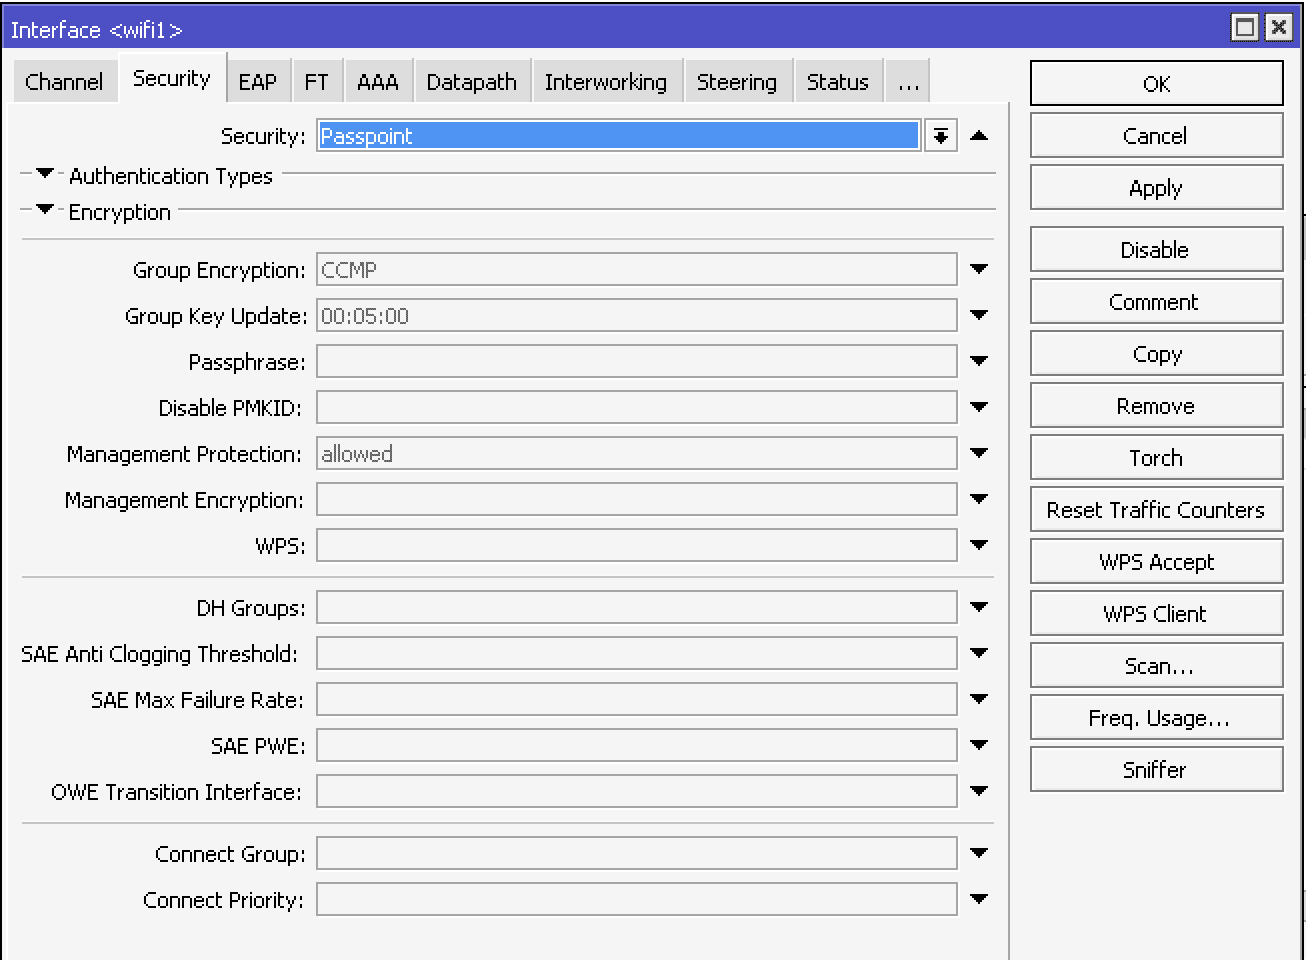
Go to WiFi -> Security tab and create the new entry by pressing +
In Security tab:
- Name - Passpoint
- Authentication Types - WPA2 EAP
- Group Encryption - CCMP
- Group Key Update - 00:05:00
- Management Protection - allowed
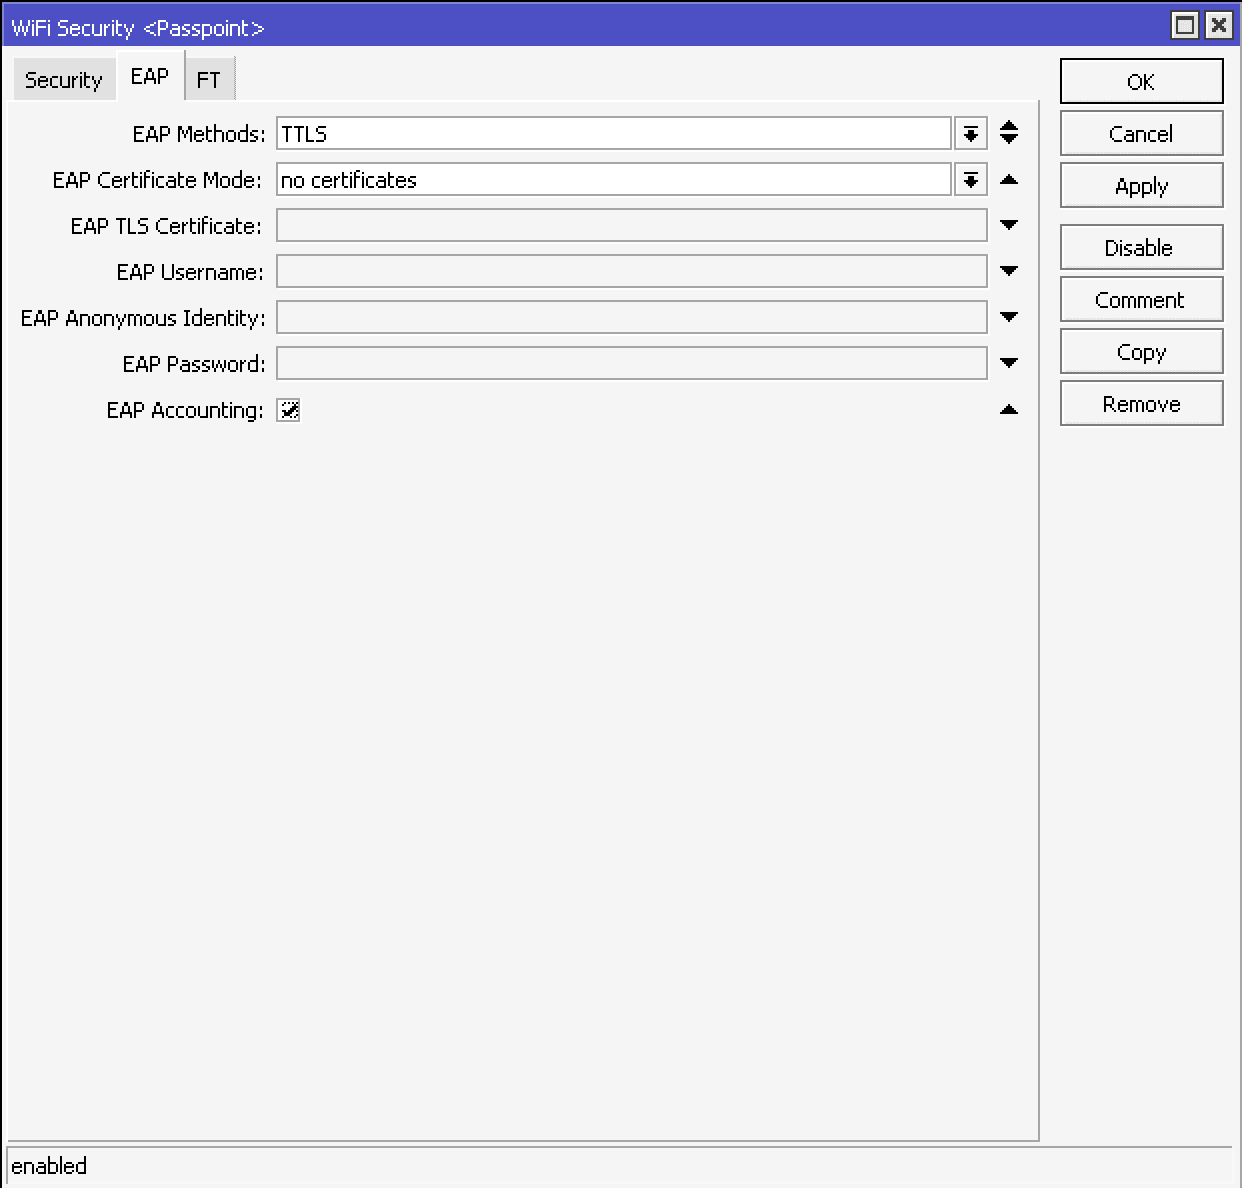
In EAP tab:
- EAP Methods - TTLS
- EAP Certificate Mode - no certificates
- EAP Accounting - select
CLI equivalent:
/interface wifi security
add authentication-types=wpa2-eap disabled=no eap-accounting=yes eap-certificate-mode=no-certificates eap-methods=ttls group-encryption=ccmp group-key-update=5m management-protection=allowed name=Passpoint
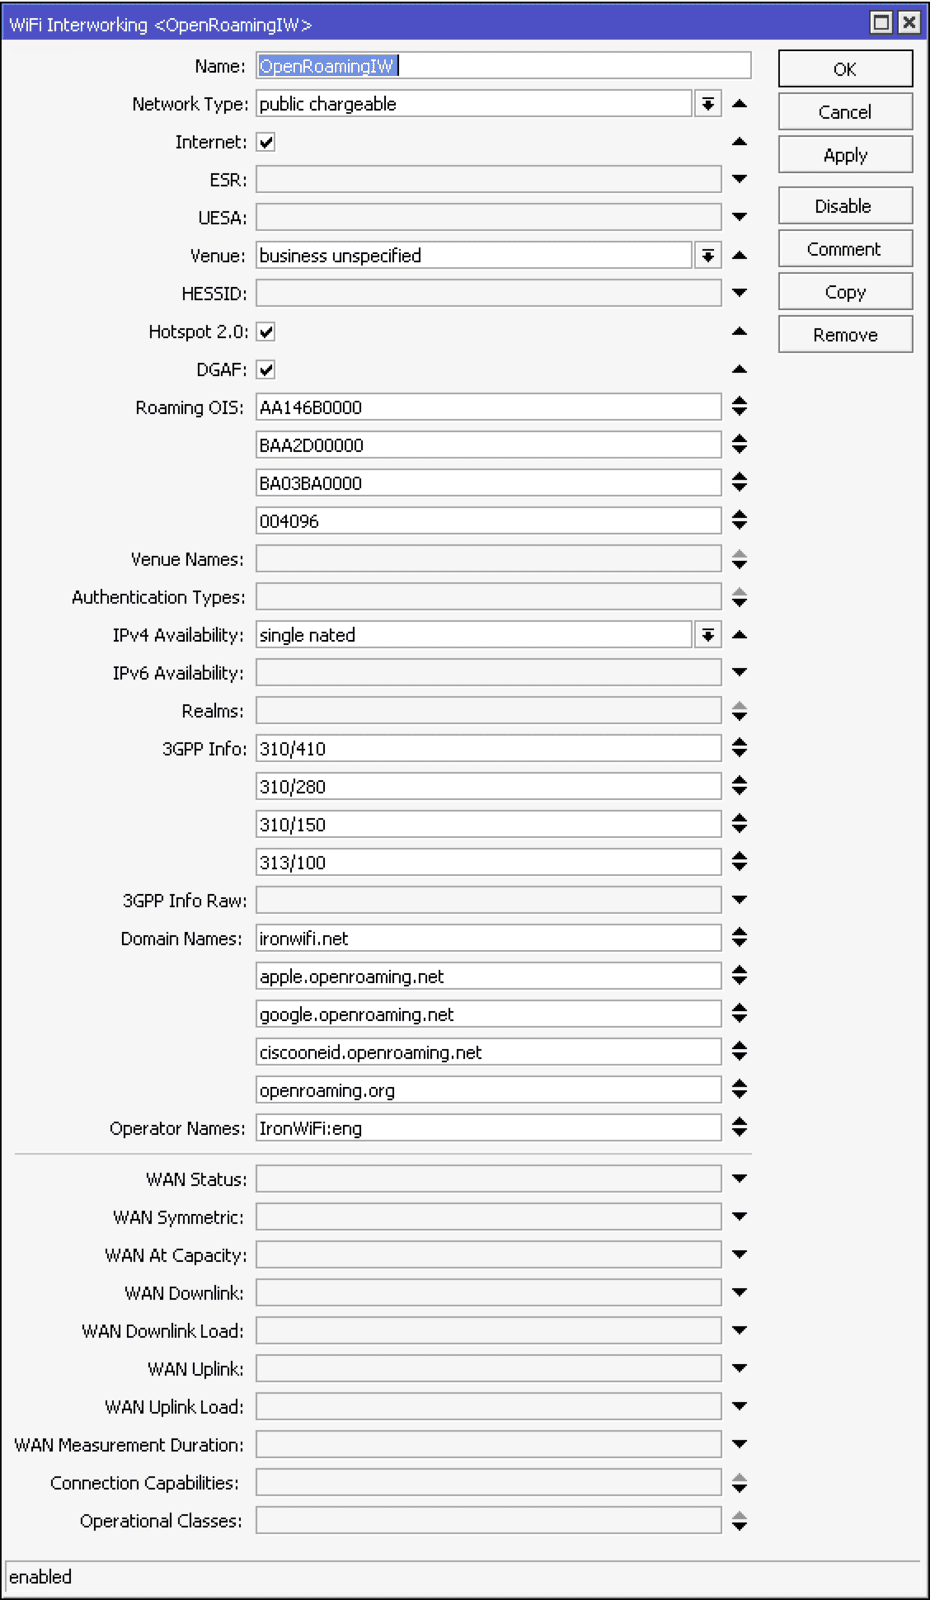
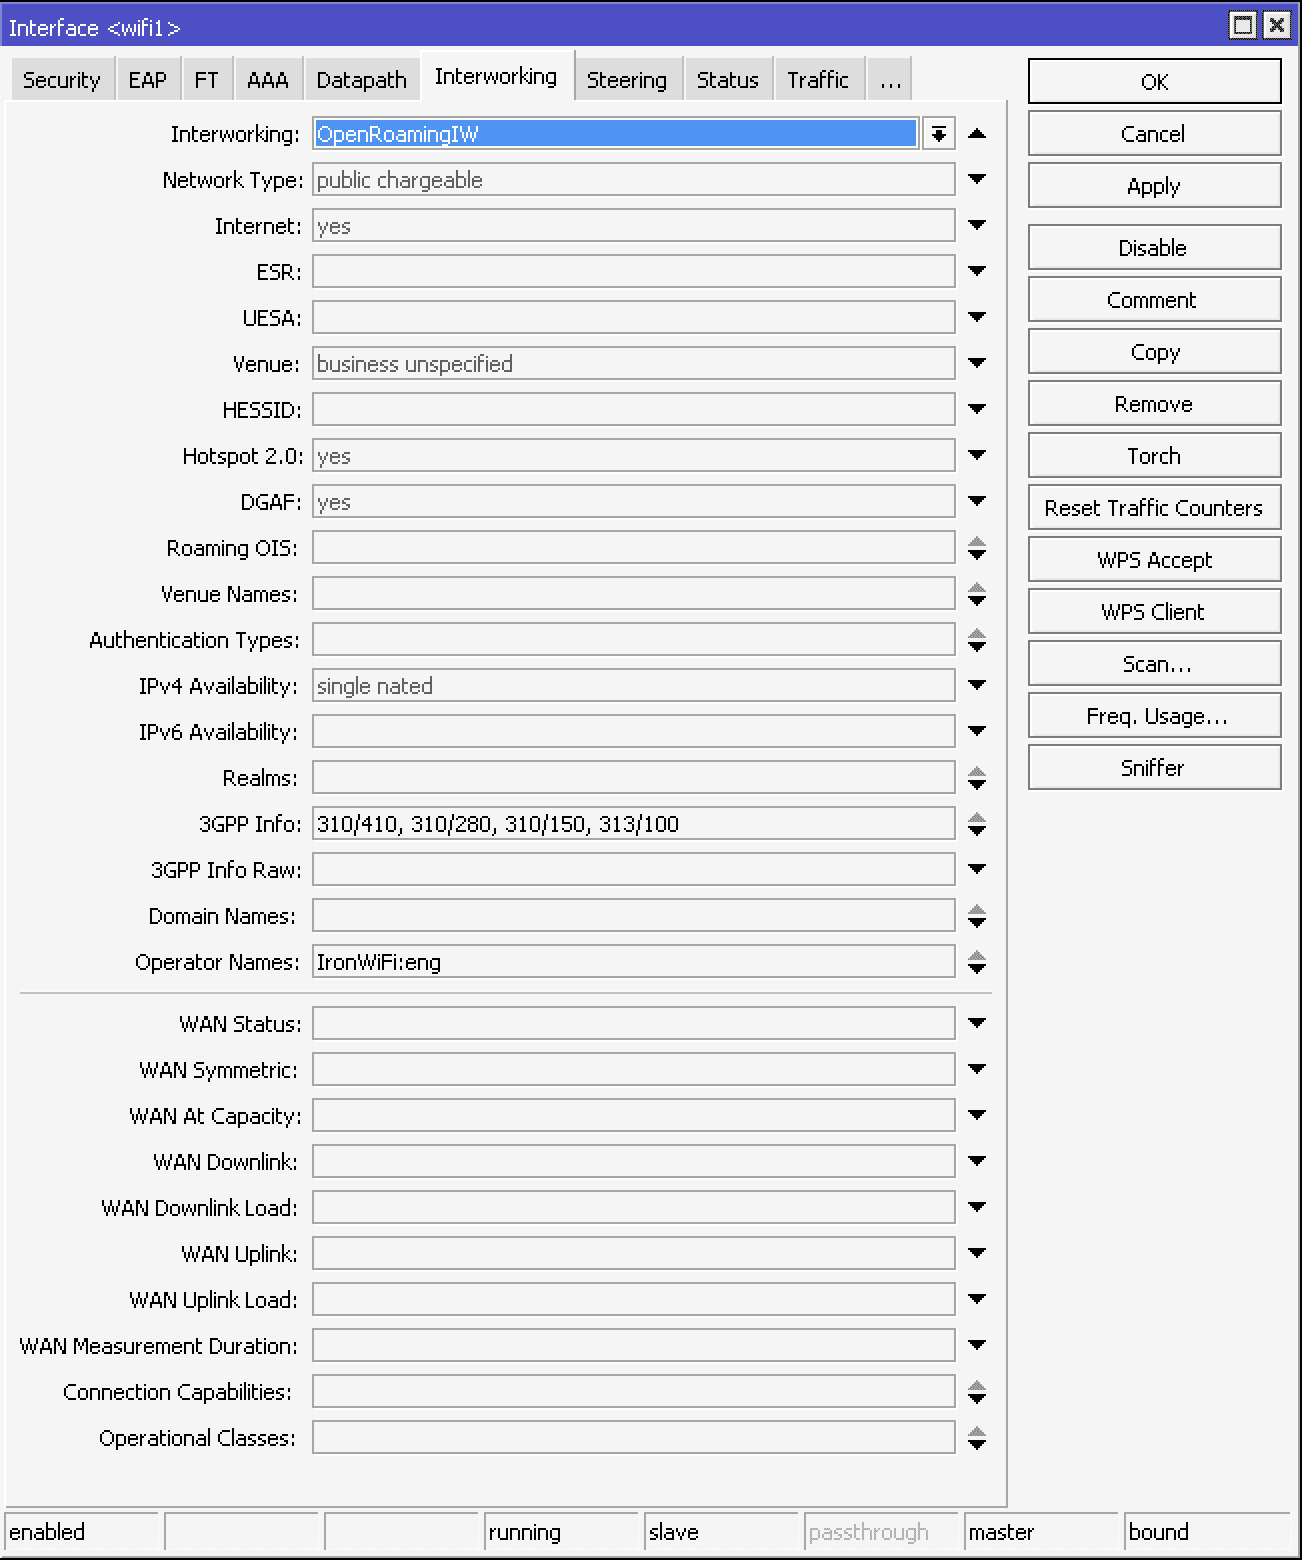
In Internetworking tab:
- Name - OpenRoaming IW
- Network Type - public chargeable
- Internet - selected
- Venue - business unspecified
- Hotspot 2.o - selected
- DGAF - selected (if your wireless network supports multicast)
- Roaming OIS - AA146B0000, BAA2D00000, BA03BA0000, 004096
- IPv4 Availibility - single nated (or specific to your network)
- 3GPP Info - 310/410, 310/280, 310/150, 313/100
- Domain Names - ironwifi.net, apple.openroaming.net, google.openroaming.net, ciscooneid.openroaming.net, openroaming.org
- Operator Names - IronWiFi:eng
CLI equivalent:
/interface wifi interworking
add 3gpp-info=310/410,310/280,310/150,313/100 disabled=no domain-names=ironwifi.net,apple.openroaming.net,google.openroaming.net,ciscooneid.openroaming.net,openroaming.org hotspot20=yes hotspot20-dgaf=yes internet=yes ipv4-availability=single-nated name=OpenRoamingIW \
network-type=public-chargeable operator-names=IronWiFi:eng roaming-ois=AA146B0000,BAA2D00000,BA03BA0000,004096 venue=business-unspecified
In WiFi open your wireless interface and in the Security tab select the security profile you have created above, then in the Internetworking tab, select the internetworking profile you have created abov
CLI equivalent:
/interface/wifi set wifi1 security=Passpoint interworking=OpenRoamingIW
Note: NAS-id that's used by IronWiFi to differentiate networks is equal to system identity, to adjust the nas-id, you can do:
/system identity set name=Required-NAS-id
Troubleshooting:
Via the command line run:
/radius monitor X
X being the numerical ID, you can see the IDs with
/radius print
For more information, additional logging can be configured under:
/system logging add topics=radius,debug,packet
You can view results under:
/log
To view active wireless connections check the wireless registration table:
/interface wireless registration-table print
Related Articles
Aruba Central OpenRoaming configuration with RadSec
Prerequisites Access to the Aruba Central dashboard as a user with administrative privileges. Access to the IronWiFi Management Console - Sign in or Open Account RadSec enabled on your Network as detailed here (you will need to download the ...Juniper Mist OpenRoaming with RadSec
Prerequisites Access to the Mist Dashboard as a user with administrative privileges. Access to the IronWiFi Management Console - Sign in or Open Account RadSec enabled on your Network as detailed here (you will need to download the certificate ...MikroTik
This page explains the Captive Portal configuration for MikroTik Router OS and authentication with IronWiFi. IronWiFi Console Configuration Log into the IronWiFi console or register for free Create a new network After that, create a new captive ...Using RadSec Secure Radius on Fortigate
Enable RadSec support in IronWiFi Console and obtain your RadSec Certificate Bundle Go to this link to enable RadSec on your account and download your secure certificate bundle. Configure Fortigate / FortiAP to use IronWiFi Secure RadSec Servers This ...MikroTik - Passpoint Configuration
Prerequisites Mikrotik device that supports 802.11u. Make sure to use the latest long-term or stable RouterOS releases. Information about the assigned RADIUS servers (Server IP address, port numbers, shared secrets): Email or document that contains ...