MikroTik
This page explains the Captive Portal configuration for MikroTik Router OS and authentication with IronWiFi.
IronWiFi Console Configuration
- Log into the IronWiFi console or register for free
- Create a new network
- After that, create a new captive portal, with vendor Mikrotik
- Download the mikrotik_login.html file. Rename the downloaded file to login.html
Access Point Configuration
Sign-in to your MikroTik configuration interface, usually http://192.168.88.1
- Navigate to Hotspot -> Users and add a temporary user called user1 and set a password for this new user
- Navigate to Hotspot -> Servers and click the Hotspot Setup button. Configure with:
- Hotspot Interface - bridge
- The local address of network - 192.168.89.0/24
- Masquerade Network - On
- Address Pool of Network - 192.168.89.10 - 192.168.89.254
- Select Certificate - none
The access point will redirect you to the default Hotspot Authentication page. Sign in as "user1" and return to the Mikrotik configuration interface http://192.168.88.1

- After you have copied the mac address, return to the hotspot settings and click on the server named "hotspot1". Then just paste the mac address to the name field and click apply
- Navigate to Hotspot -> Server Profiles and click the newly created profile called hsprof1
- In the Login by section, configure with the following values:
- HTTP CHAP - un-check
- Cookie - un-check
- HTTP PAP - check
- Use RADIUS - check

- Navigate to IP -> Hotspot -> Walled Garden IP List and allow access to the IronWiFi global load-balancer - 107.178.250.42
- Enabled - check
- Action - accept
- Server - hotspot1
- Dst. Address - 107.178.250.42
- Protocol - (6) tcp
- Dst. Port - 443
- In the MikroTik configuration menu, navigate down to the Radius and click Add New to add RADIUS server. In the Service section, configure with:
- Service - hotspot
- Address - get this value from the IronWiFi console
- Secret - get this value from the IronWiFi console
- Authentication Port - get this value from the IronWiFi console
- Accounting Port - get this value from the IronWiFi console
- Timeout - 1000ms

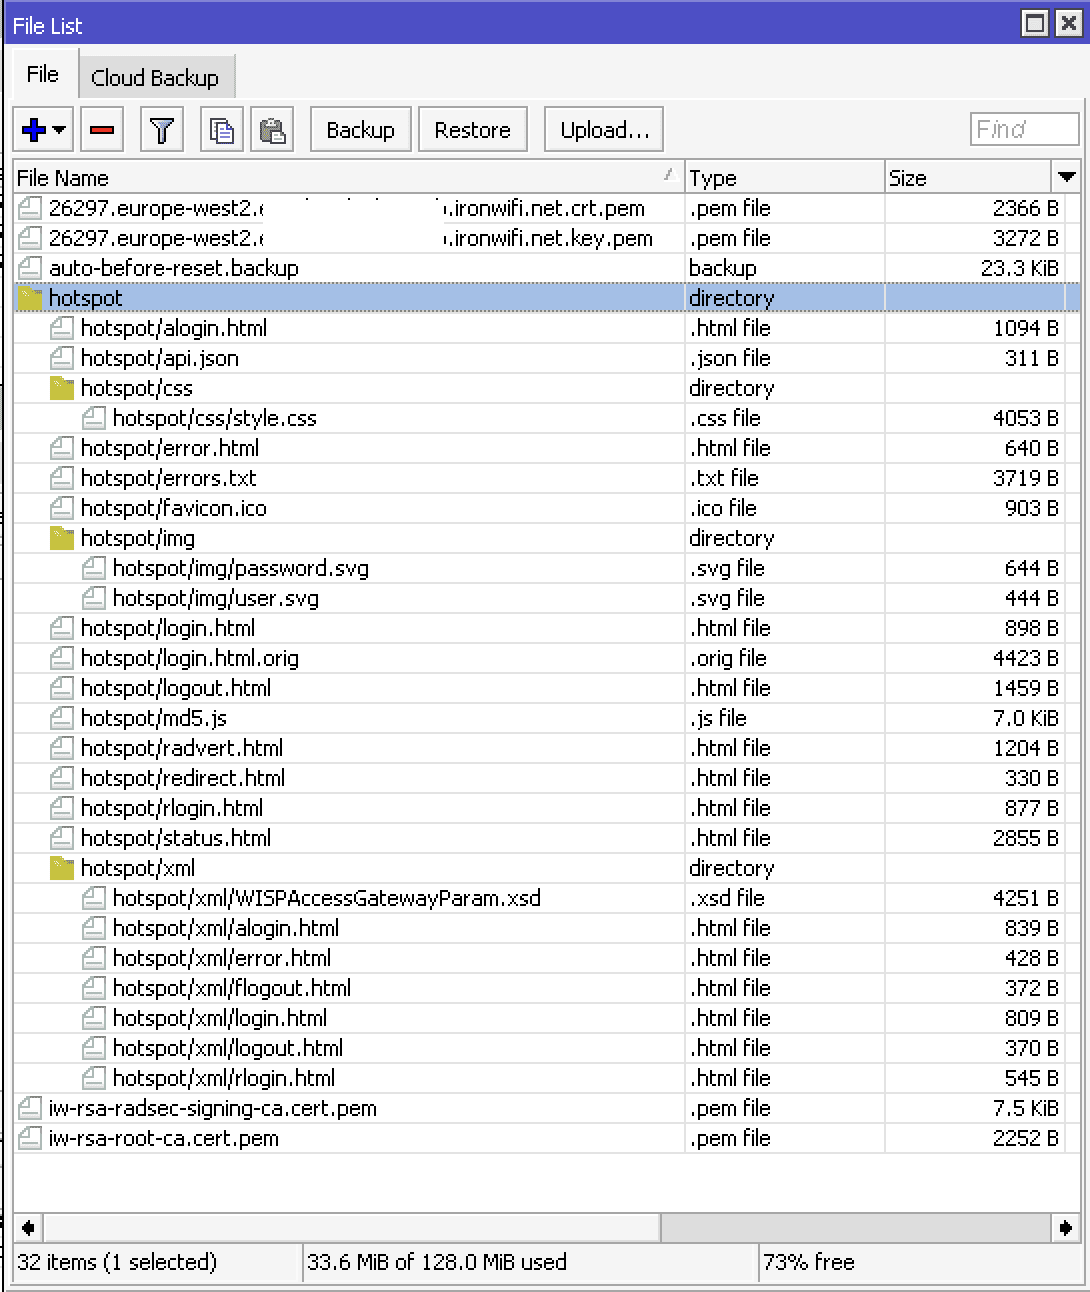
Copy all 3 certificates and 1 key from the downloaded bundle to the MikroTik file system:

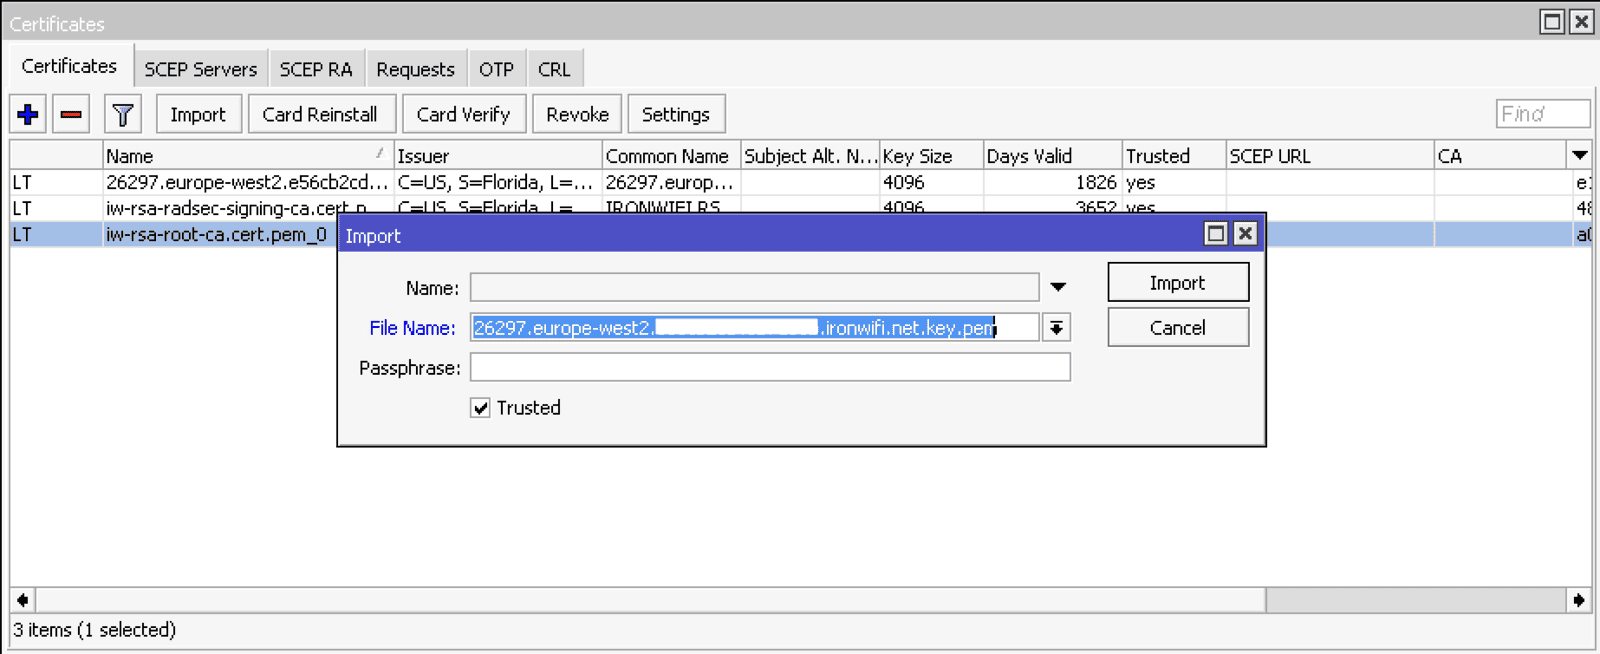
Go to System > Certificates and Import 3 certificates, marking them as trusted and then import the key.

When correctly imported the CA certificates will have the LT flags and the RadSec Client Certificate will have the KLT flag denoting you have a private key for it:

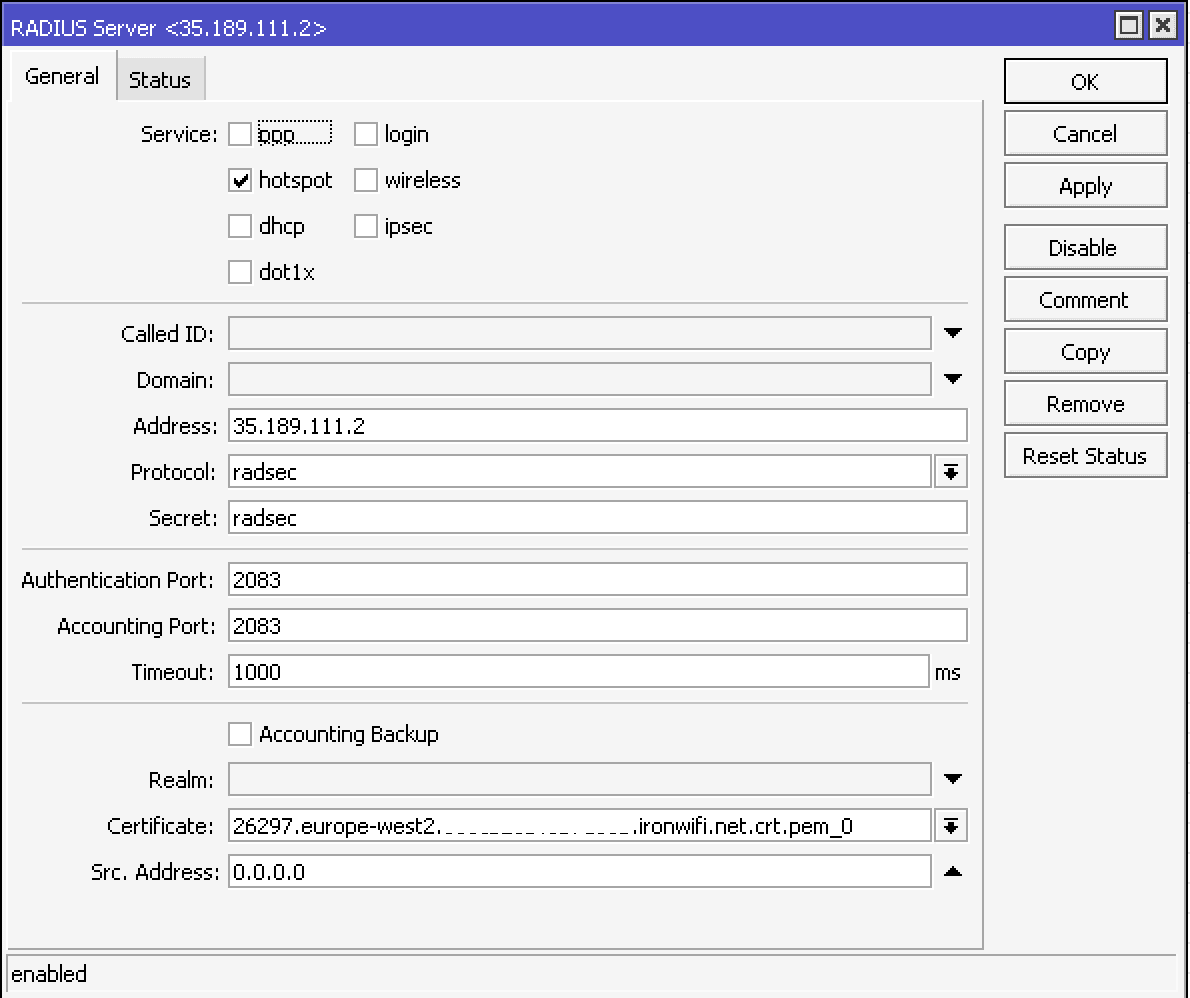
In the MikroTik configuration menu, navigate down to the Radius and click Add New to add RADIUS server. In the Service section, configure with:
- Service - hotspot
- Address - get this value from the IronWiFi console
- Protocol - radsec
- Secret - radsec
- Authentication Port - 2083
- Accounting Port - 2083
- Timeout - 1000ms
- Certificate - select the client certificate with the key that you have imported

3. Use an FTP client to connect to the access point and navigate to /flash/hotspot (or /hotspot). Create a copy of the login.html file and upload the previously downloaded file login.html to the access point.
$ ftp 192.168.88.1
(username admin, empty password)
$ cd /hotspot

$ get login.html login.html-backup

$ put mikrotik_login.html login.html
Related Articles
MikroTik - Passpoint Configuration
Prerequisites Mikrotik device that supports 802.11u. Make sure to use the latest long-term or stable RouterOS releases. Information about the assigned RADIUS servers (Server IP address, port numbers, shared secrets): Email or document that contains ...MikroTik ROS v7 OpenRoaming with RadSec
Due to the changes in RouterOS firmware, RadSec stopped working in the version 7.15 (and later). If you want to use RadSec, our recommendation is to use ROs 7.14.3 Sign in to the IronWiFi Management Console Go to Networks -> Select the network you ...