Azure AD OAuth
This page provides instructions on how to configure your Azure Active Directory to allow Captive Portal authentication with OAuth.
- Navigate to https://portal.azure.com
- Go to Azure Active Directory submenu
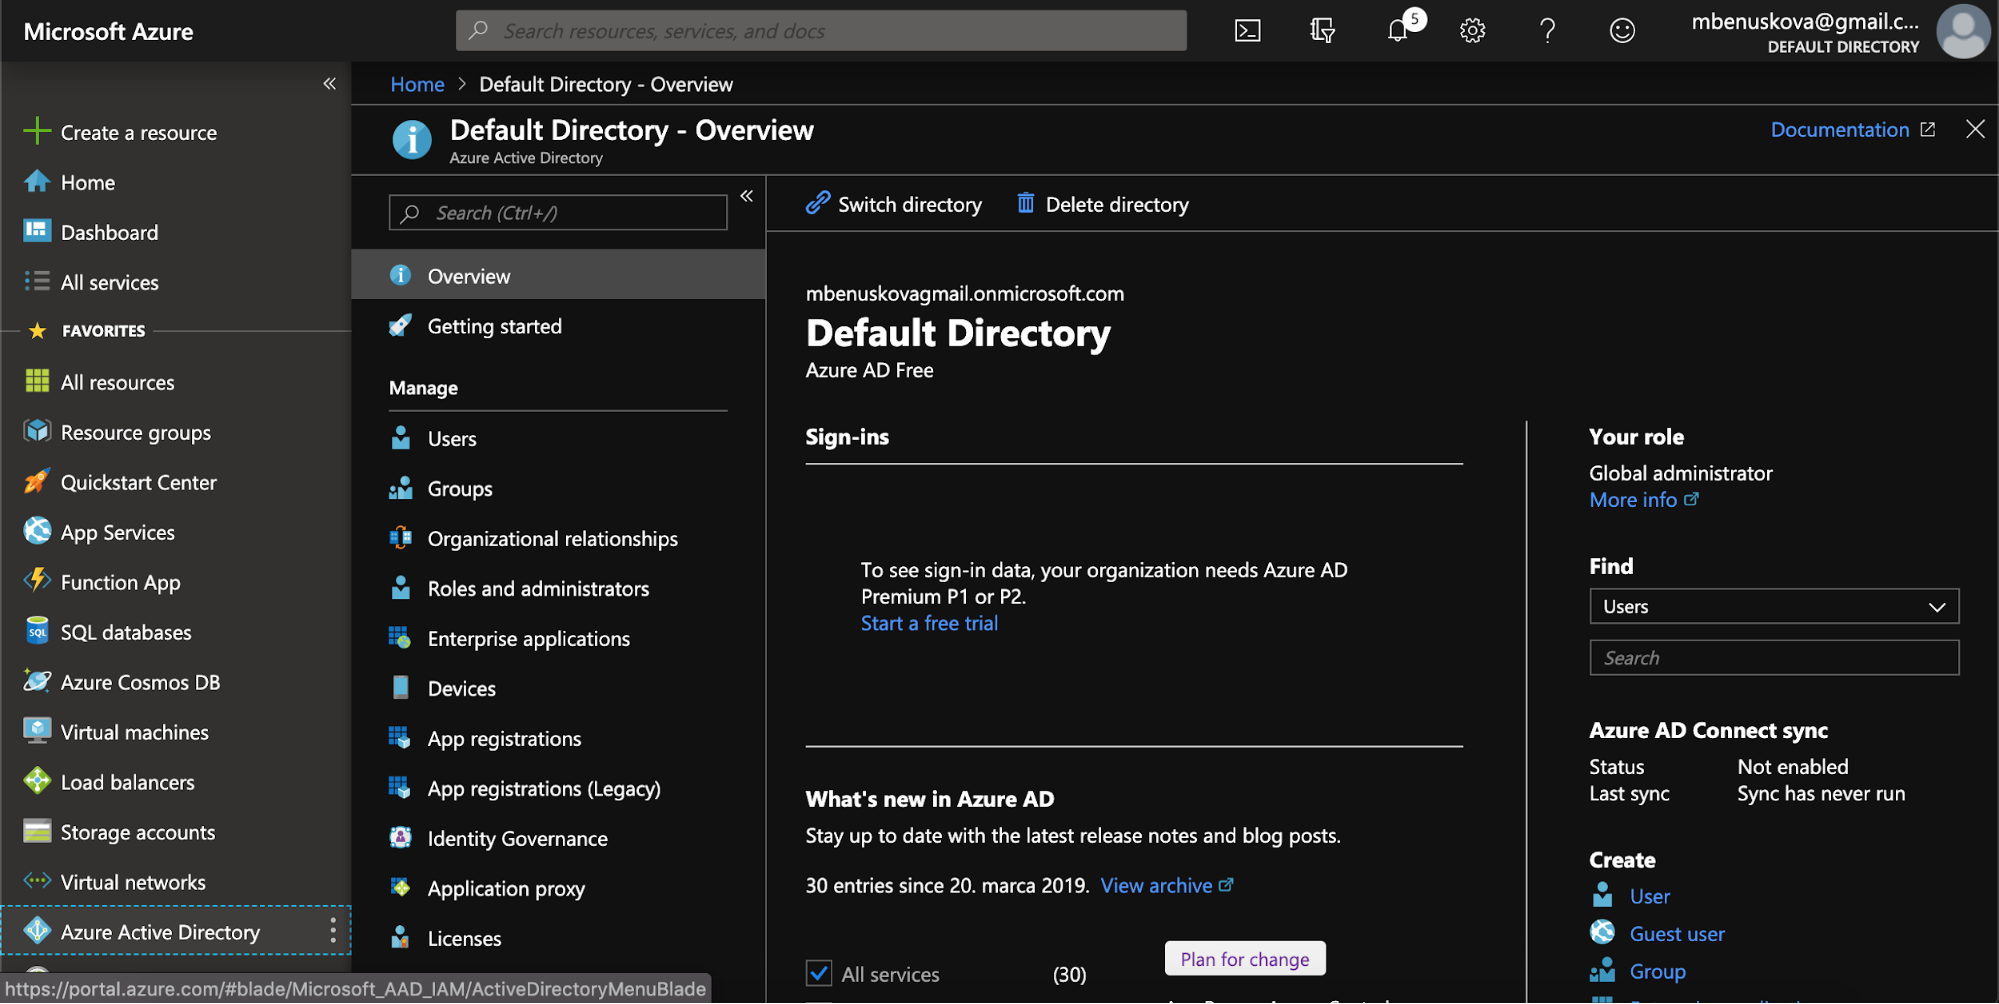
3. Select the active directory you wish to use for SSO
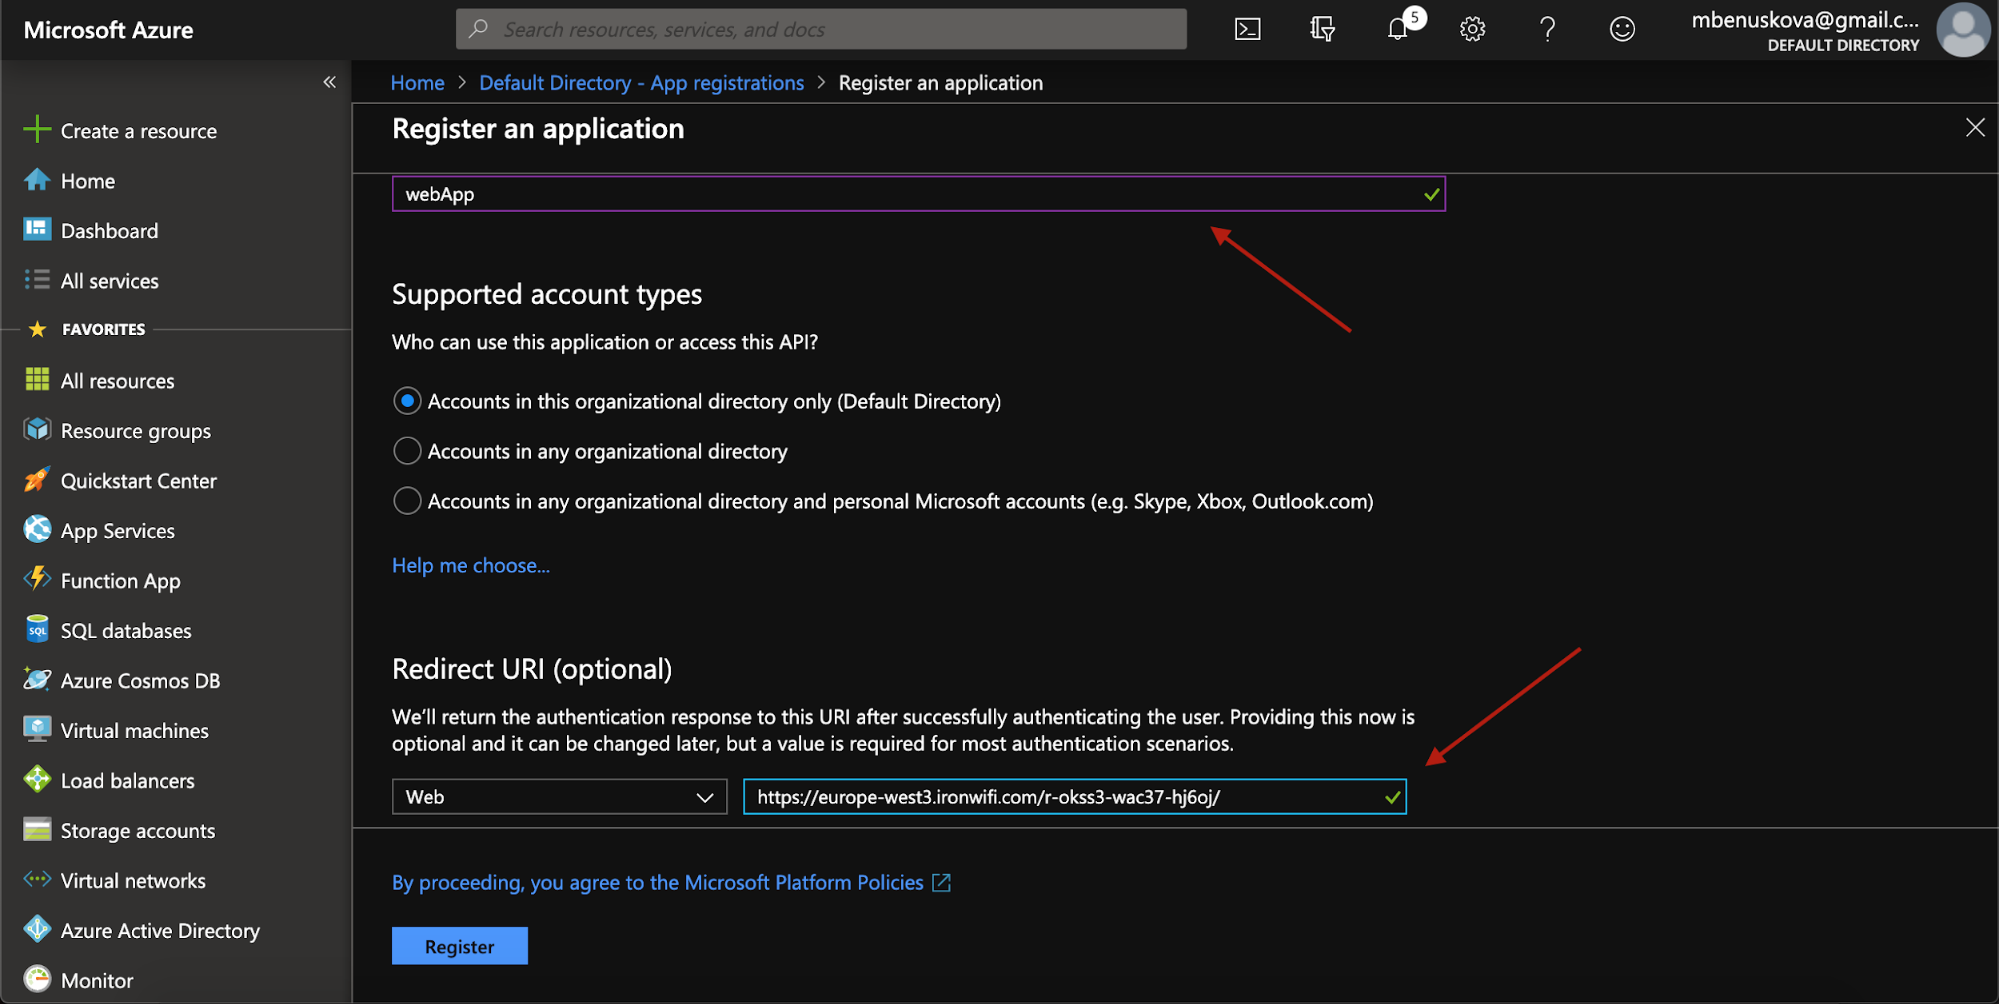
5. Enter the name for the new application, select type Web, and enter Sign-on URL enter(reply URL) - for example https://us-west1.ironwifi.com/api/signin/azure (update subdomain with the selected region or use splash for Global).
6. Then click Register
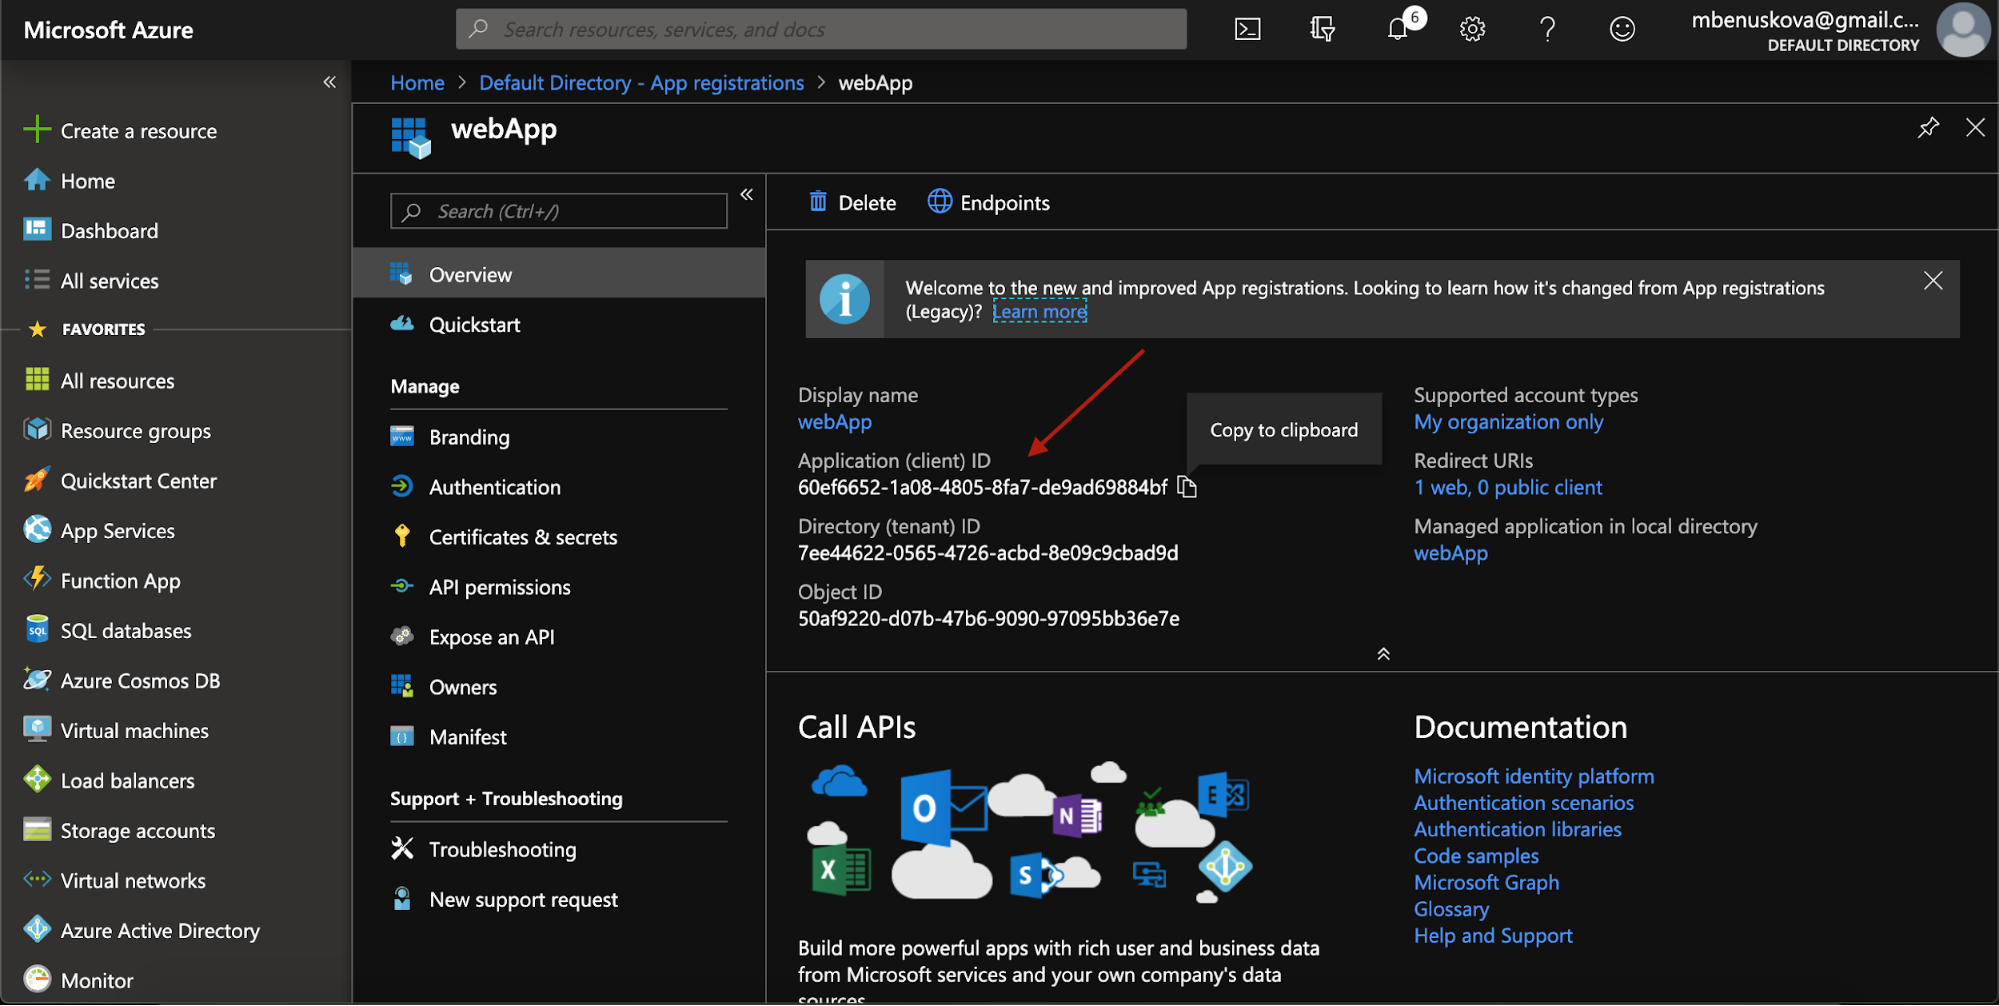
7. Copy Application (client) ID
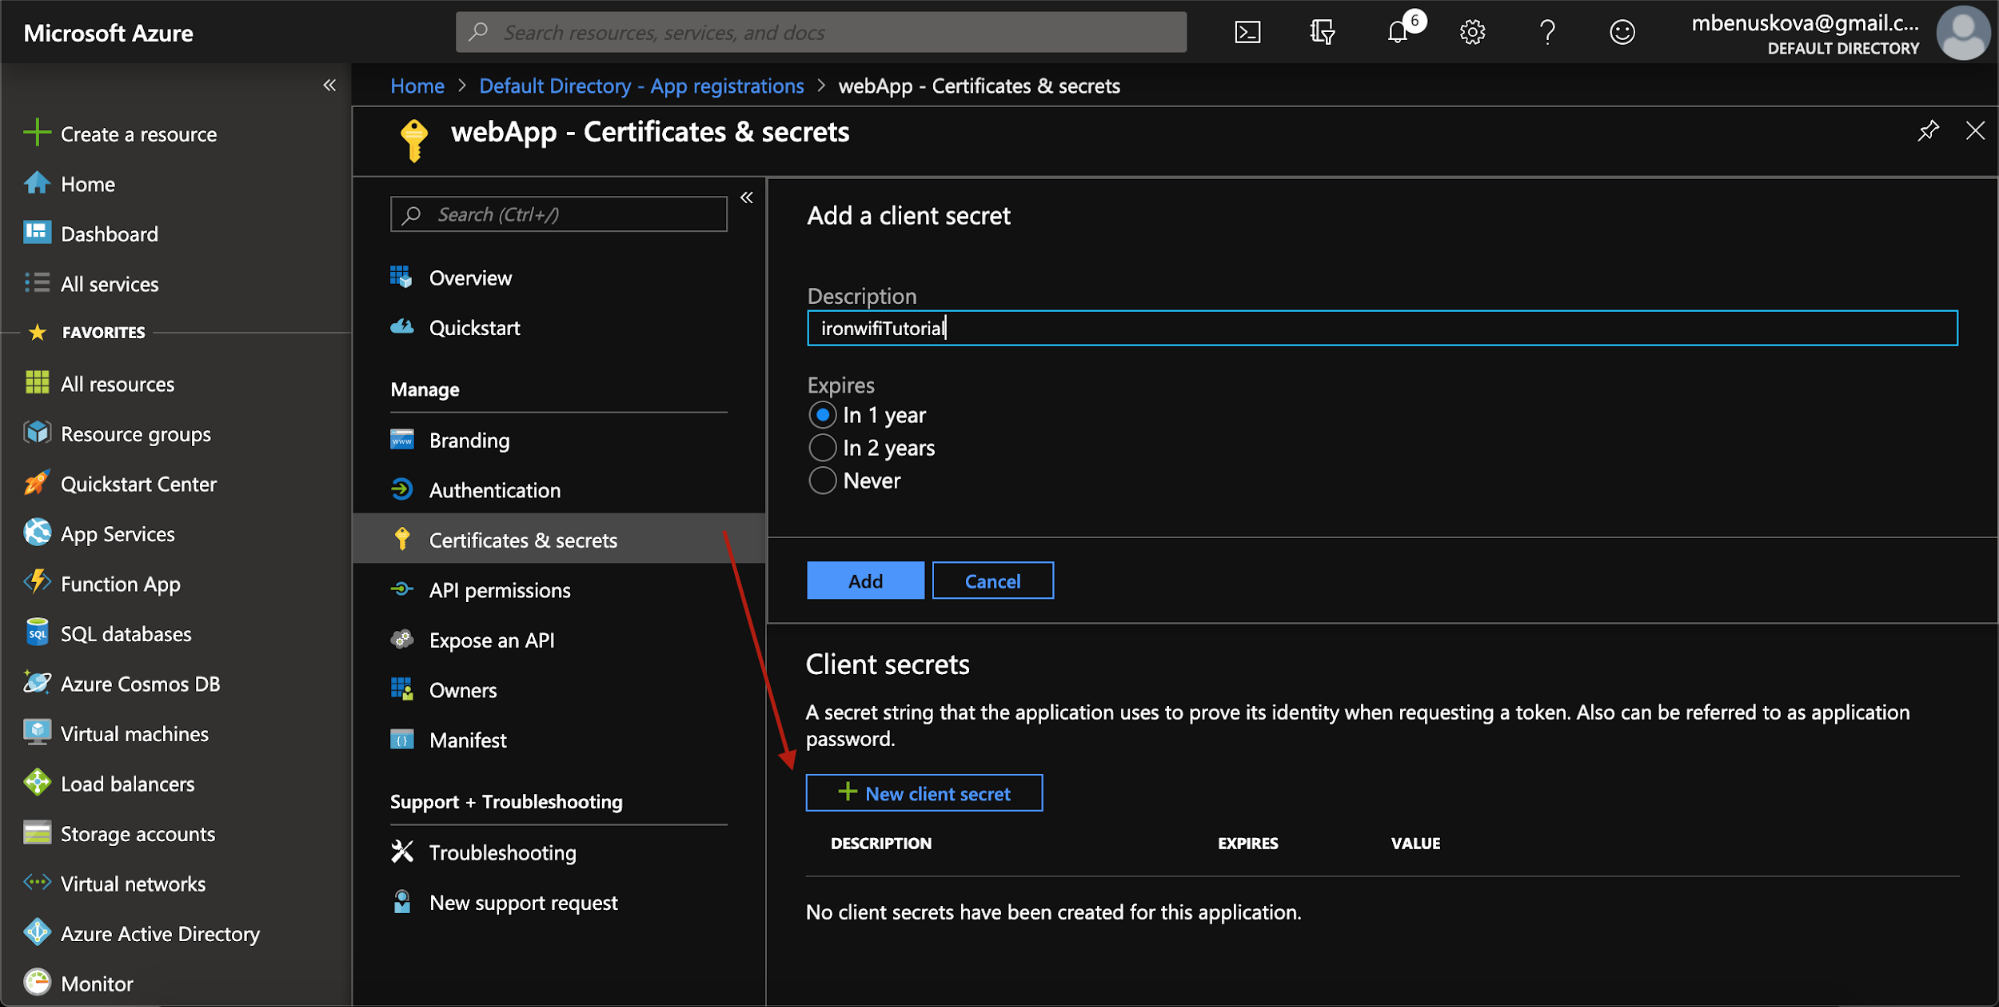
8. In the application settings panel, click on Certificates & secrets, then add a New client secret and enter a description and expiration time. Then simply click add.
Sign in to the IronWiFi console
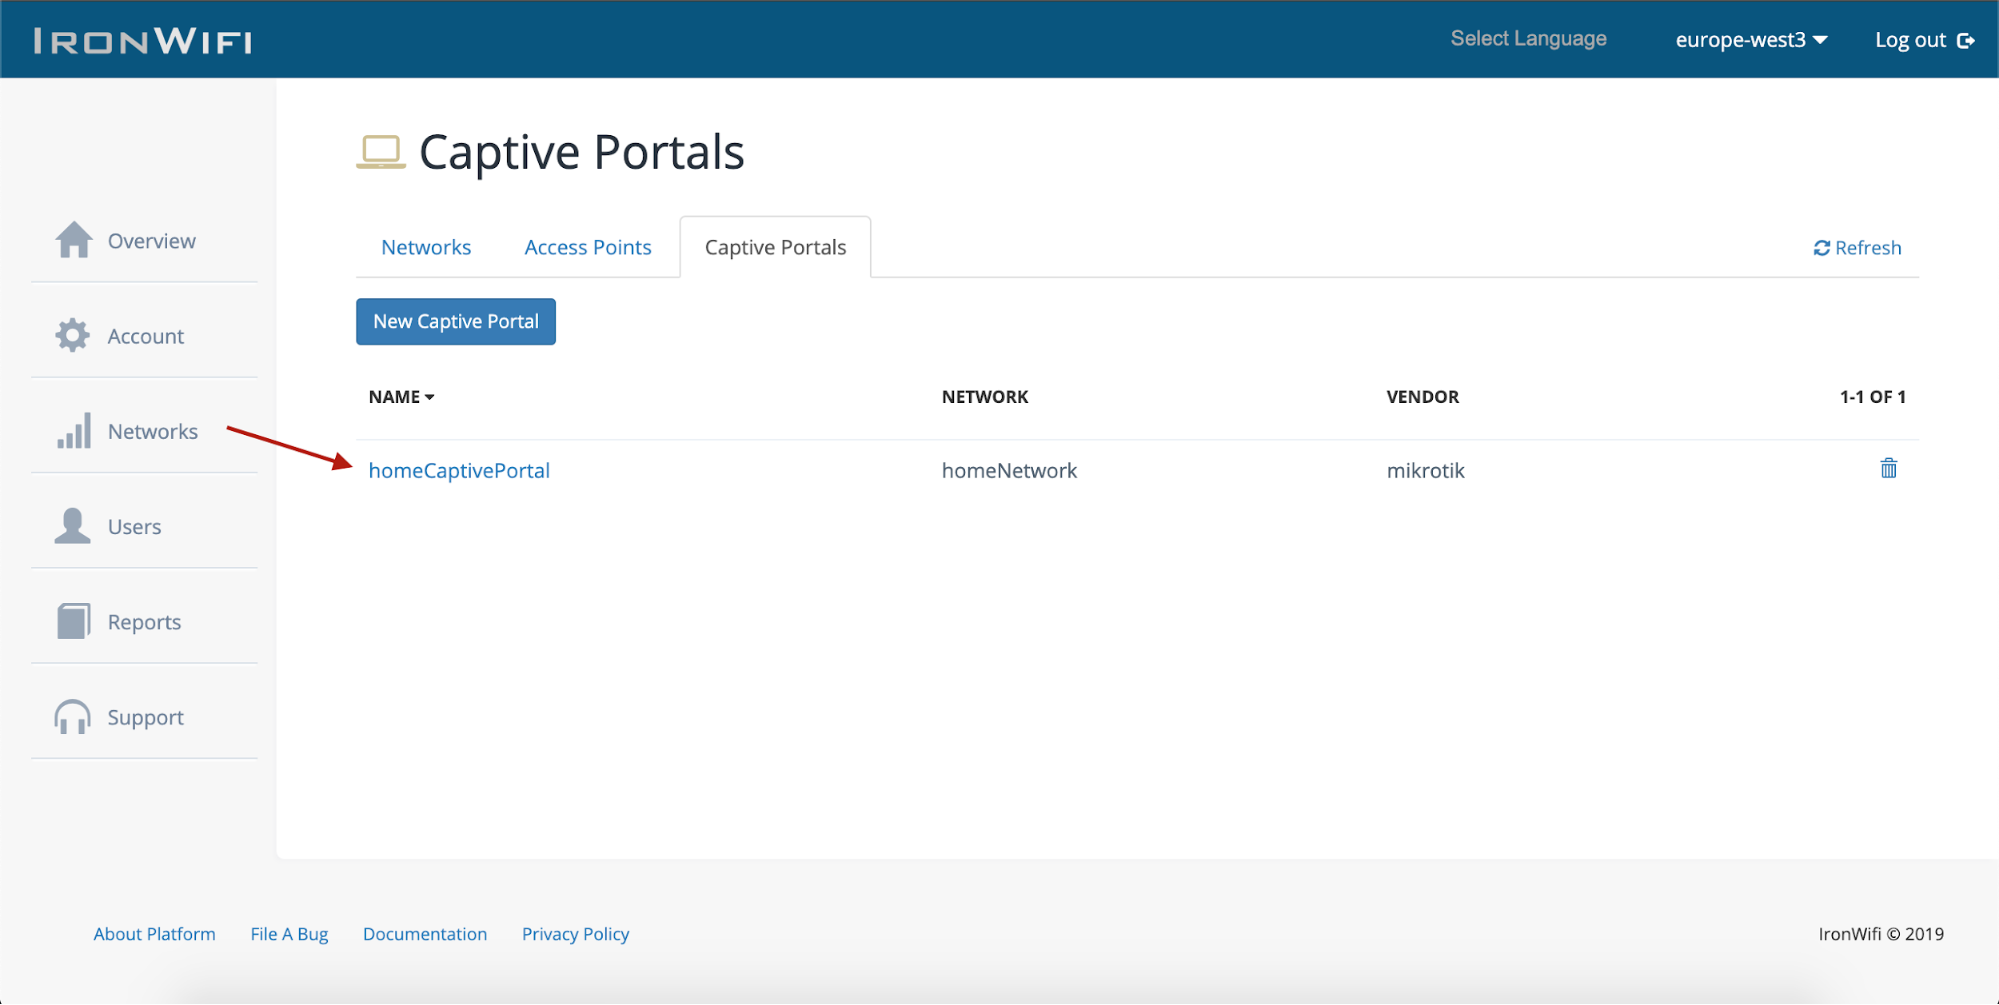
- Click on Networks > Captive Portals and create a new Captive Portal. Then click on the newly created Captive Portal
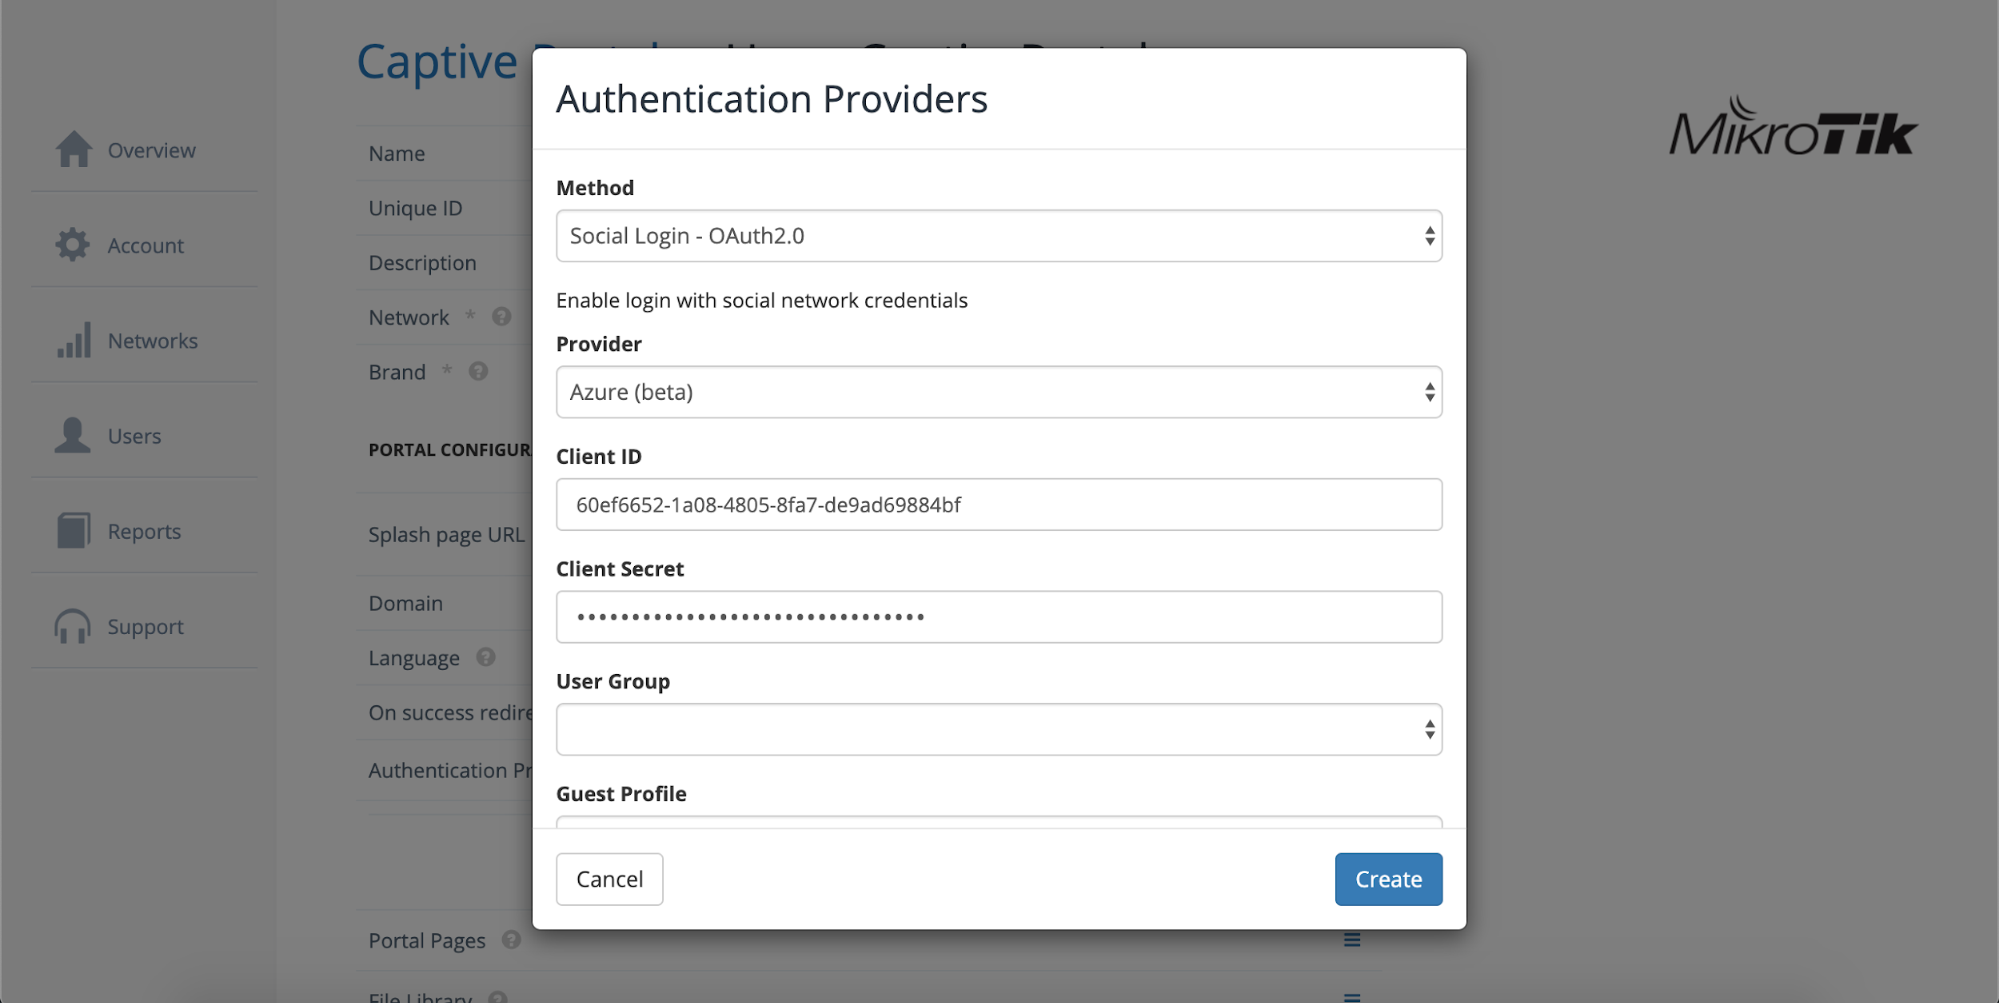
2. Expand the Authentication Providers menu and click Add New

3. Select Social Login - OAuth 2.0, provider Azure
Related Articles
Azure
Our azure integrations allow you to import users from your Azure Active Directory, use Azure SAML authentication, set up 2FA and more. We provide instructions to help you get up and running as fast as possible, see the links below and follow the ...Azure AD Connector
To manage your wireless users using Azure Active Directory account, you can enable remote synchronization with your Azure account for users in specific groups. Log in to the Azure Portal From the main menu, navigate to Azure Active Directory > ...Azure AD SAML
This page provides instructions on how to configure your Azure Active Directory to allow Captive Portal authentication with SAML. Navigate to https://portal.azure.com Go to the Azure Active Directory submenu 3. Select the active directory you wish to ...Azure AD Authentication with PEAP-MSCHAPv2
This tutorial provides instructions on how to make PEAP-MSCHAPv2 authentication work with IronWiFi and Azure AD Domain Services. enable Azure AD Connector enable Azure AD Domain Services create CentOS virtual machine Make sure to choose the same ...Testing Azure Connector
Go to Users -> Connectors -> New Connector Select Azure AD as Database Type Enter values for Tenant Identifier (ID), Application ID and Application Secret that are provided from Azure. Select Authentication Source as "azure". Click Continue It should ...